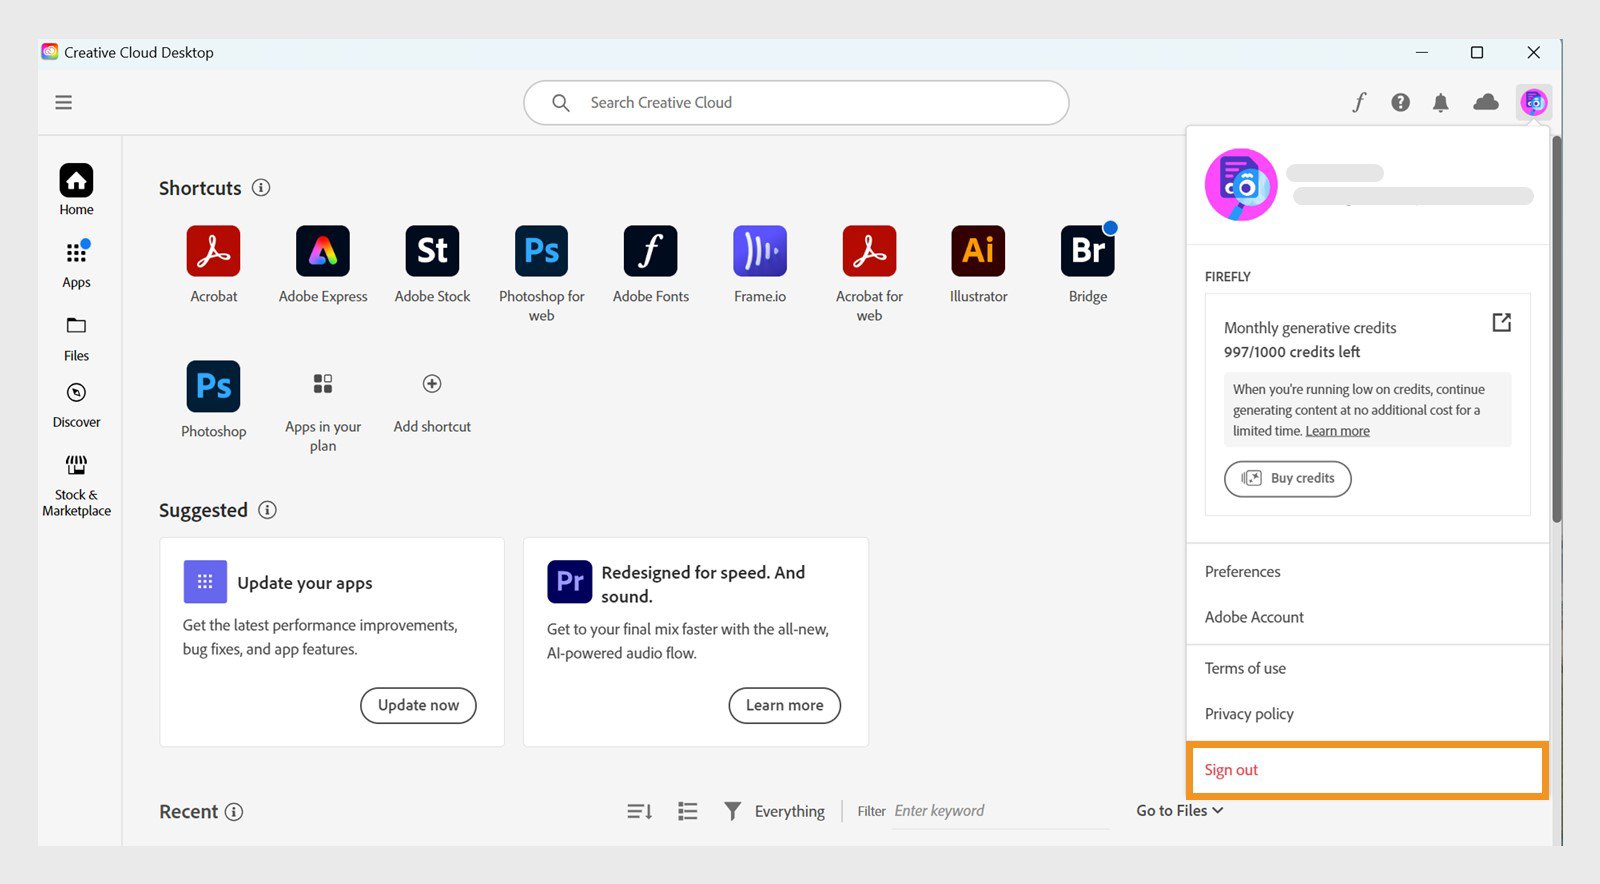
In the Creative Cloud desktop app, select Account > Sign out.
Last updated on
Nov. 4, 2024
External extensions and plugins (.ccx or .zxp files) can be acquired outside the Marketplace tab in your Creative Cloud desktop app. Troubleshoot common installation errors to easily install external plugins.
Note
If you receive an error code while installing Creative Cloud desktop app plugins, find a solution for your error code.
Plugin appears to be installed but is missing from the app's plugin menu
-

Select your profile picture to open the menu and sign out.
Select your profile picture to open the menu and sign out. -
Restart your computer.
-
Sign back in to your Creative Cloud desktop application.
-
Relaunch the host application for which the plugin has been installed (for example,
Photoshop). It should now display in the host app.
Default install language isn't compatible with the plugin
Not all plugins are available in all languages. If you're having issues installing a plugin or can't find one you installed, changing the default installation language can help ensure your system recognizes the plugin.
-
In the Creative Cloud desktop app, select Account > Preferences.
-
Select Apps > Default install language, then select the language compatible with your plugin.
Select a compatible language to install the plugin.
Select a compatible language to install the plugin. -
Select Done.

For example, some plugins may appear incompatible if you set your default language as English (International). However, if you switch to English (North America), the same plugin may become compatible.
Alert
Changing the default installation language may cause some applications to uninstall automatically. Make sure to back up your user preferences in advance.
Message displayed "Compatible App Required"
The "Compatible App Required" error message appears if the CCX file you downloaded is meant to work with an app that isn't installed on your device.
Some CCX files are compatible with the minimum application versions they're meant to work with. Check the required applications and versions for the installed plugin.
Message displayed "Creative Cloud cannot open files of this type." or "Could not complete your request because Photoshop does not recognize this type of file."
You may receive a compatibility error message if you've changed the association of a CCX file (the app your plugin will open with).
To ensure that your plugin is installed correctly re-associate the plugin with the installer app in your system.
-
Right-click the plugin and select Open with.
-
When a new window opens, select Unified Plugin Installer Agent.
Find the installer files in the following locations:
- Windows: C:\Program Files\Common Files\Adobe\Adobe Desktop Common\RemoteComponents\UPI\UnifiedPluginInstallerAgent\UnifiedPluginInstallerAgent
- macOS: /Library/Application Support/Adobe/Adobe Desktop Common/RemoteComponents/UPI/UnifiedPluginInstallerAgent/UnifiedPluginInstallerAgent
Note
If the installer file is hidden for macOS, use Command + Shift + . to find it.
Command line installer shows an error code
If you're having trouble installing your CCX or ZXP file, use our command line tool to initiate installation.
Sometimes, the command line installer might show an error code that wasn't previously visible in the Creative Cloud desktop app. In such instances, find the solution to your error codes.
Error codes "-2" and "-152" appear for macOS Sonoma
If error codes "-2" or "-152" appear for macOS Sonoma, change system permissions.
-
Select System Settings > Privacy & Security, and then select Full Disk Access.
-
Select the + button to add an application in the newly opened window. Browse through or search your system's applications to select and add the Adobe Creative Cloud app.

Select Open to add the Adobe Creative Cloud app to the Full Disk Access window.
Select Open to add the Adobe Creative Cloud app to the Full Disk Access window. -
In the Full Disk Access window, select the toggle next to Adobe Creative Cloud to turn on its settings.
-
Relaunch the Creative Cloud desktop app and install the extension or plugin again.
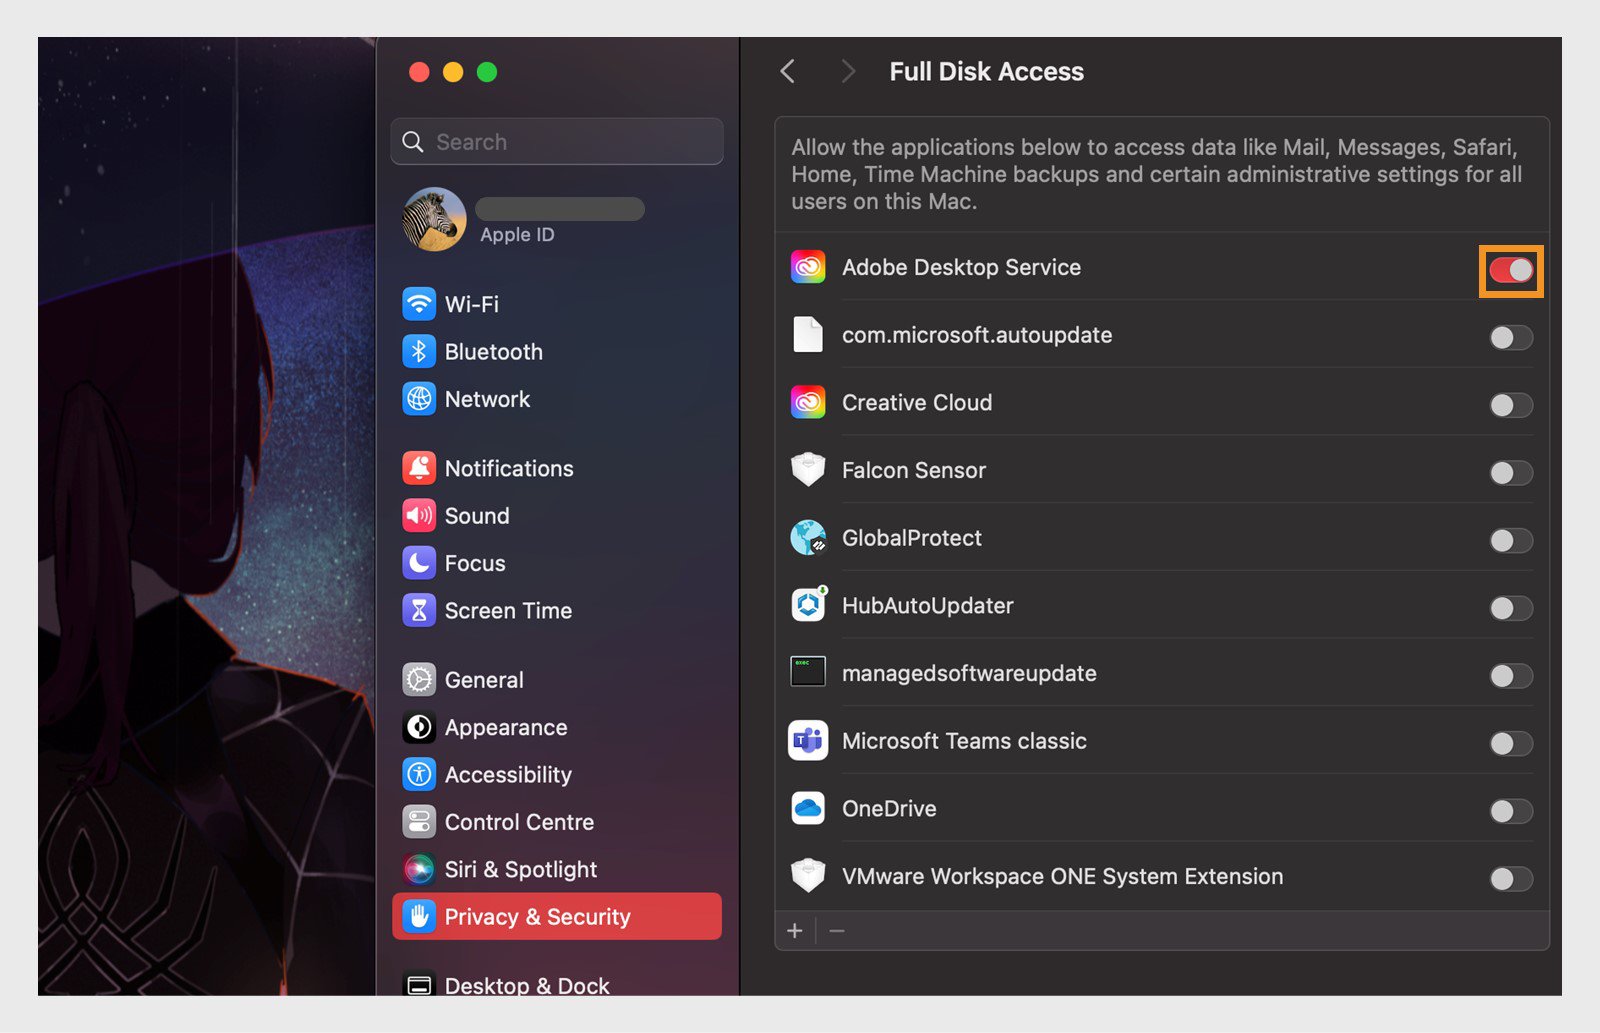
If you still have trouble installing the plugins, you'll need to allow full disk permissions for Adobe Desktop Service.
The Adobe Desktop Service is located inside the Root Library on Mac. To find the app and add it to the Full Disk Access window:
-
Select the Go > Go to Folder and then copy and paste the following path: /Library/Application Support/Adobe/Adobe Desktop Common/ADS/Adobe Desktop Service.

Select the highlighted location to open the ADS folder and find the Adobe Desktop Service app.
Select the highlighted location to open the ADS folder and find the Adobe Desktop Service app. -
Select System Settings > Privacy & Security, and then select Full Disk Access.
-
Drag and drop Adobe Desktop Service (previously located via the Go menu) into the Full Disk Access menu of the System Settings window.
-
Select the toggle next to Adobe Desktop Service.
Selecting the toggle will allow the Adobe Desktop Service full disk access to your system.
Selecting the toggle will allow the Adobe Desktop Service full disk access to your system. -
Relaunch the Creative Cloud desktop app and install the plugin again.