Adobe Photoshop Lightroom is now Adobe Lightroom Classic, with the same functionality and features. If you're looking for the all-new photography service, check out Lightroom.
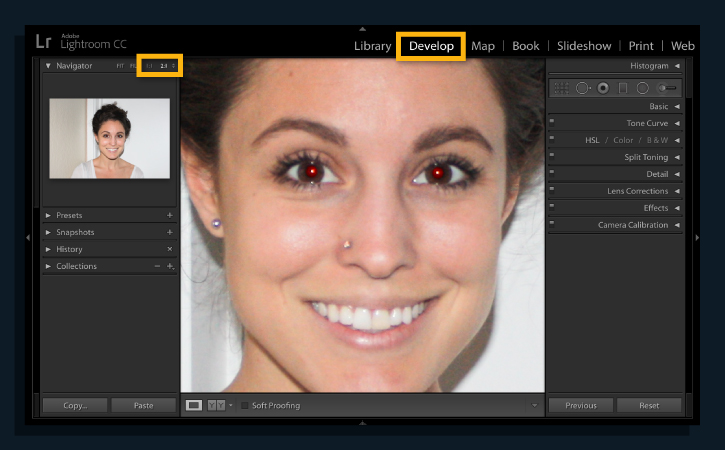
Select a photo in Lightroom Classic and go to the Develop module. Need help getting your photos into Lightroom? Learn how to import your photos.
Click on either the 1:1 or 2:1 option in the Navigator panel to zoom in. If you need to zoom in more, click on the double arrows next to the 2:1 option and choose a different magnification.
Click and drag the photo so that the red eye or pet eye area is visible.
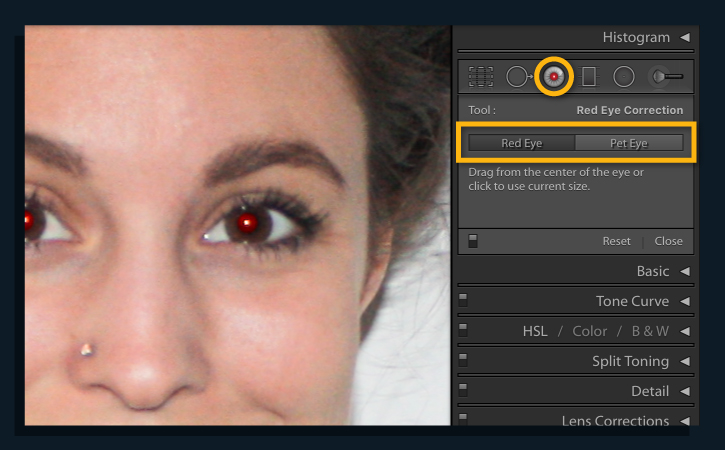
Click the Red Eye Correction tool in the Develop panel on the right side of your workspace.
Click either Red Eye or Pet Eye. Red Eye will remove the red discoloration of a person's eyes that can result from a camera flash going off. Pet Eye will remove the yellow or green discoloration that can occur in your photos of pets.
Position your cursor in the center of one eye. Click and drag out until the circle of the tool covers the entire eye. Release your cursor when you're done.
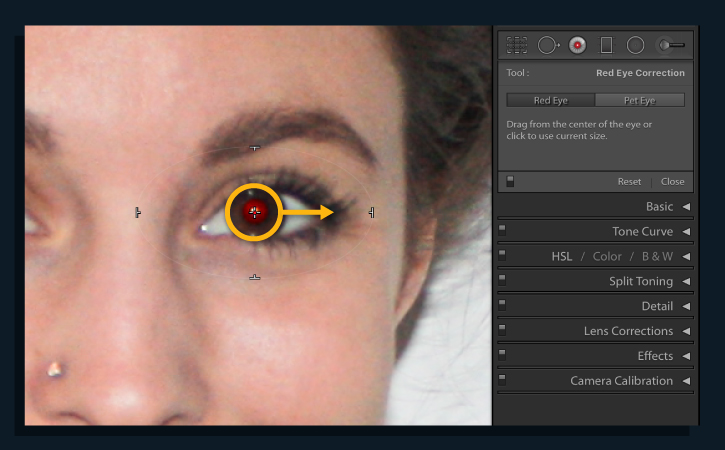
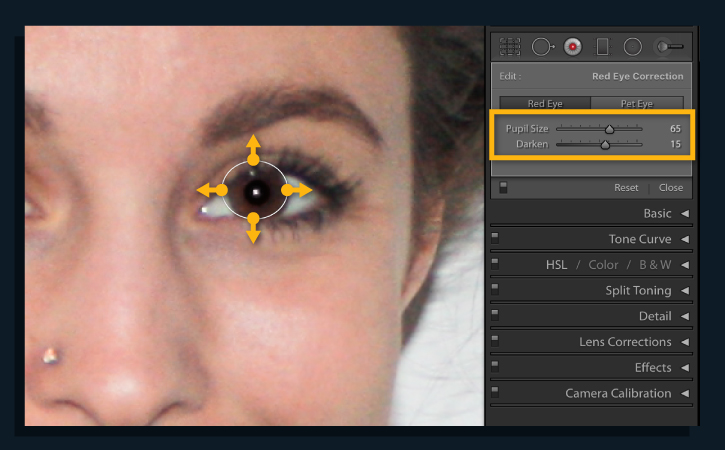
Click and drag the edges of the circle to resize the correction area, if needed. You can also click and drag inside the circle to move the correction area.
Fine-tune the pupil size or darkness of the adjustment by using the sliders in the Red Eye Correction panel.
Position your cursor over the center of the other eye and click. Lightroom Classic automatically copies the size of the tool from the first eye. Adjust the correction as needed.
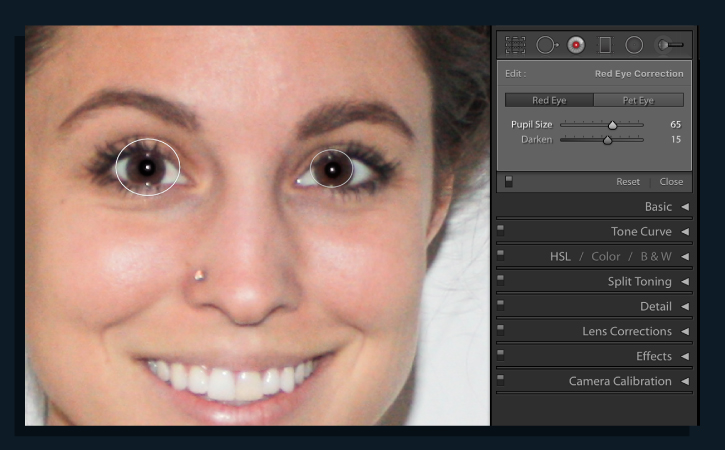
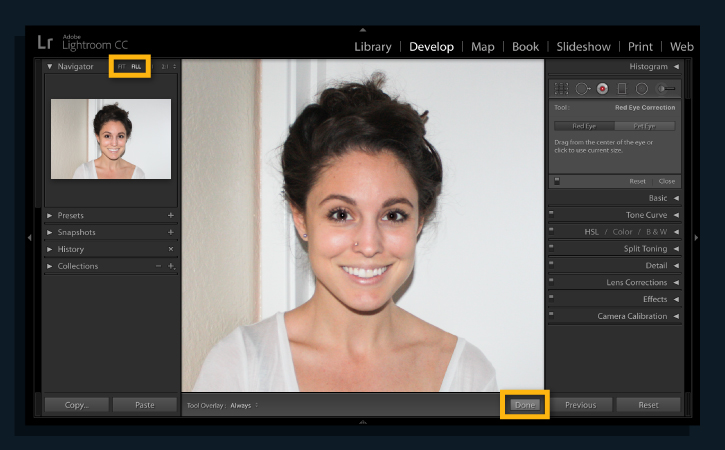
Click Done at the bottom of your workspace.
Click Fit or Fill from the Navigator panel to view the entire photo.
