Learn how to build and modify graphs.
Find out how to add nodes to the graph, link them together, and change their properties to create awesome, procedural assets.
Navigation and Selection
The main graph area is where you interact with node networks. We recommend using an external 3-button mouse, as navigating the graph uses both middle-click and right-click.
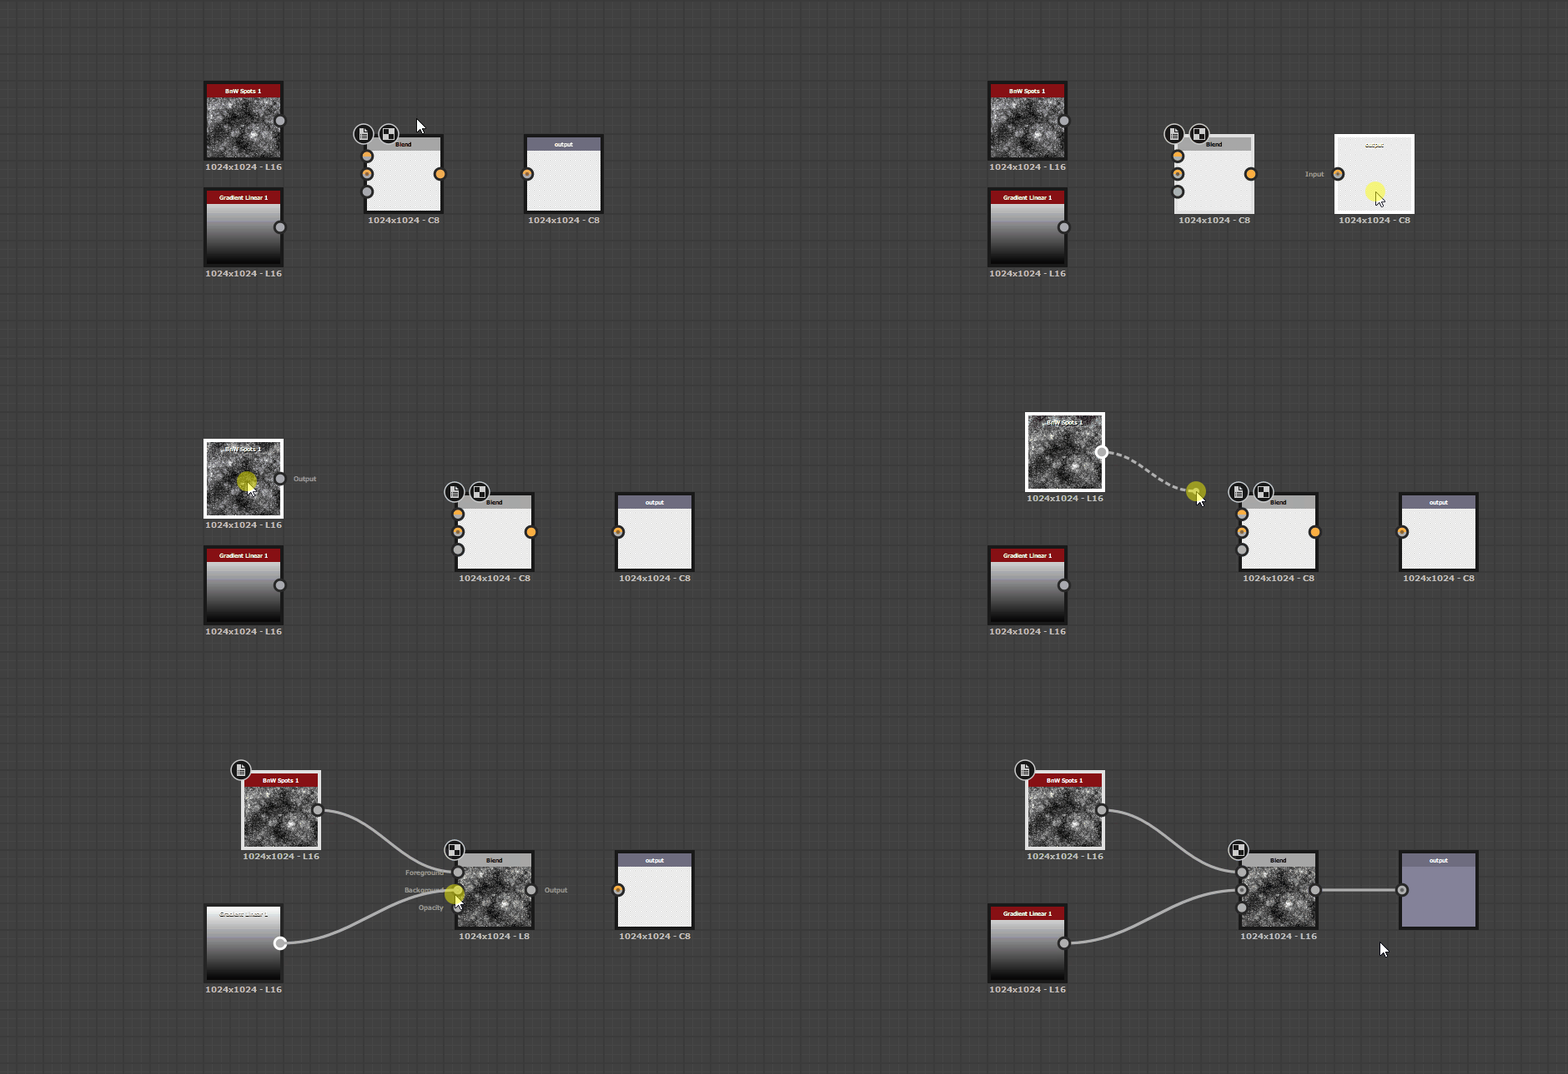

- Click nodes, links, and graph elements to select them. You can select multiple nodes by dragging from an empty area to draw a selection box.
- Move Nodes by dragging on the main node body.
- Connect links by dragging from input or output slots on nodes, using the Left-Mouse button. To connect the output of one node to multiple node inputs, hold ctrl (cmd on macOS) before dragging from the node output.
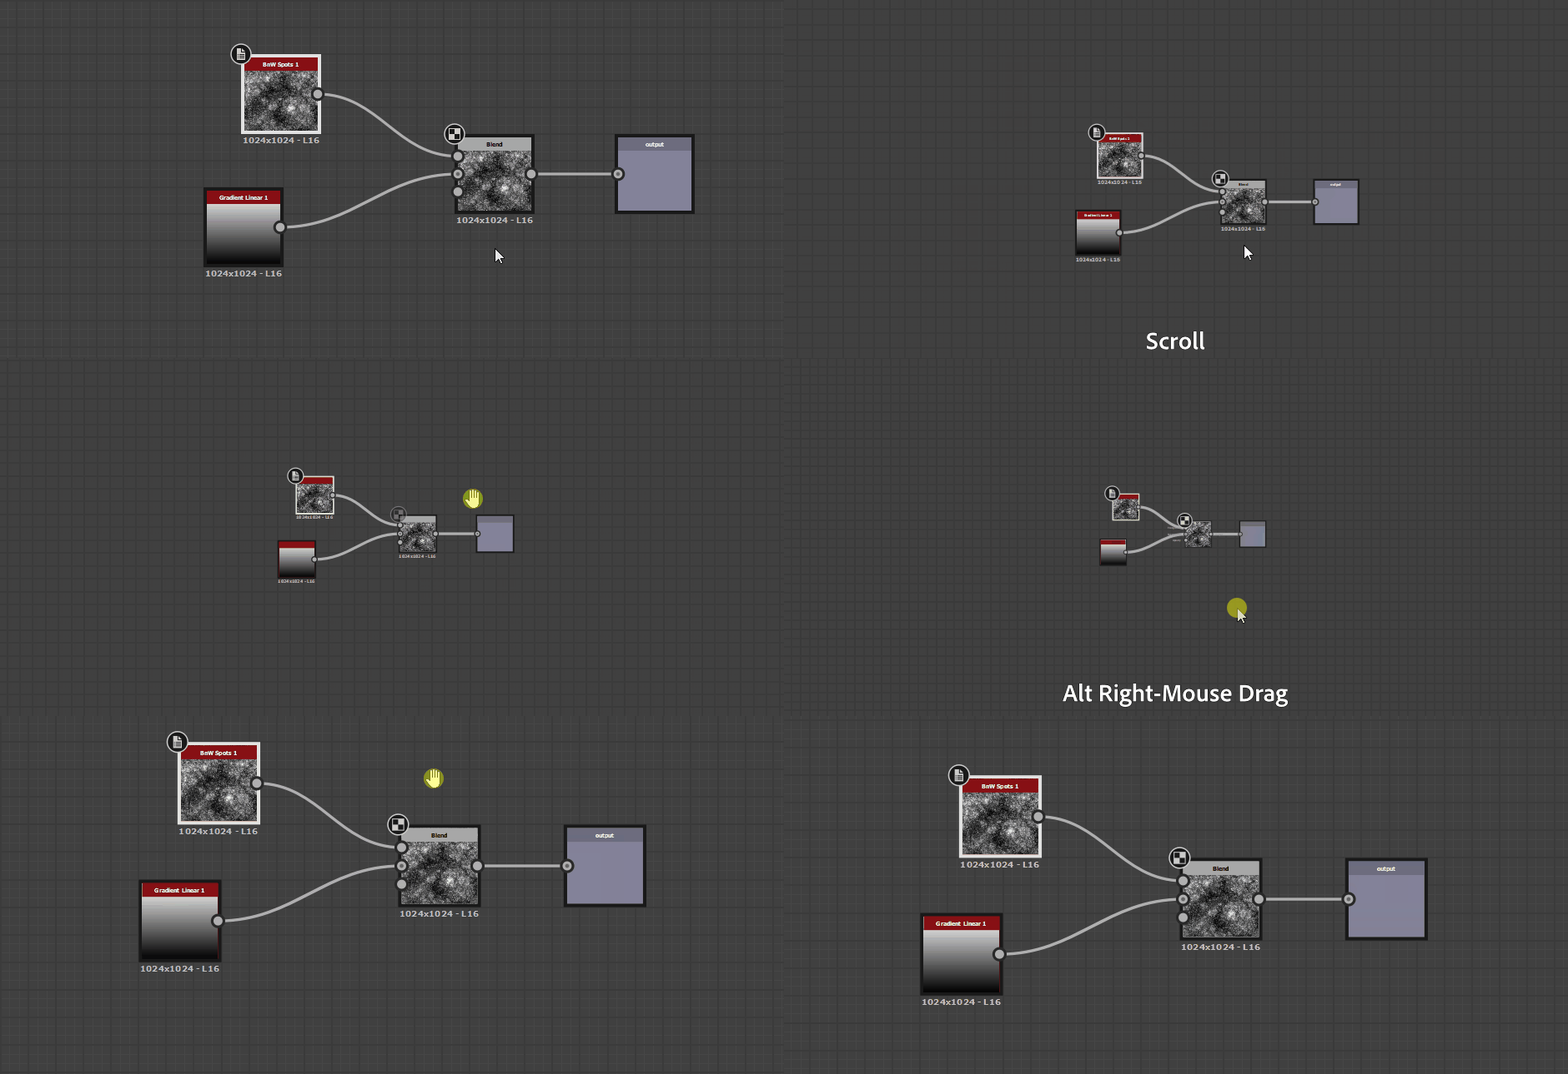

- Zoom in and out with the scroll-wheel, or with alt + right-click (option + right-click) and drag.
- Pan the view by dragging with Middle mouse button, or with ctrl + right-click (cmd + right-click on macOS).
There are multiple methods of placing nodes, and tools to manage nodes so you can keep your graphs organized.
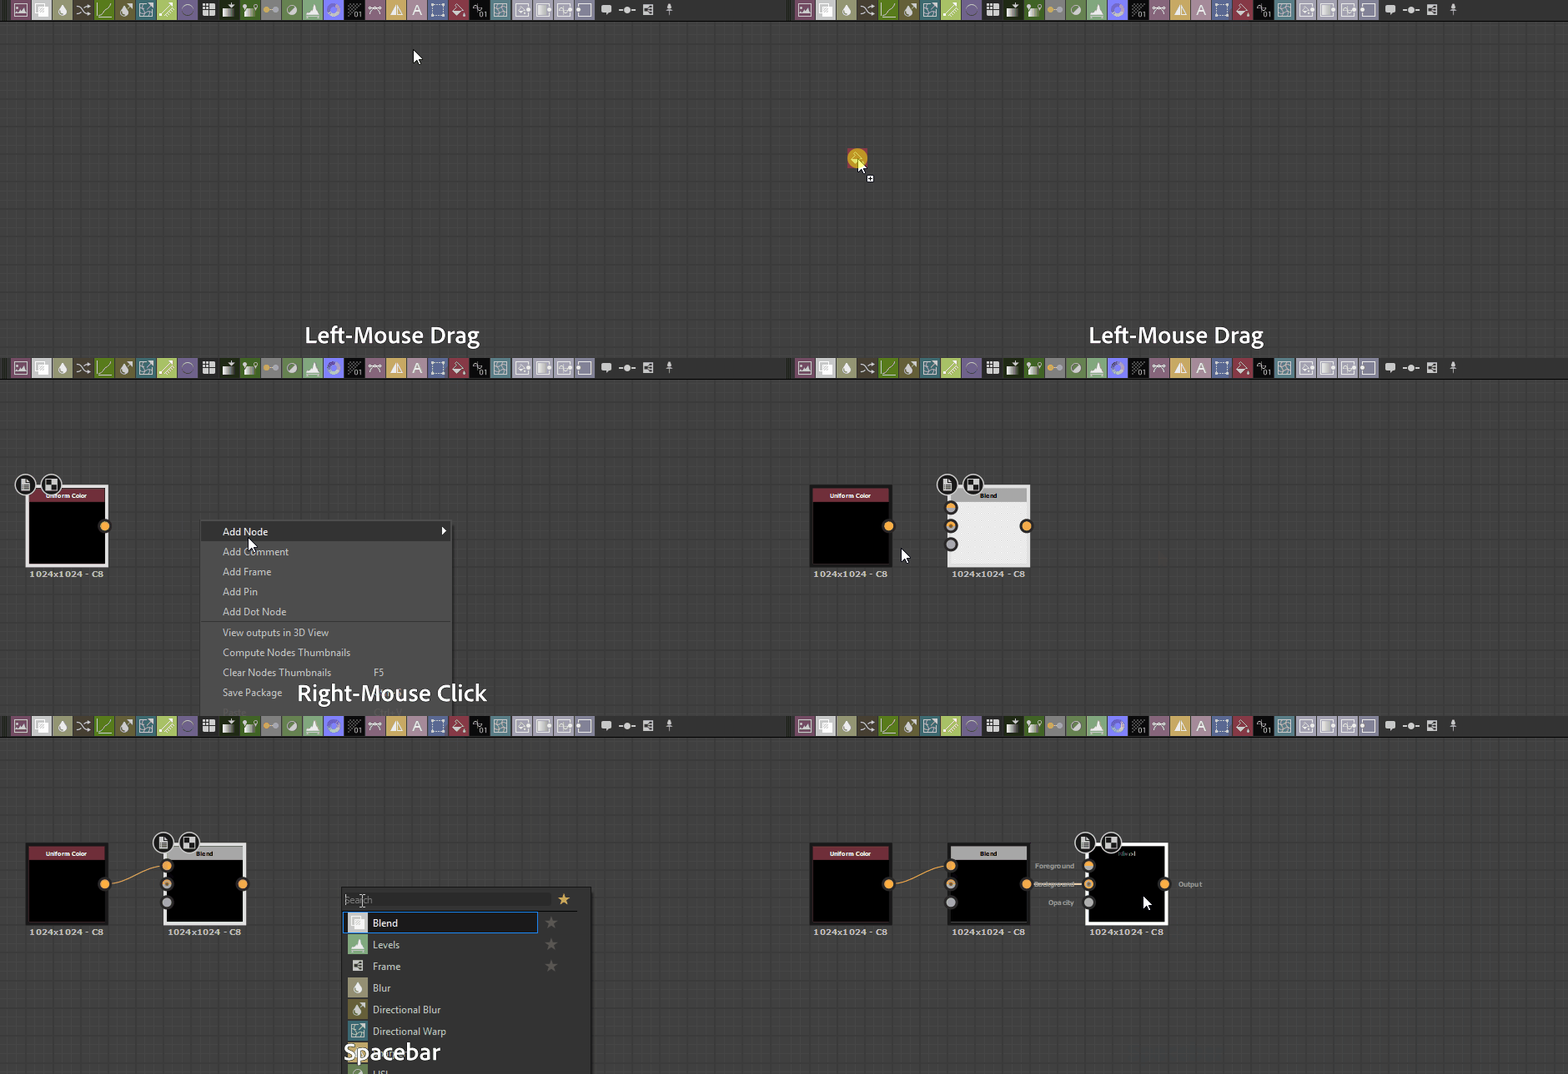

Placing Nodes can be done within the graph area through four methods:
- Drag a node icon from the Graph Toolbar above the main area. Only atomic nodes are available from the Graph Toolbar. To learn about atomic nodes, look at the Nodes Overview.
- Use the spacebar or tab shortcut to open the nodes menu. With the nodes menu open, start typing a search term to find a node. The nodes menu allows access to all atomic nodes, graph items, and library nodes. If you have a link or node selected, the nodes menu will filter nodes based on your selection. This means you will only be able to place nodes that can be correctly connected to your current selection.
- Right-click and select Add Node, then choose an atomic node to place in the graph.
- Drag a node from the Library window.

There are a few standard ways to interact with nodes, links, and graph elements. You can also access all options below through the right-click menu.
- Copy and paste work on nodes and graph elements through standard keyboard shortcuts ctrl + c and ctrl + v (cmd + c and cmd + v on Mac).
- Duplicate selected elements with ctrl + d (cmd + d on Mac). Duplicate without relink with ctrl + shift + d (cmd + shift + d on Mac). Duplicate without relink duplicates your selection, but does not keep any links with non-duplicated nodes.
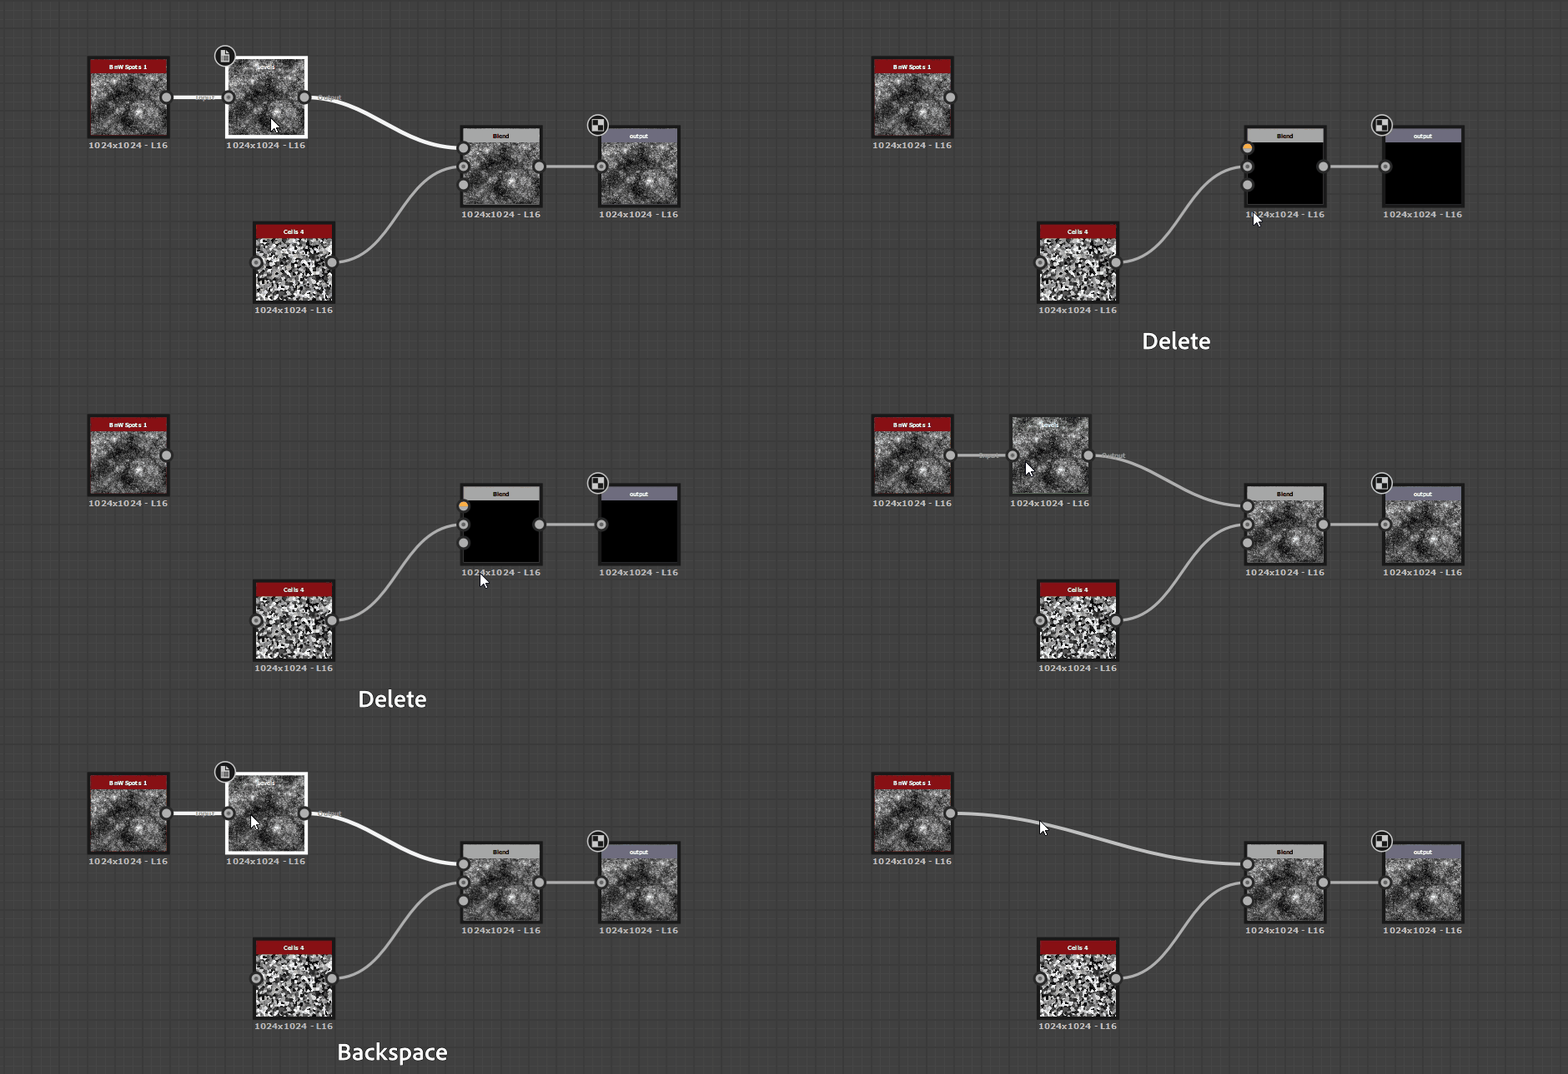
Removing nodes, links and graph elements can be done in two ways:
- Keyboard shortcut del removes the selected element, breaking any links attached to it. Usually this breaks the flow of a graph if performed on a node.
- Backspace removes a Node, but tries to relink the graph so no connections are broken.
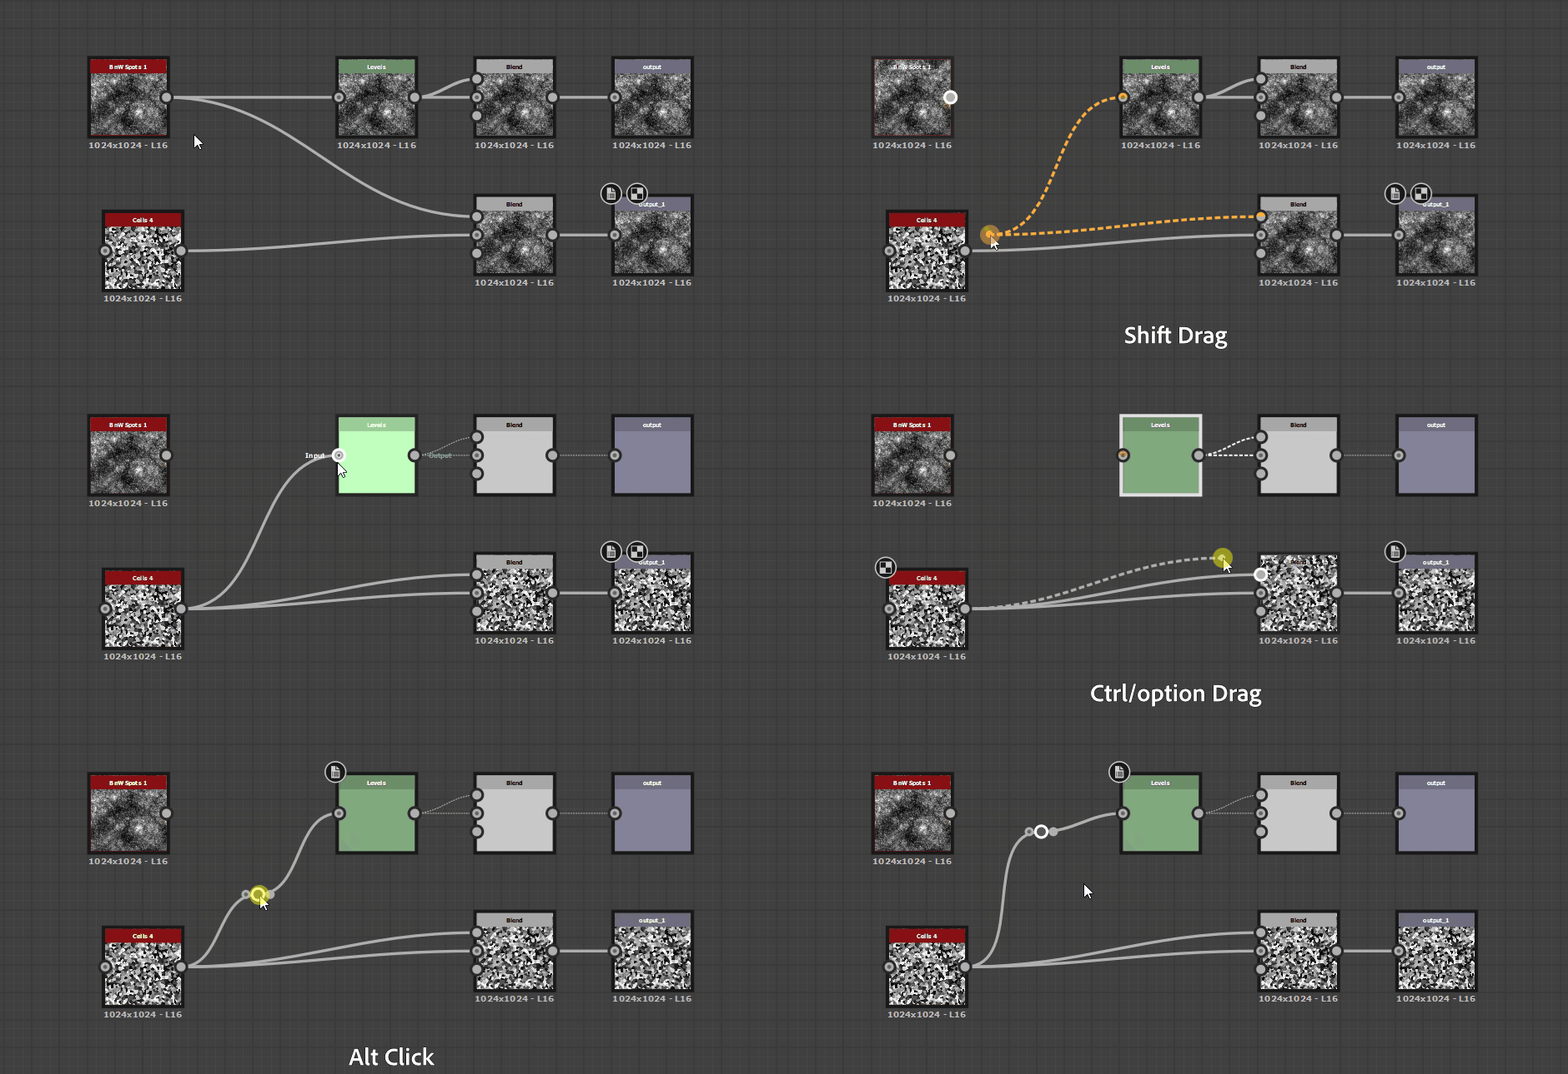

Links have a few keyboard shortcuts available with modifier keys:
- Shift + drag on an input or output slot will pick up the Link and allow you to transfer it to another slot.
- Ctrl + click (cmd + click) and drag on an input to duplicate that link from its origin to another slot.
- Alt + click an input or output slot removes that link. Alt + click a link itself will add a dot node, allowing you to reshape the link.
To swap two links, select the links and use keyboard shortcut X.
Preview and Properties
The graph view interacts closely with the Properties window, the 2D viewport, and the 3D viewport:
- Click a node to show its properties in the Properties window. Double click an empty area to display the graph properties in the Properties window.
- Double click a node to see its results in the 2D viewport. The 2D viewport allows you to preview any node in the graph, helping to debug the creation process at any point.
- Right-click on an empty area and select View outputs in 3D View to preview all combined outputs as a material on a 3D mesh. Note: your outputs must be set up correctly, such as when using the PBR (Metallic/Roughness) template.
- Right-click on a specific node and choose View in 3D View, then select a channel. This allows you to send one specific node output to a channel of your choice in the 3D View.
What's next?
Learn about some of the most commonly used nodes. The Material Nodes Overview introduces nodes like Blend, Levels, Histogram Scan, and Blur HQ.
Have a question or an idea?
If you have a question or an idea to share, join other Designer users in the Substance 3D Designer Community. Get help, make suggestions that could be incorporated into Designer, or show off your work and techniques.
If you have new ideas for Designer nodes or features, share them with us here!