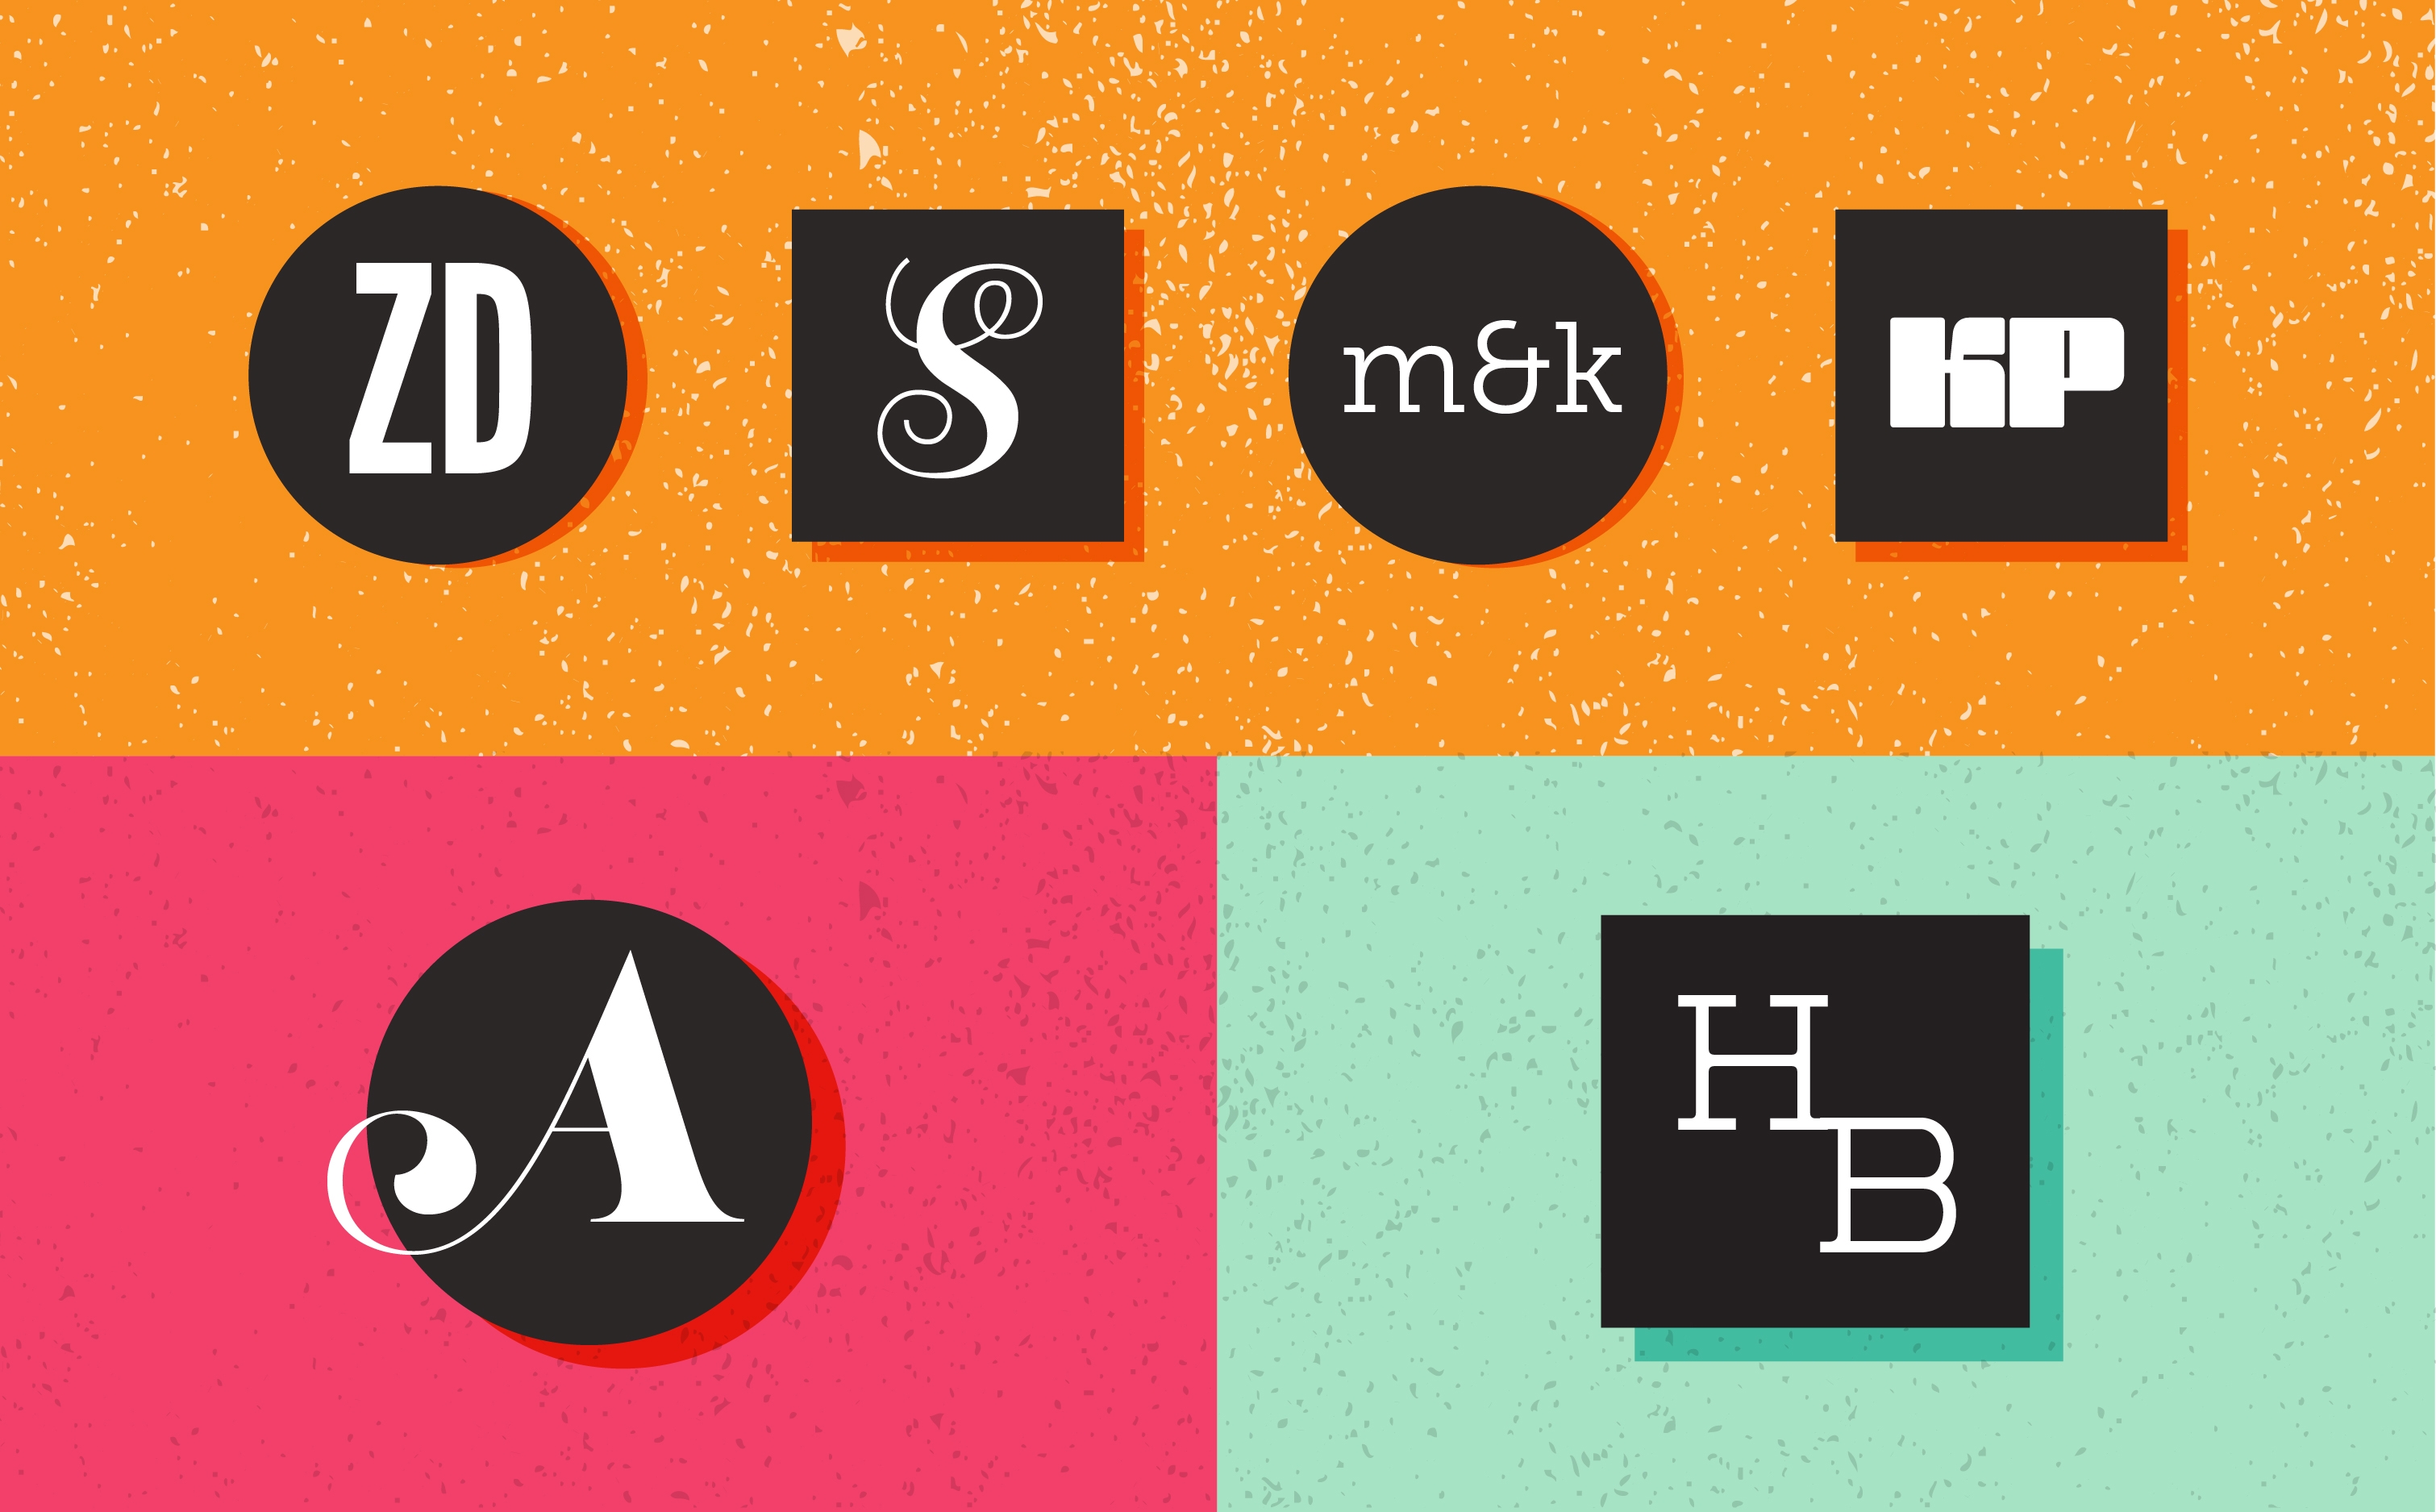
Use a simple shape, a professional typeface, and color to create a striking monogram.
Typekit is now Adobe Fonts.


What you'll need
A special kind of mark
A monogram is a type of personal branding made up of one or more letters, typically initials, that may be intertwined as part of a design, like those you see in crests and wedding designs. It can be simple or complex, elegant or fun—it's a great way to capture your personality in a small footprint.
Try this tutorial to learn how to create a monogram with just three graphic elements: a letterform, a shape, and a color. If you want some inspiration before you start, download the sample file above.

Set up your document
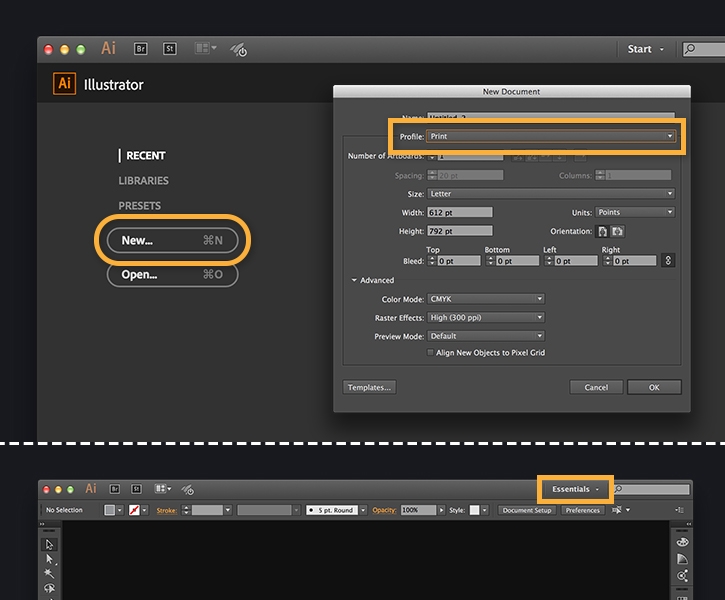
Click the New button on the start screen, or choose File > New.
Select Profile: Print and click OK.
Tip: Choose the Essentials workspace in the Workspace Switcher menu to display all the panels you'll need for this project.

Type your initial
Press T to select the Type tool and click on the artboard to add an insertion point.
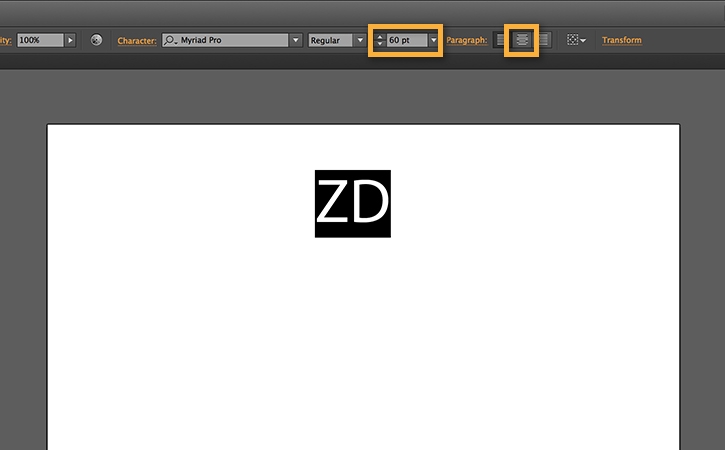
In the Control panel at the top of the screen, enter 60 pt for Font Size so your text is easier to see.
Type a letter or your initials, then highlight the typed text with your cursor.
Click the Align Center icon in the Control panel.

Choose a font that expresses your personality
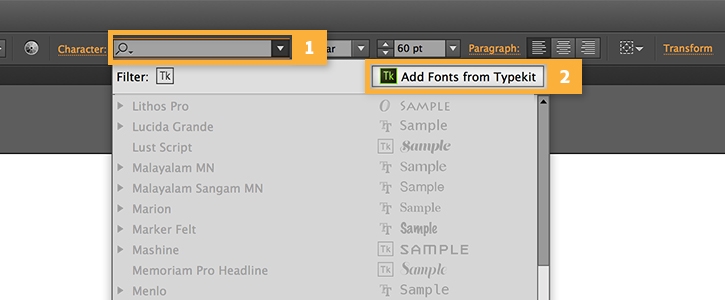
In the Control panel, open the Font family pull-down menu and choose an existing font, or you can add new fonts using the Adobe Typekit library available to Creative Cloud subscribers. Click Add Fonts from Typekit to launch it your browser.

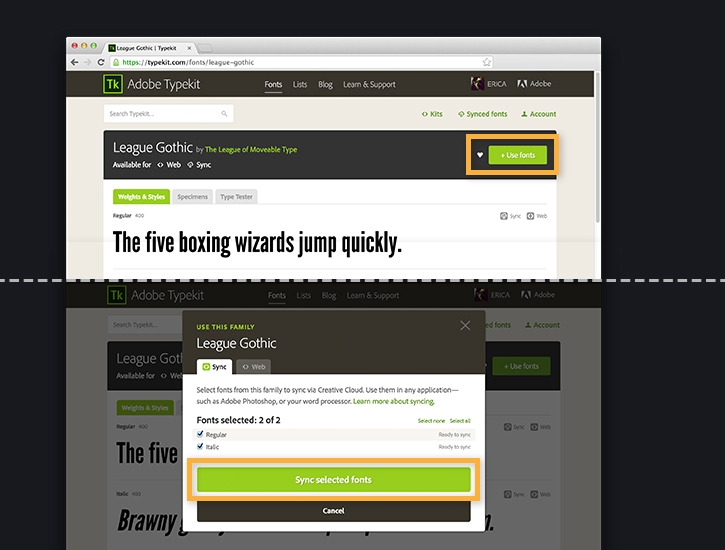
Using the Typekit browser, you can choose from thousands of fonts. If you want to follow along, type "League Gothic" in the search field, and then click + Use fonts. Choose the style variation and click Sync selected fonts. The font will be added to your computer to use in your projects.
Select League Gothic from the Font menu, and then press ESC to exit the Type tool.
Note: Some fonts are only available with a paid Creative Cloud membership. See Getting started with Typekit and Creative Cloud for details.

Create a frame for your initials
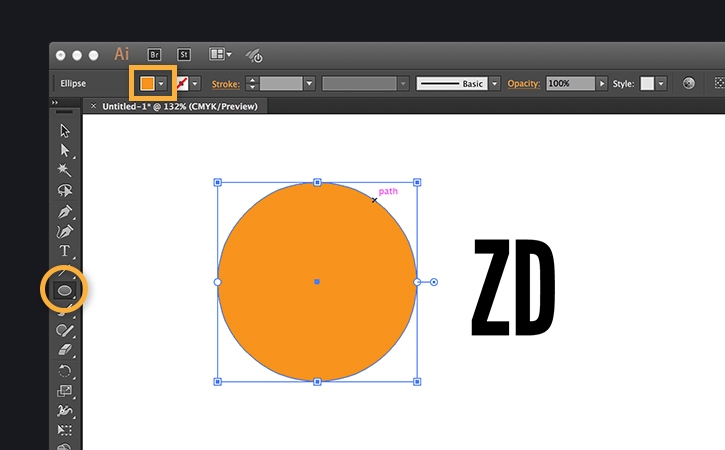
In the Tools panel, click and hold the Rectangle shape tool to access other shapes. Select the Ellipse tool.
Press Shift and drag to draw a circle off to the side.
In the Control panel, click the Fill Color swatch and choose a color from the Swatches panel.
Optional: Click the Stroke Color swatch next to it and apply a colored stroke to the shape. You can use the Stroke Weight field to adjust the thickness.

Assemble your monogram
With the shape still selected, choose Object > Arrange > Send to Back.
With the Selection tool, drag your initial and place it above the shape.
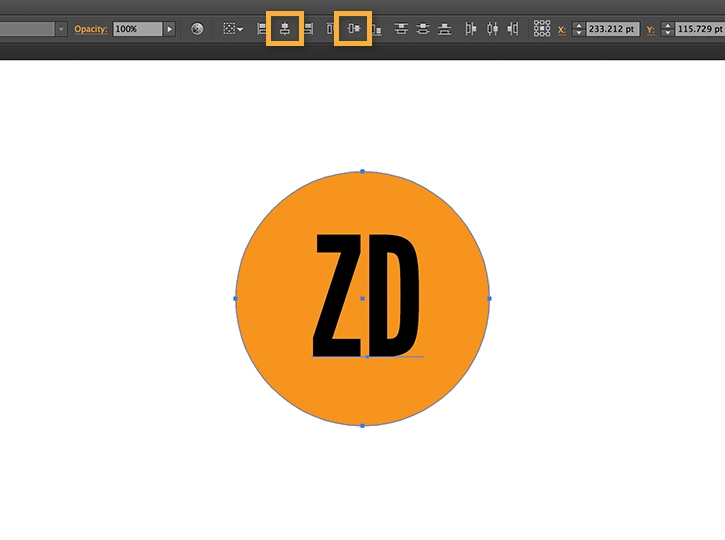
Tip: To align the initial and shape perfectly, select both and click the Horizontal Align Center and Vertical Align Center buttons in the Control panel.
Optional: If you want to experiment with different variations of color, type and sizing for your monogram design, you can quickly save the variations in a Creative Cloud Library to reuse or share. See What are Creative Cloud Libraries for details.

Resize the elements
You can resize the shape and initial at any time.
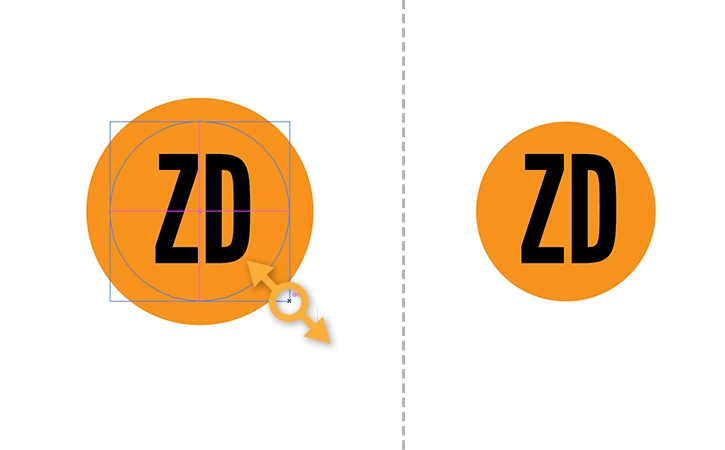
To scale the shape proportionally from the center, select the shape, and with the Shape tool selected, press Alt/Option + Shift and drag a corner of the bounding box.
To resize your initial, select it and change the font size in the Control panel.
When you're happy with the size and proportion of your monogram, select both objects and choose Object > Group or type Control/Command + G.

Prepare for output
As a final step, you'll copy and paste the logo into a new document for final output.
Select the grouped monogram and press Control/Command + C to copy it. Choose File > New and select Profile: Print.
Press Control/Command + V to paste your monogram into the center of the artboard.
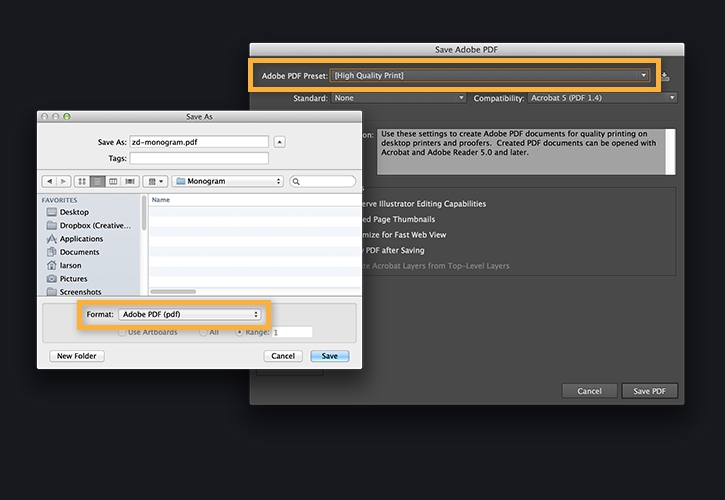
To save the monogram for print, choose File > Save, and select Adobe PDF. In the Adobe PDF Preset menu, choose either the High Quality Print or Press Quality options, based on your print provider's recommendations.

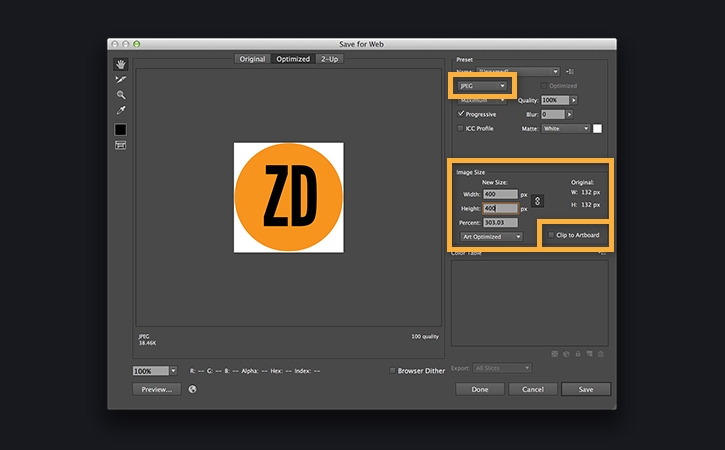
To save the monogram to view onscreen, choose File > Save for Web. In the Preset menu, select either the JPEG or PNG option. Specify an image size, such as 400 x 400 pixels for a Twitter profile image, and then deselect Clip to Artboard. Click Save to export your monogram for your blog, website, or digital publications.
