Take parts of photos and combine them into creative images on your mobile device with Photoshop Mix, and then fine tune them in Photoshop. (Watch, 1 min) And then read the tutorial.
What you'll need
Copy the sample assets to your Creative Cloud Libraries
To recreate the artwork in this tutorial, sign in to your Creative Cloud account. Get an Adobe ID if you don't have one.
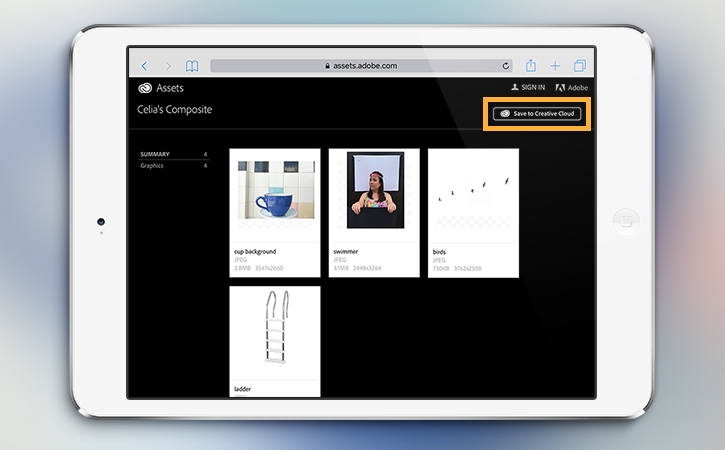
Go to Celia's Artwork library and click Save to Creative Cloud to copy her assets to your library. Now you can use the assets to create a composite in Photoshop Mix, and then refine your project in Photoshop.
Note: Photoshop Mix is only available for iPhones, iPads, and Android phones. It is unavailable for Android tablets.

Start a new photo composite in Photoshop Mix
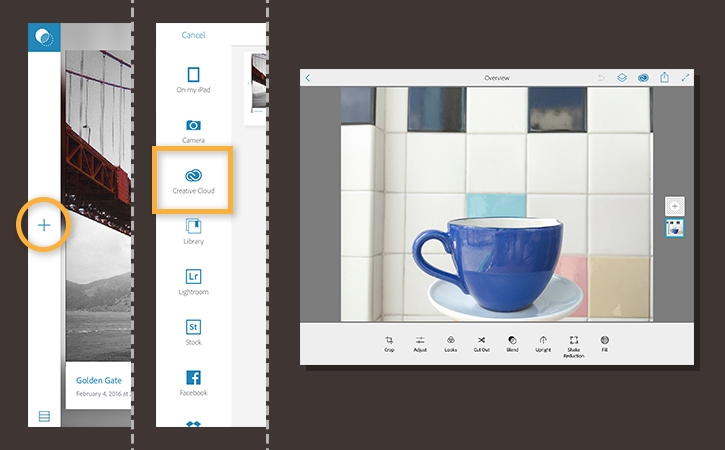
Tap the plus (+) icon to create a new project.
Select a background image for your composite.
If you are using Celia's assets, tap Creative Cloud. Tap Files and switch to Library Assets, and then choose Celia's Composite. Tap cup background, and then tap Open to set this image as your background layer.

Combine photos
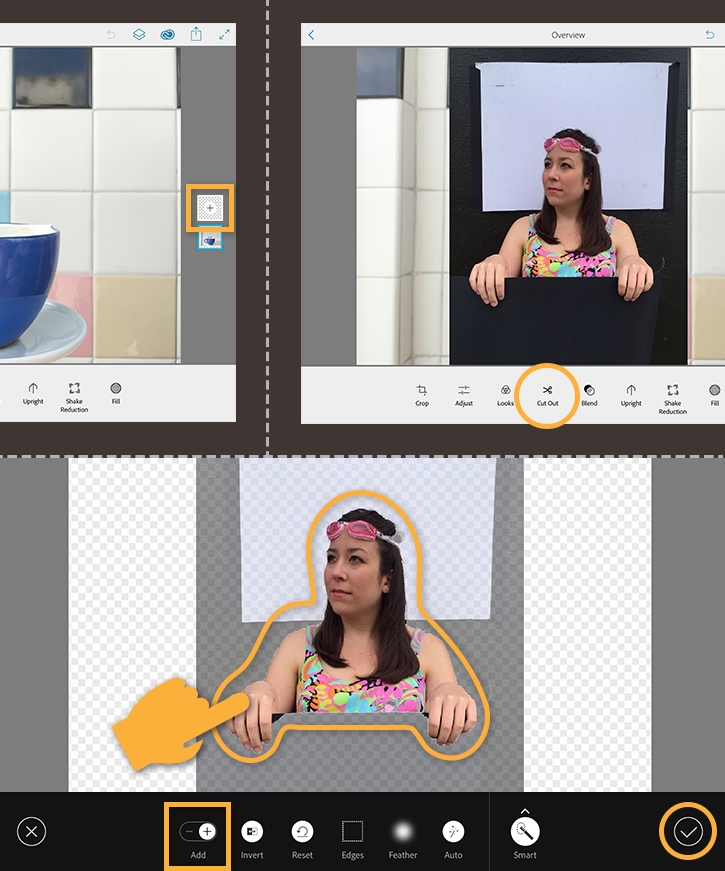
To add another photo layer to your composite, tap the plus (+) thumbnail. Navigate to Creative Cloud and Celia's Composite library, and choose swimmer. Tap Open.
To isolate the subject of the new photo from its background, tap Cut Out and use your finger to scrub the section of the image you want to keep. To remove areas from your selection, tap Add to switch to Subtract mode and scrub the areas you want to remove. You can pinch in or out to clean up your selection. When you’re finished, tap the checkmark.
Cut Out defaults to the Smart Selection mode, which automatically detects the edges of what you want to cut out. You can switch to the Basic Selection mode for a more manual approach.
Your subject will appear against your background photo. Use pinch gestures to adjust the scale of the subject, rotate, and move your subject to place it within your original photo.

Blend images together
Note: The Blend modes feature is only available on iPhones and iPads at this time.
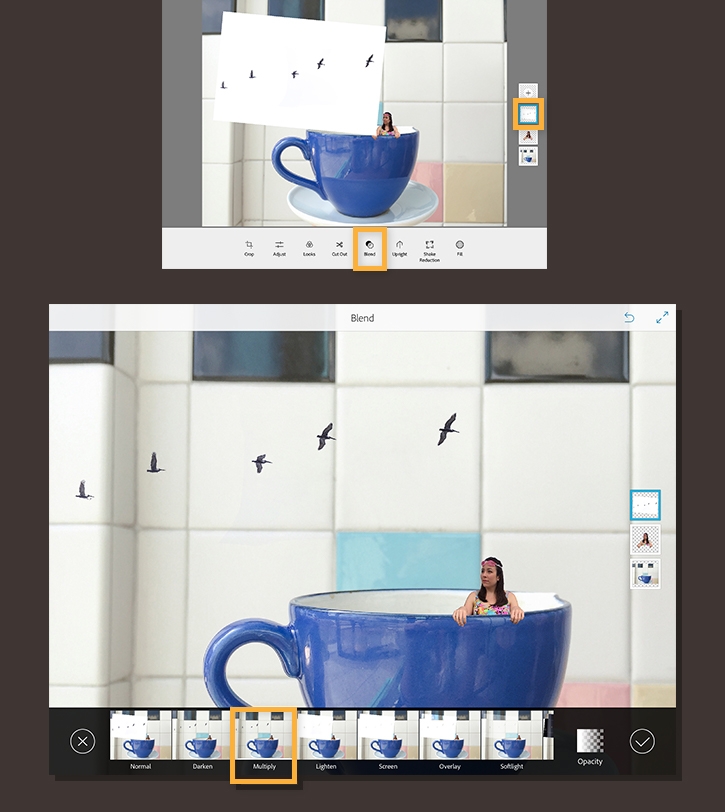
Tap the plus (+) thumbnail and add a third layer, using the birds image in Celia's Composite library. Use pinch gestures to scale and rotate the photo.
Tap the birds layer thumbnail and then tap Blend. Move the slider to play with the opacity of the image until you achieve your desired effect.
For this example, we set the Blend mode for the pelicans photo to Multiply, which makes the white background of the image blend into the rest of the composite. This leaves the dark birds visible. Experiment with different blend modes, and learn more about them in Adobe Help.
When you’re finished with blending, tap the checkmark.

Combine more subjects into the photo with layers
Note: The ability to add more than two layers is only available on iPhones and iPads at this time. You can add a maximum of two layers on Android phones.
Repeat steps 3 and 4, adding more subjects, such as the ladder image. Each time you add a photo to the mix, it creates a layer. Continue adding photos and blending layers to create a rich composite.
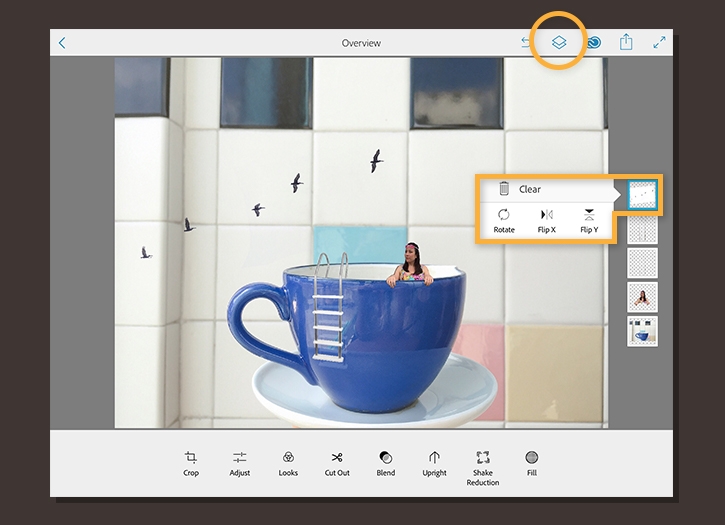
Tap the Layers icon to see your entire project, or to see different layer thumbnails.
To delete an unwanted layer, tap the layer’s thumbnail and select Clear.
Tip: If you’re not sure if you want to keep a layer, tap Blend and reduce the opacity to zero. If you change your mind later, you can always increase the layer’s opacity.

Send your composite to Photoshop
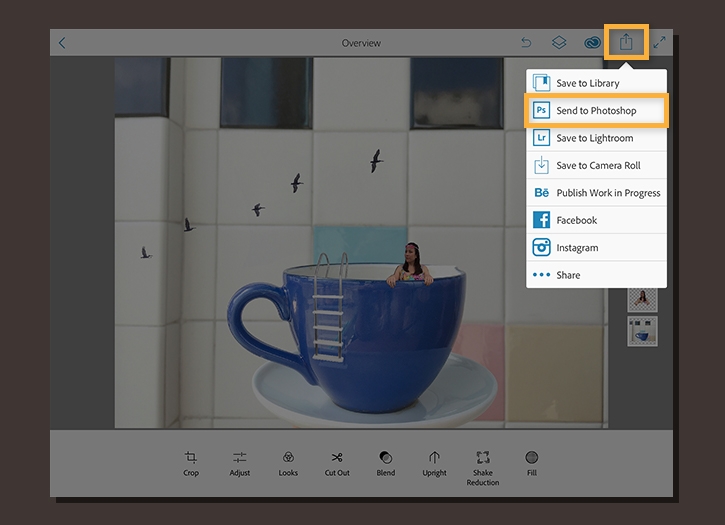
Photoshop has powerful tools to further enhance your Photoshop Mix composites. Make sure you’re connected to the same Wi-Fi network as your desktop computer, tap Share, and tap Send to Photoshop.
When you launch Photoshop and sign into Creative Cloud, your composite will open in Photoshop as a complete layered file — with your Photoshop Mix adjustments, blend modes, and layer masks intact and available for you to edit and refine further.

Refine in Photoshop
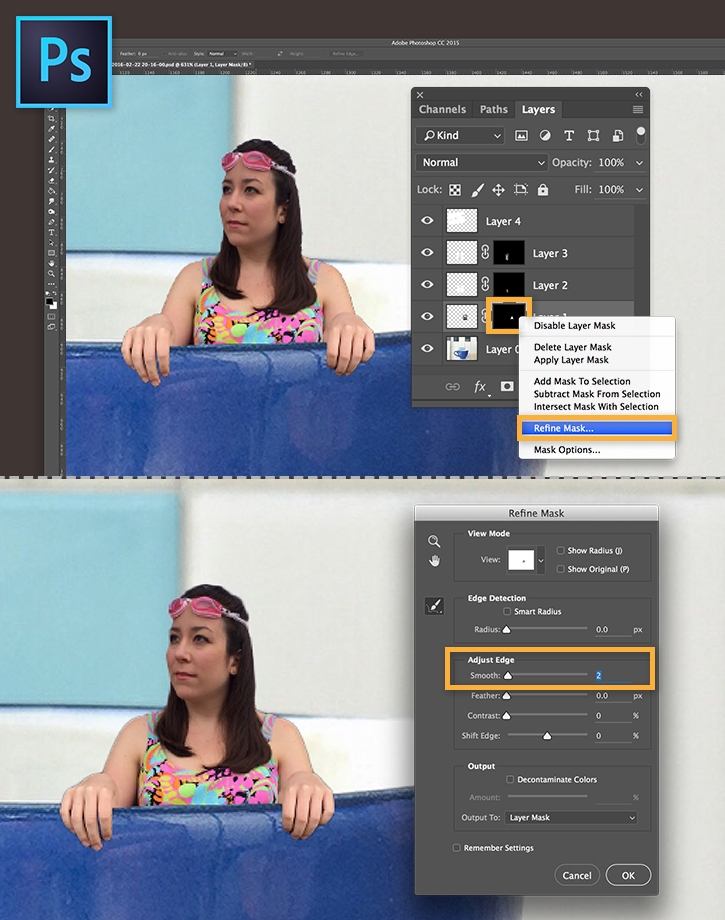
In Photoshop, you can clean up the composite by smoothing the edges between the cut outs.
Click swimmer layer mask thumbnail once to select it, and then right-click it. Select Refine Mask.
In the Refine Mask dialog box, move the Smooth slider to fix jagged edges. Experiment with the other Adjust Edge controls to further refine the cut out. When you're finished, click OK.
Show us what you ended up with creating! Share your artwork in Instagram: #IusePSMix.
