Photos shot against a plain studio backdrop or a solid background present a wide range of new worlds and scenes you can create in Adobe Photoshop.


What you'll need
This sample file has Adobe Stock images you can use to practice what you learn in this tutorial. If you want to use the sample file beyond this tutorial, you can purchase a license on Adobe Stock. Check out the ReadMe file in the folder for the terms that apply to your use of this sample file.
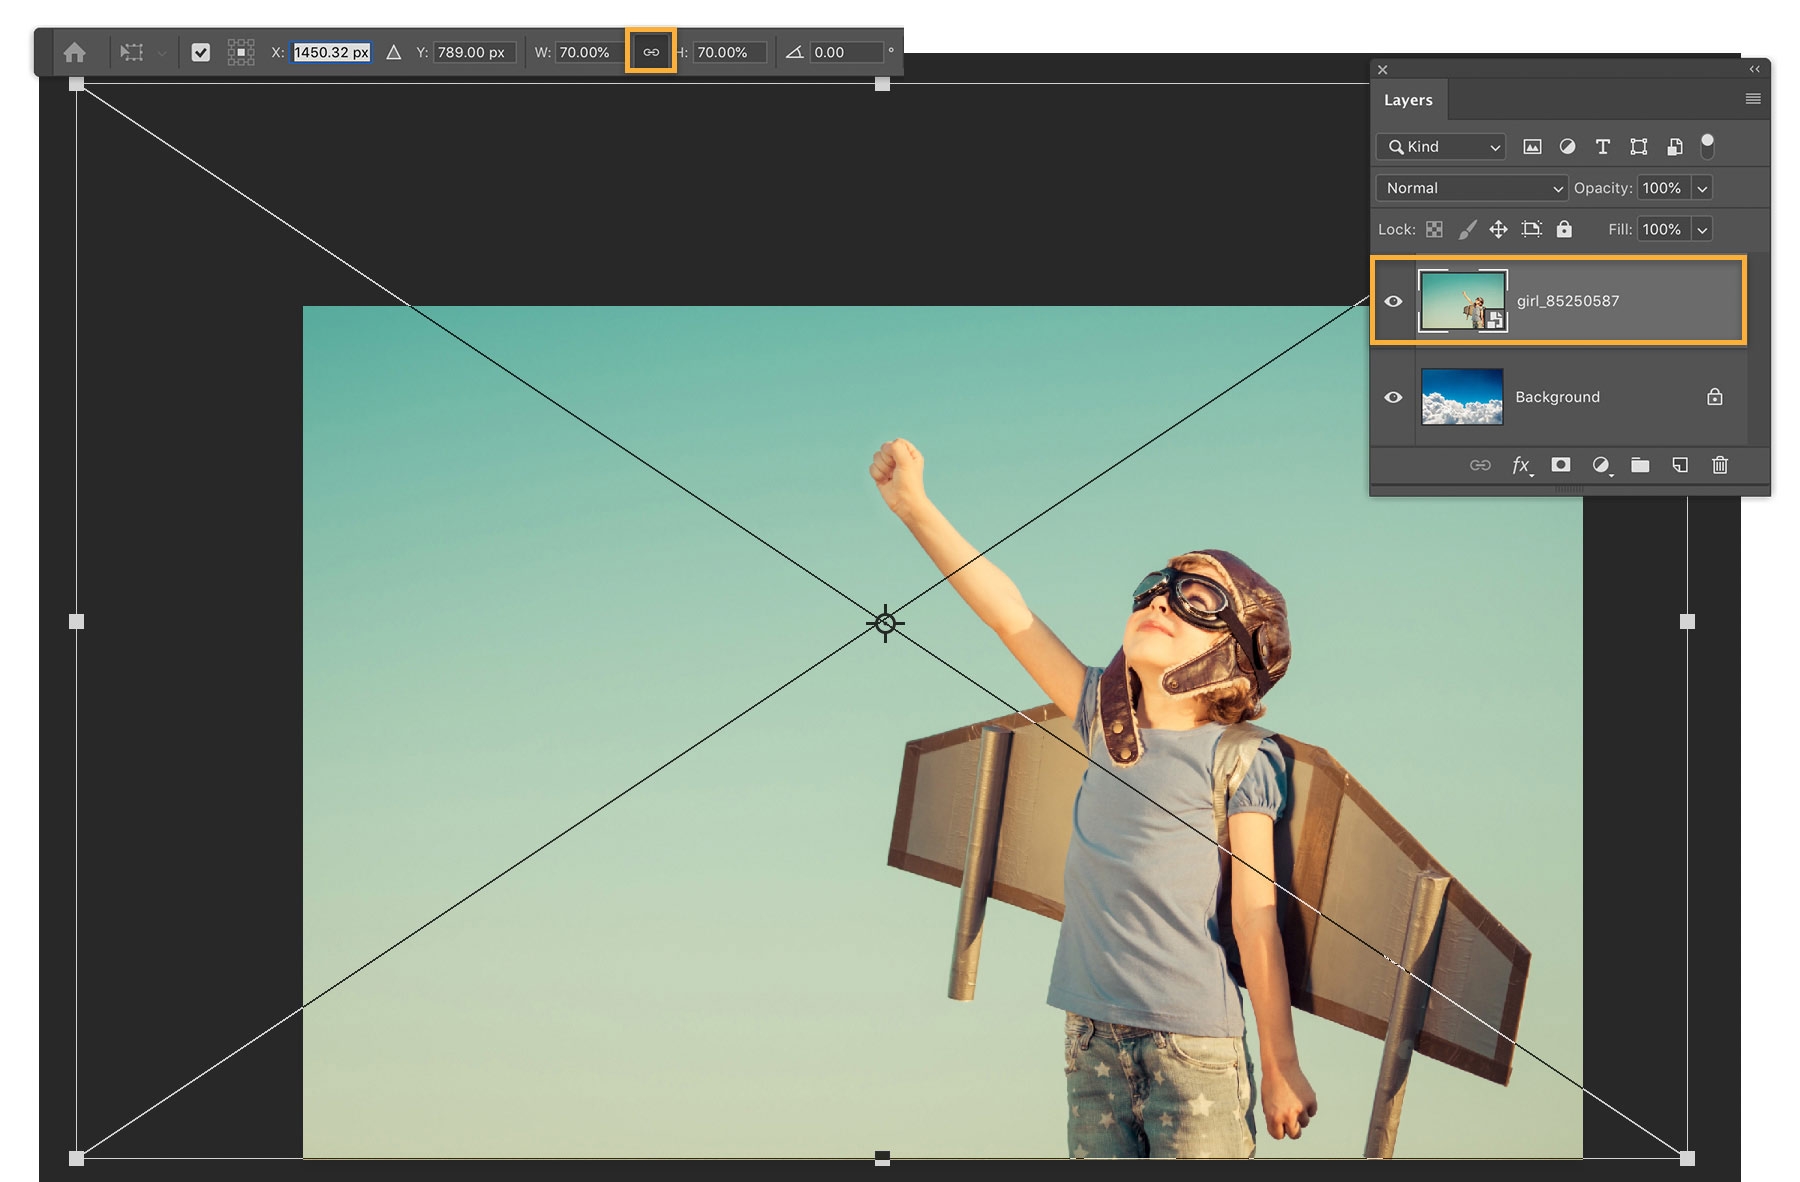
Feel free to use our practice files, or try these steps with your own. Open the white cloud image first. Photoshop names this layer Background. Drag the image of the girl from your computer into the open document. Drag the corner handles to resize the image. Then, press Enter or Return to place it. Make sure you can see the Layers panel (Window > Layers).

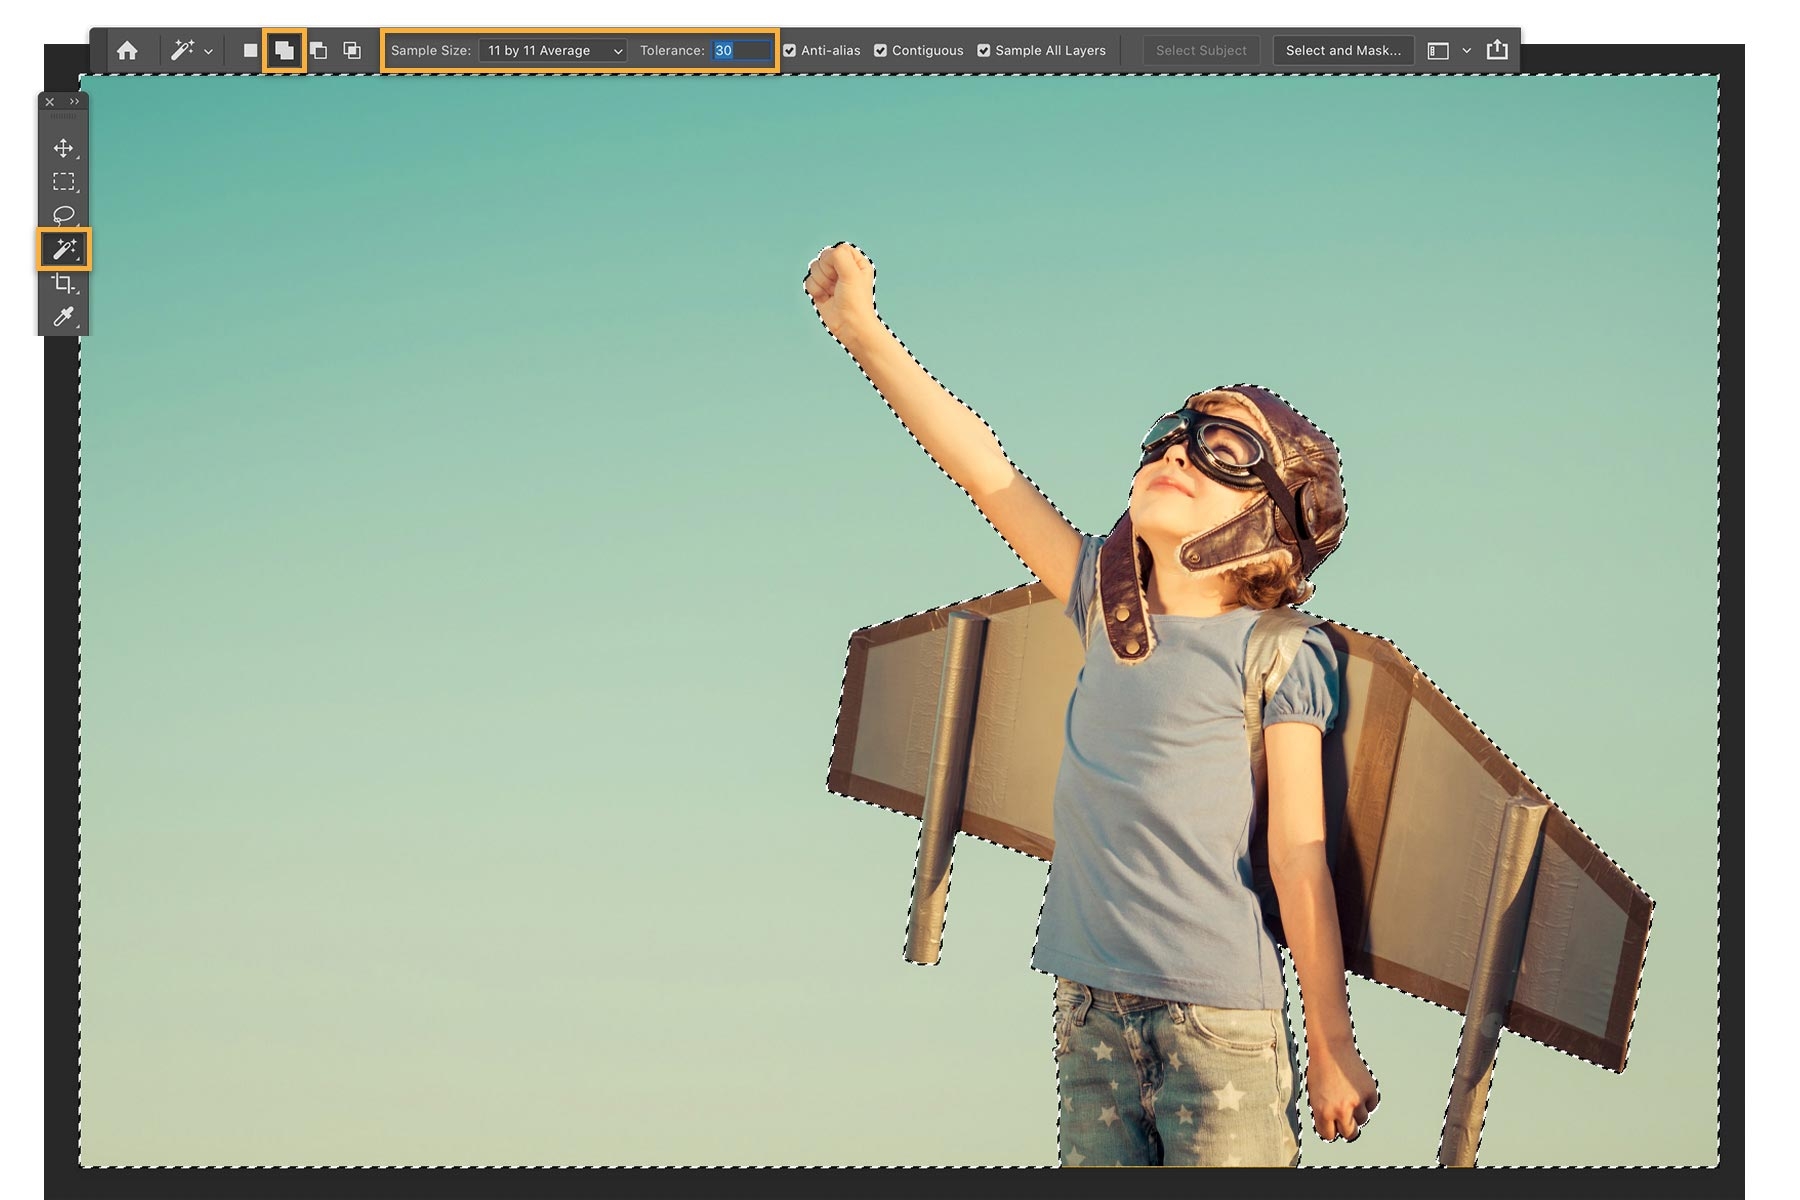
Use the Magic Wand tool to select the background color around the girl. The Magic Wand works best when there is a sharp contrast between the subject and background. Modify the Magic Wand settings to see what works best for you. Below are the settings we used for this image. You will likely change these settings if you are editing a different photo. Click the area around the girl until everything around her is selected. The selected area is indicated by a moving dotted line, also known as marching ants.

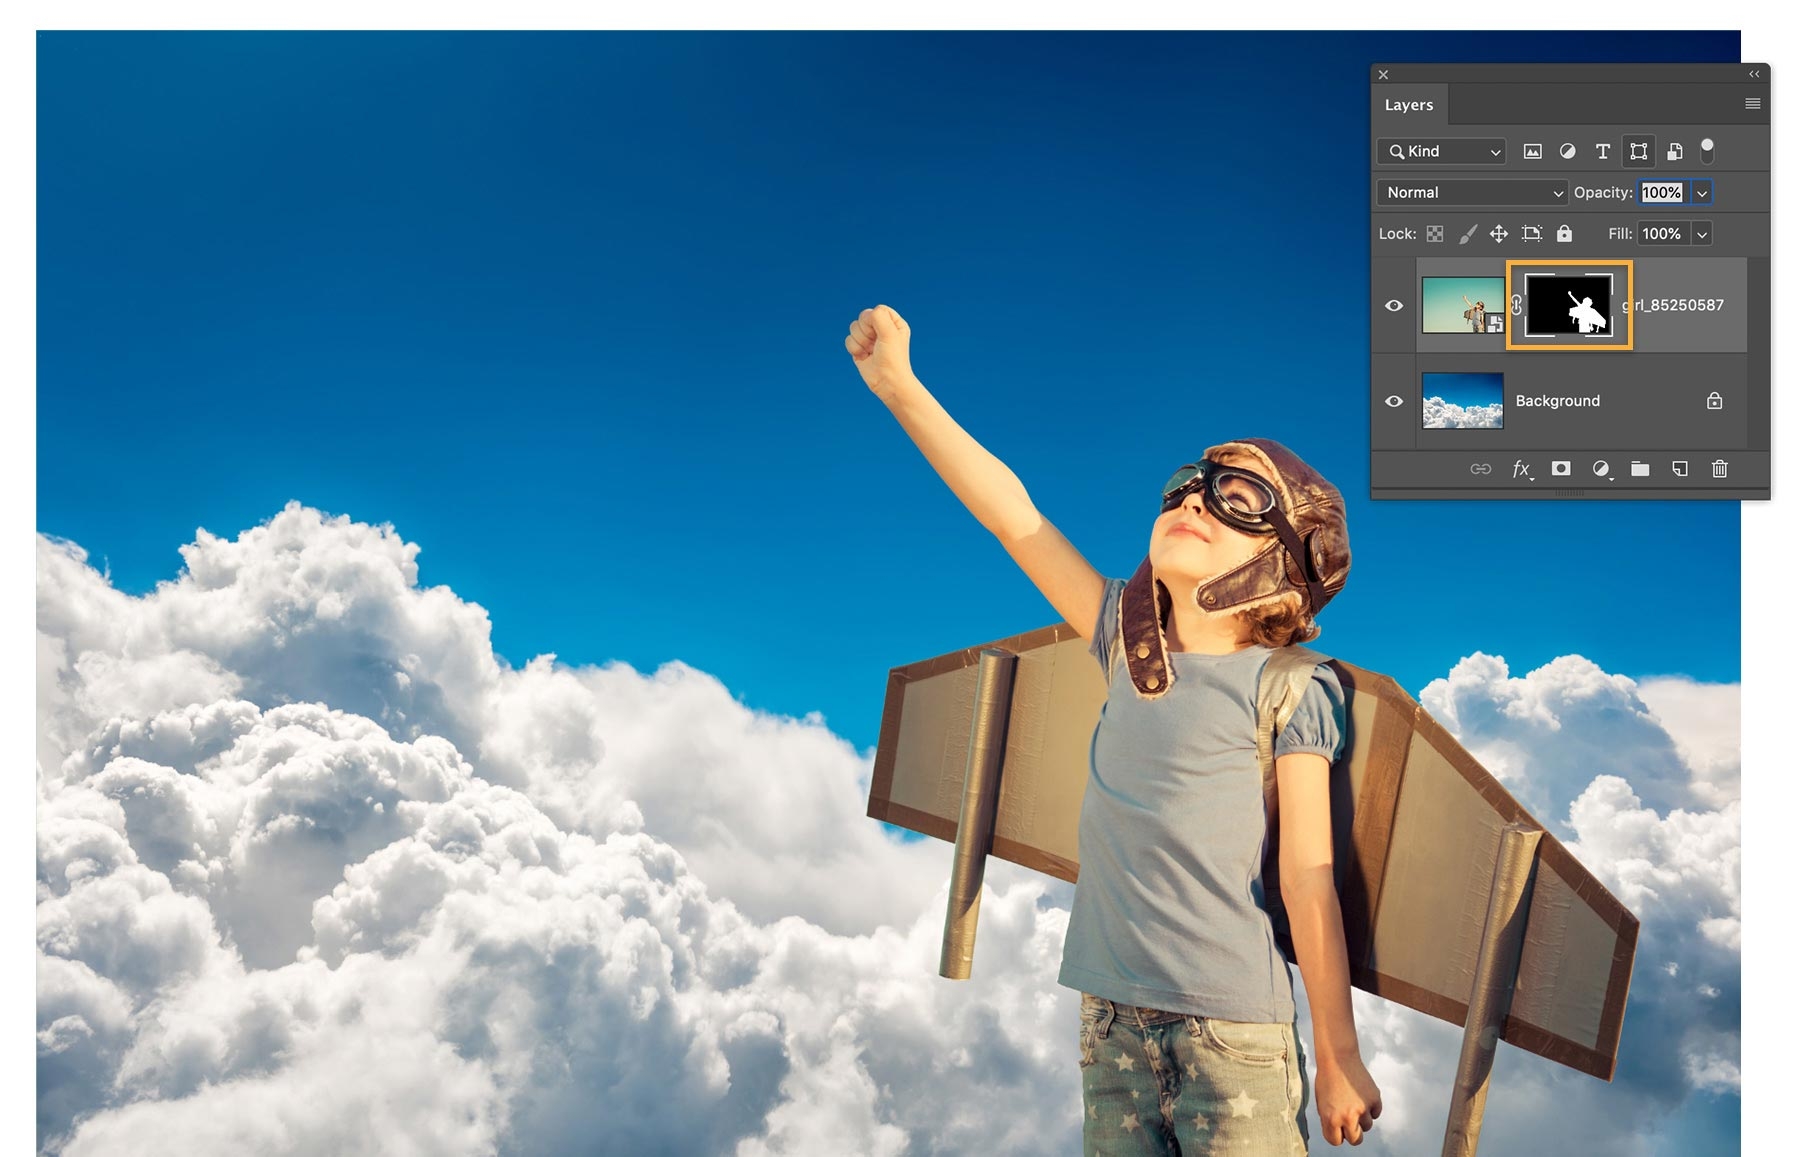
Use a layer mask to combine the selection with the background layer to create a new composition. With the girl layer still selected, choose Layer > Layer Mask > Reveal Selection. The selected area remains visible and the girl, the area not selected, is hidden to reveal the layer below. Photoshop adds an icon to the girl layer in the Layers panel indicating there is now a mask on the layer. The white portion of the mask icon indicates areas of the layer that are visible, while black indicates areas of the layer that have been hidden to reveal the image on the layer below.


Undo the last action, Control+Z (Windows) or Command+Z (macOS), to try the next technique. Choose Layer > Layer Mask > Hide Selection to hide the selection, the area around the girl, so the layer below appears around her. Notice the mask icon is now the reverse of the previous selection.

Experiment with different background images to create new compositions. Drag another image into the Photoshop document. Make sure the new background image appears just below the main subject in the Layers panel. You can also click the eye icon of the previous background to hide it.


Combine your favorite subjects with new backgrounds to create compositions both artistic and surreal.
With Adobe Stock, you have access to more than 100 million high-quality, royalty-free images including photos, graphics, videos, and templates to jump-start your creative projects. Try Adobe Stock and get 10 free images.