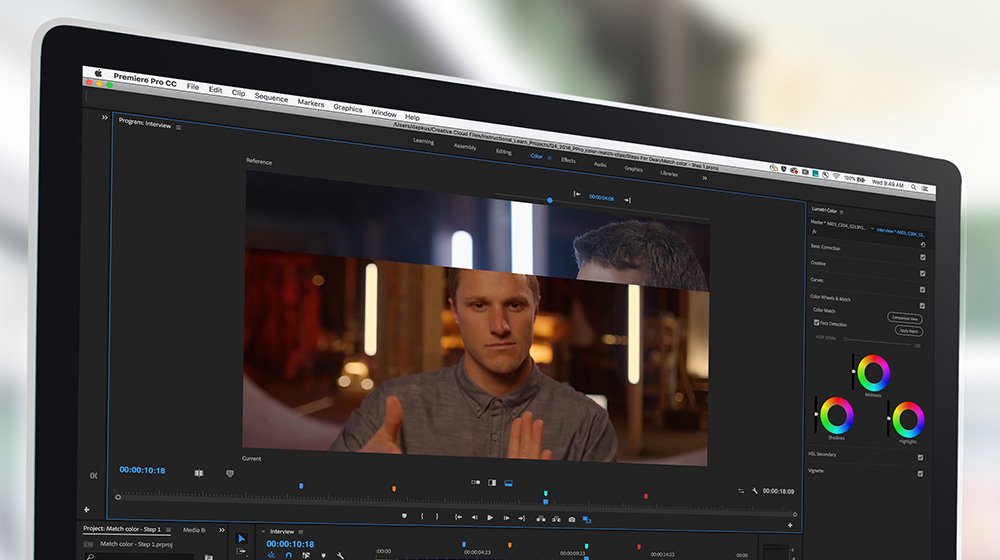
Compare shots in Adobe Premiere Pro and then choose a clip with the primary look you want so you can match other clips to it.


What you'll need
Match the color in footage taken with different cameras shooting the same scene. Starting in the Color workspace, expand the Color Wheels & Match section of the Lumetri Color panel and then click the Comparison View button. Reference and Current frames now appear in the Program Monitor. The default view is Side by Side; click the Vertical Split or Horizontal Split button to change how you want to compare the shots. Position the playhead on the current clip you want to correct. Scrub the Reference position timecode value — or click the arrows — until you reach the reference clip that has the look you want to apply to the current clip.


To match the two clips, click the Apply Match button. (Turn off Face Detection if there are no faces in either the Reference or Current frame.) If necessary, fine-tune the automatic changes by adjusting the sliders for Shadows, Midtones, and Highlights — or by making further refinements in the Basic Correction area of the Lumetri Color panel.


Continue using these tools to match scenes using a combination of automatic and manual adjustments.