Learn how to find inspiration in the thousands of unique images from Adobe Stock, and combine them into surreal, compelling composites.


Carolina Niño's inspiration
Argentina-based artist, Carolina Niño, is inspired by the wisdom and mystery of nature. She combines natural elements and abstract shapes: "The space between one object and another is more important than the object itself. In this way we realize visual harmony."
In this tutorial, follow her steps to find images from Adobe Stock that will inspire you to build a collage that expresses your own "visual harmony."


Create a Library for your assets
Open Photoshop. If the Libraries panel is not yet open, go to Window > Libraries to open the panel.
To make a new Library, click the drop-down menu in the Libraries panel and choose Create New Library. Name your Library, and click Create. This is where you’ll collect all the assets for your collage.


Search for Adobe Stock images
For the collage, you’ll need a background image and some graphic elements.
Click Search Adobe Stock to search for images. Play with the search terms to find assets that resonate with your composite theme. For the background image, Carolina searched, "blurred colorful background design"; and for nature elements, she searched, "colorful mineral crystal."
Click Save Preview to save a low-resolution watermarked image.
Note: Images with solid backgrounds are easier to cut out. You can filter image file types with the Results from Adobe Stock menu.


License Adobe Stock images
If you find an image you know you want to use, you
can license it from Adobe Stock directly inside Photoshop.
Click License and Save to save a full-resolution image to your Library. You can also license images from your Library. Right-click an image and choose License Image...
Let the images you find inspire your composite theme.
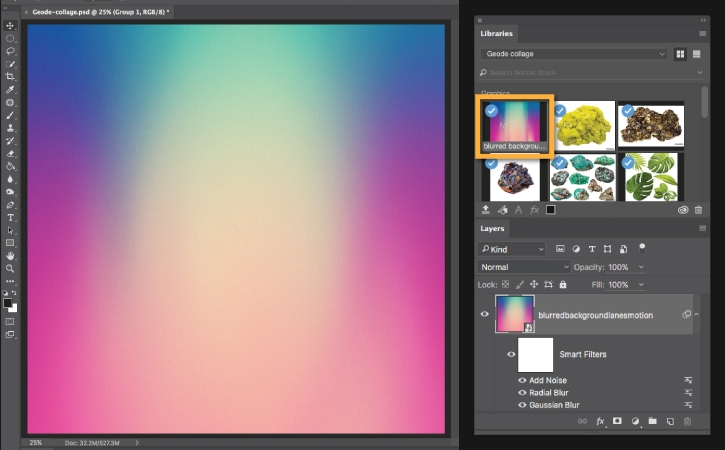

Select a background image
Select an image from your Library to use as your background. Double-click the image to open it on the canvas as a new Photoshop document.
Customize the background image with Smart Filters, such as Add Noise, Radial Blur, and Gaussian Blur.
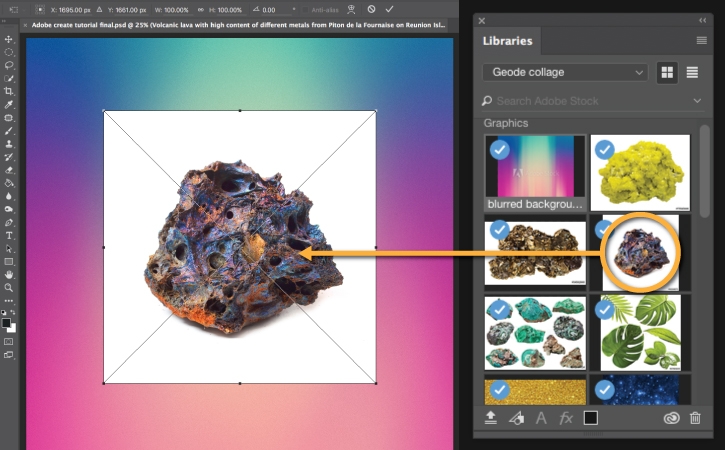

Add images to your composite
Continue building your composite. Click and drag images from the Library panel onto your background canvas. Each image you drag to your workspace will create a separate layer.
Rotate, scale, and position the images, holding the Shift key to maintain the original image proportions. Press Enter/Return on your keyboard or click the checkmark at the top of your workspace to commit the change.
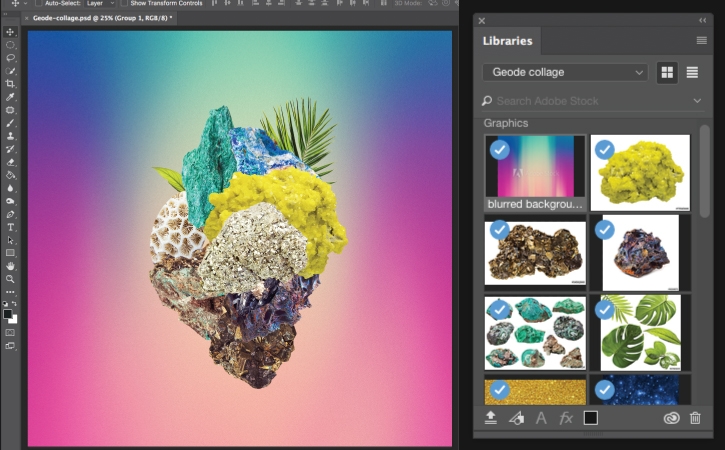

Cut out and arrange images
Cut out images from their background by going to Select > Select and Mask. See more in Selecting and masking part of a photo.
Arrange the cut-out images to create a unique, organic shape. Experiment with layering different images and adjusting the scale of the individual elements. See more in Create a composite.


Experiment with different effects and shapes
Experiment with the Stock images: Clip them to shapes, use Liquify Filter for a melting effect, apply Adjustment Layers, change the blending modes of layers, or add extra images.
Carolina also suggests adding abstract forms to give the image a sense of depth.


Save and share your artwork
Save your image to share to social media or post on your Behance portfolio.
Tag your composite with #AdobeStock to share it with the creative community.
Search for Stock photos at Adobe Stock.