Taking elements from multiple photos and using them to create a new image allows you to create beautiful, evocative, or just plain startling juxtapositions. And it’s a technique that visual artist Temi Coker uses to great effect in his work. In this easy-to-follow tutorial, learn how Coker isolated elements from two images to create a brand-new composition in Adobe Photoshop.
आपको क्या चाहिए
This sample file has Adobe Stock images you can use to practice what you learn in this tutorial. If you want to use the sample file beyond this tutorial, you can purchase a license on Adobe Stock. Check out the ReadMe file in the folder for the terms that apply to your use of this sample file.
Prep your subject
Start by separating the model from the background. Coker used the Quick Selection tool, and then chose Select And Mask. Once in the Select And Mask workspace, he set the View Mode to Overlay and used the Refine Edge Brush to enhance the details of the model’s hair. He then output his selection to a Layer Mask.


Add more elements
Next, Coker dragged the flower image onto the model, rotated the image, and moved it into position. He chose the Quick Selection tool and used Select Subject to separate the flowers from the background. He then chose Select And Mask to clean up the selection.


Get clear details
In the Select And Mask workspace, Coker brushed over the flowers with the Refine Edge Brush tool to remove the remaining bits of background. To get a better view of the composition while working, set the View Mode to On.


Arrange the design
Coker duplicated, rotated, flipped, resized, and moved the flowers layer two more times to create an arrangement around the model. He then added a Curves adjustment layer and modified the tones of the model.


Add more warmth
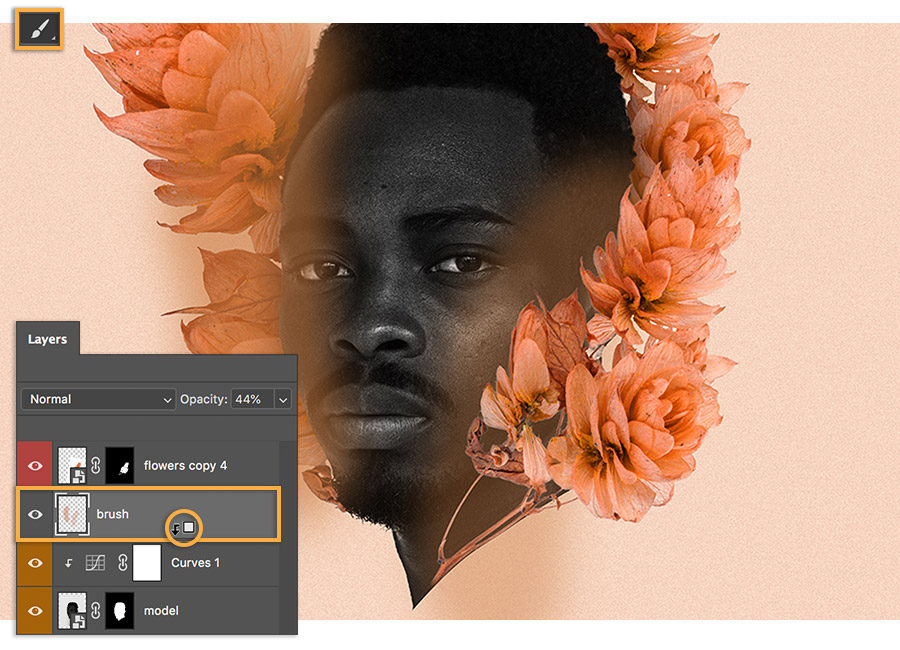
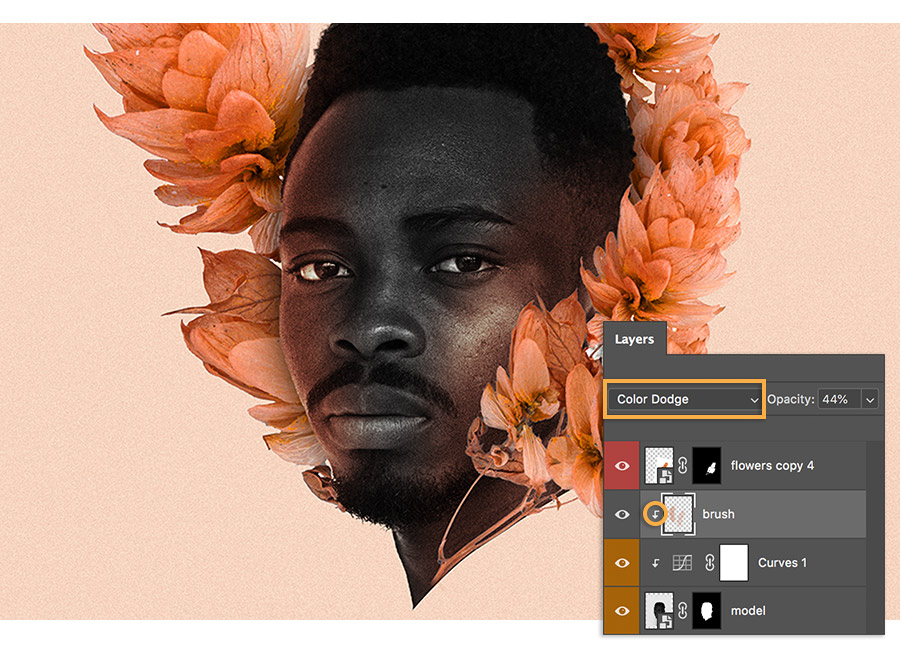
Coker added a new layer above the model layer. He then set the Brush tool to a color he selected from the flowers, and brushed the sides of the model’s face along the edge of the flowers. He blended this effect by option-clicking (or alt-clicking) between the new layer and the model layer to create a clipping mask, and set the Blend Mode to Color Dodge.

Keep your creativity blooming
Experiment with the variety of tools in the Select And Mask workspace. You can make complex selections in a snap.


Note: Project files included with this tutorial are for practice purposes only.
With Adobe Stock, you have access to more than 100 million high-quality, royalty-free images including photos, graphics, videos, and templates to jump-start your creative projects. Try Adobe Stock and get 10 free images.
