Adjust a graphic’s video effect controls over time in Adobe Premiere Pro to animate it in a sequence, and then edit the keyframes to fine-tune the result.


आपको क्या चाहिए
This sample file is an Adobe Stock asset you can use to practice what you learn in this tutorial. If you want to use the sample file beyond this tutorial, you can purchase a license on Adobe Stock. Check out the ReadMe file in the folder for the terms that apply to your use of this sample file. Any reference to "The Last Lane" is for demonstration purposes only and is not intended to refer to any actual organization, products, services or creative work.
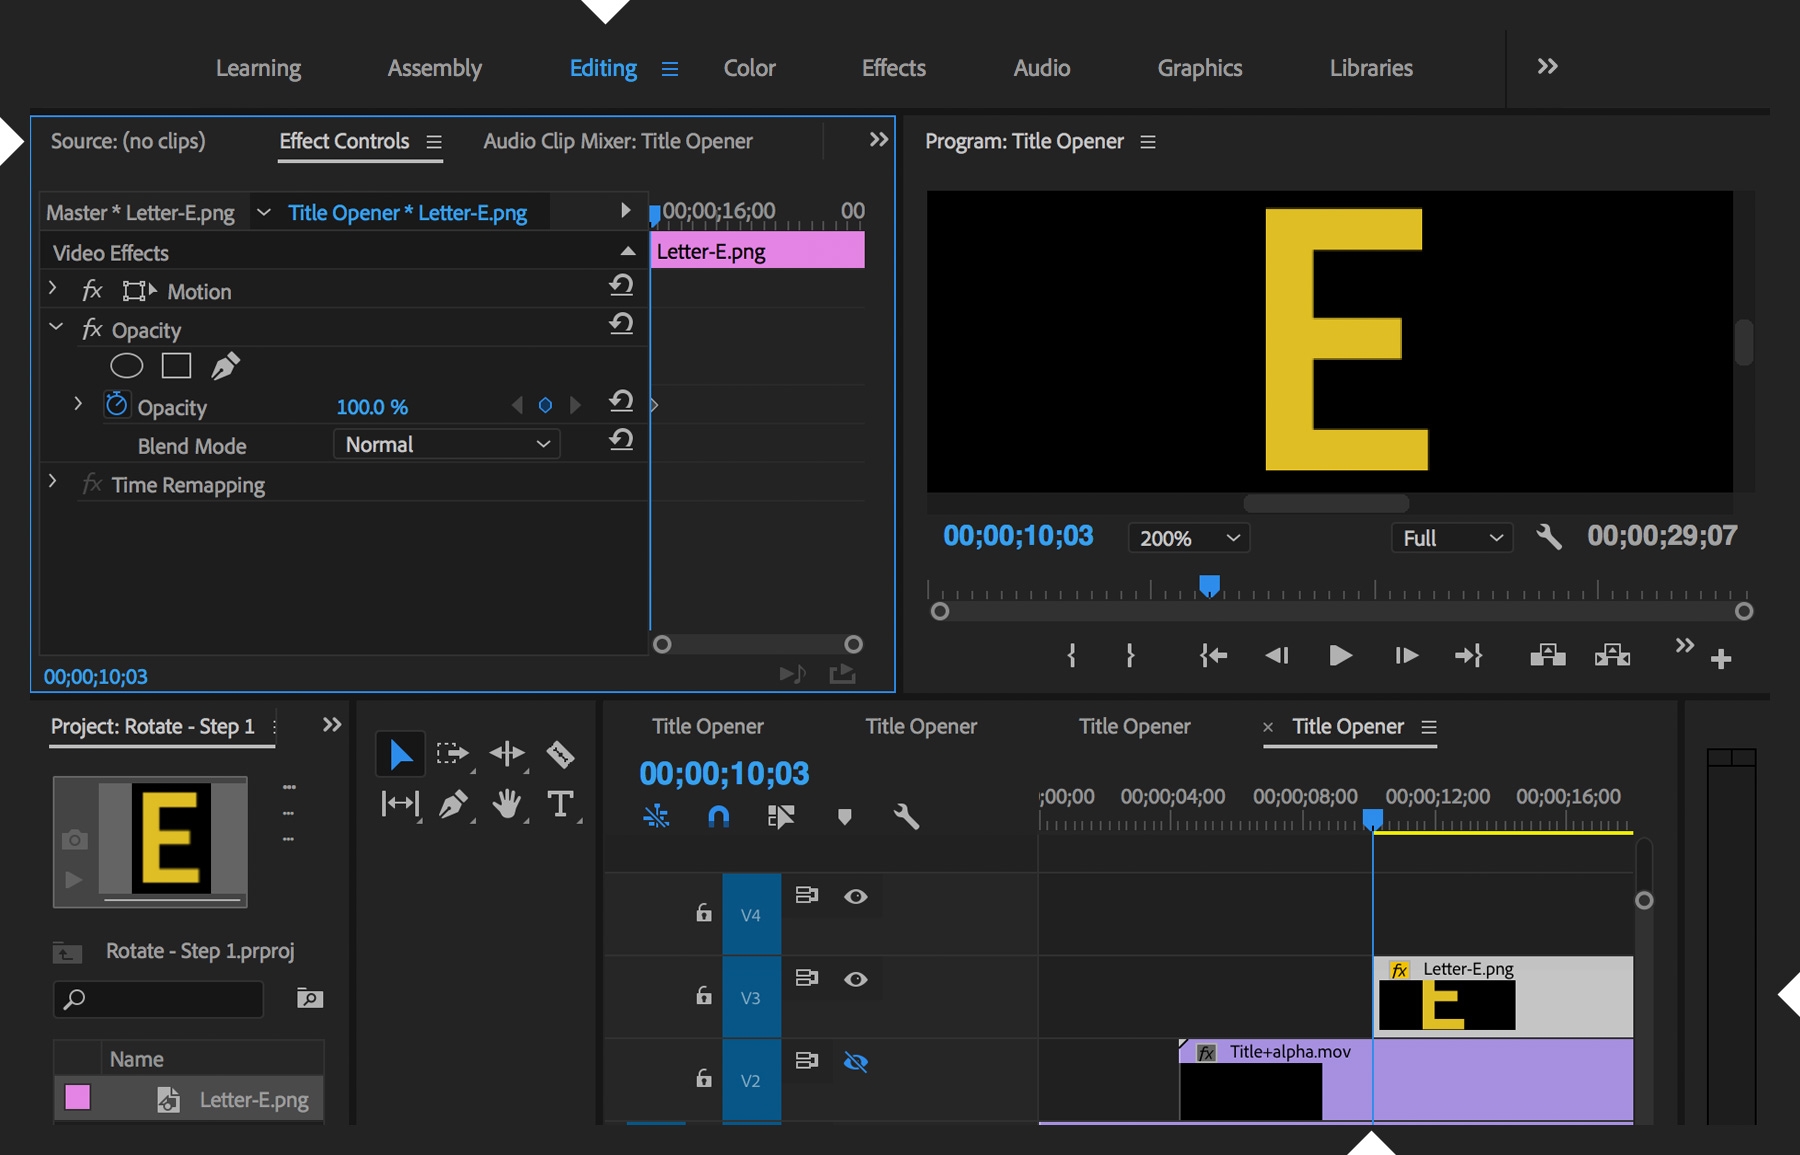
Starting in the Editing workspace, import a graphic into your project. Drag the graphic from the Project panel to your sequence. (In our example, it’s the letter E and it will complete the name of our movie title.) With the graphic selected in the Timeline panel, move the playhead to the start of the graphic’s clip and open the Effect Controls panel (Window > Effect Controls).


Toggle the animation stopwatch on for the first Video Effects property you want to animate across your sequence — usually Position, Scale, or Rotation. (Opacity is toggled on by default.) For the property you’re animating, advance the playhead by a certain amount and then change the property’s value until you’re happy with how the graphic looks at that point. Continue advancing the playhead and changing the property’s value until you reach the end of your animation. A keyframe will automatically be created every time you change the property’s value. You can select an existing keyframe (or navigate to it by clicking one of the keyframe arrows) to edit its value.


When you’re done animating one property, return to the beginning of the graphic’s clip and animate another property across the duration of the animation. Click the word “Motion” if you want to see the graphic’s motion path displayed in the Program Monitor.


By default, the property values change in a steadily progressing, linear fashion between the discrete values you set at each keyframe. This can make the animation look mechanical. To make it look more natural, right-click a keyframe (or lasso-select multiple keyframes and right-click one of them) and choose a different Temporal Interpretation setting in the menu, such as Continuous Bezier. The keyframe’s diamond shape will change accordingly.


Play your sequence. Experiment with changing the values of keyframes — or moving them left and right to change their relative timing — to see how the look of the animated graphic is affected.
With Adobe Stock, you have access to more than 100 million high-quality, royalty-free images including photos, graphics, videos, and templates to jump-start your creative projects. Try Adobe Stock and get 10 free images.