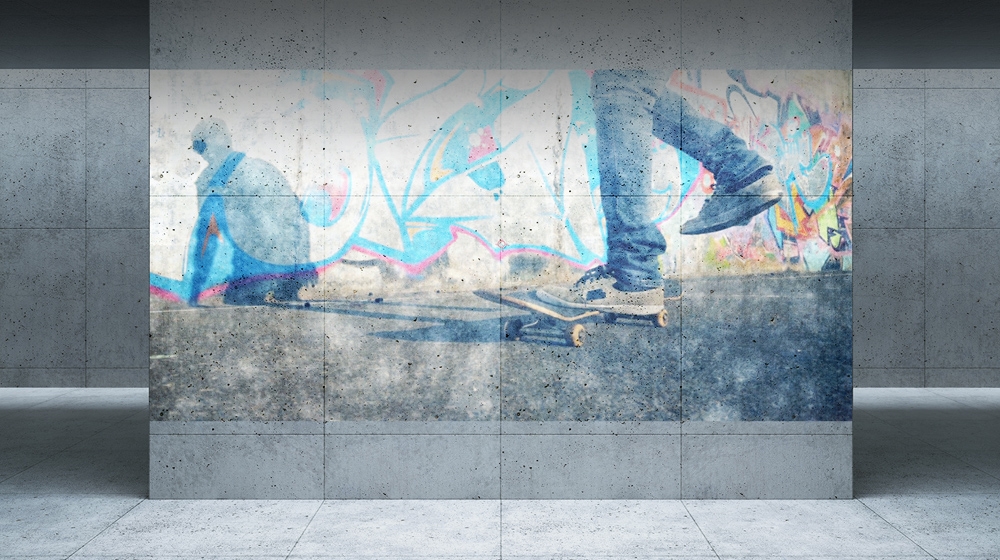
Give your footage a beat-up, distressed look using the Turbulent Noise effect in Adobe After Effects.

Tai, ko reikia
This sample file is an Adobe Stock asset you can use to practice what you learn in this tutorial. If you want to use the sample file beyond this tutorial, you can purchase a license on Adobe Stock. Check out the ReadMe file in the folder for the terms that apply to your use of this sample file.
Turbulent Noise is a powerful, versatile effect. Whether generating digital, blocky textures or smooth, organic clouds, you can use it to lend your footage a grungy look. Find it by typing Turbulent Noise into the Effects & Presets panel and dragging the effect to the layer in your composition. Explore some prebuilt textures in our sample project file by opening the comps in the Turbulent Noise Samples folder and pressing UU on the keyboard to see what settings we modified to achieve those looks.
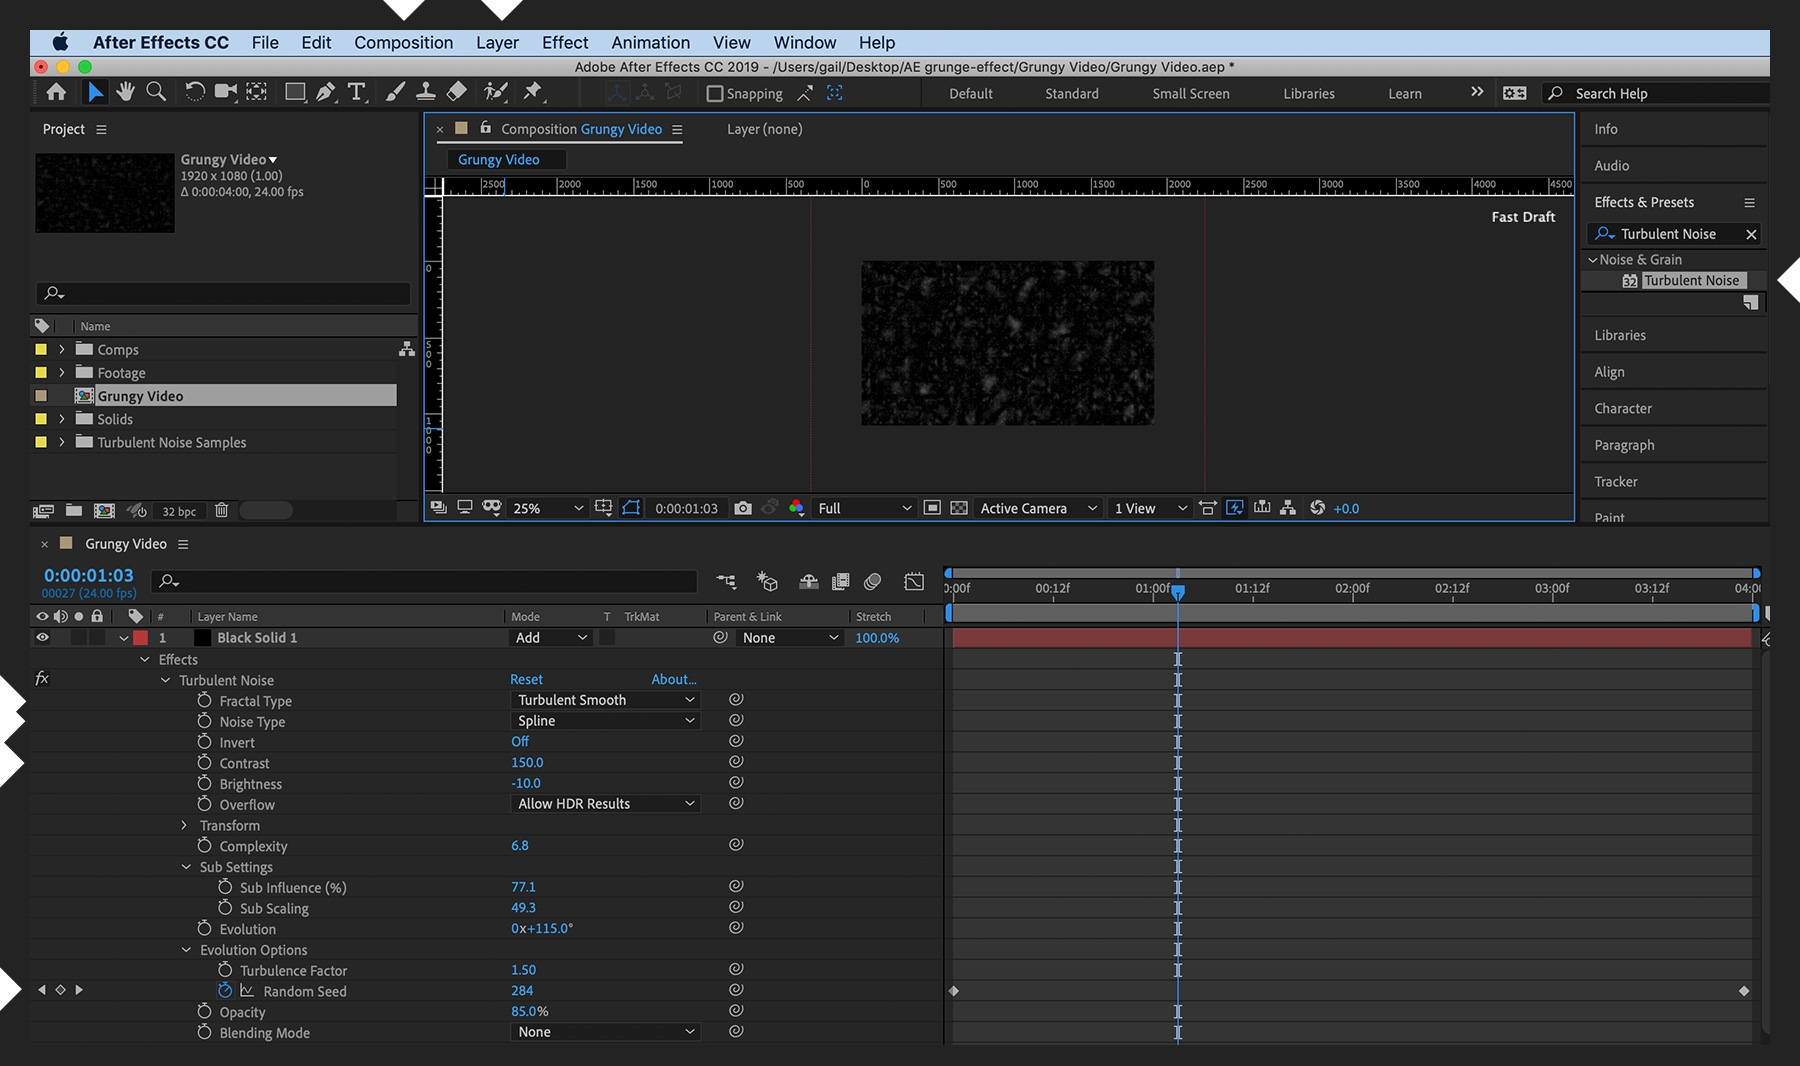
To generate cloud-like splotchy noise, create a new composition (Composition > New Composition), add a solid (Layer > New > Solid), and apply the Turbulent Noise effect to it. Expand the Effects in the solid layer to see the Turbulent Noise options. Set Fractal Type to Turbulent Smooth, set Noise Type to Spline, and change the Contrast settings. Animate the effect randomly and quickly by setting a keyframe for Evolution Options > Random Seed to 0 at the start of your composition and to a high value (at least 1,000) at the end of the comp.

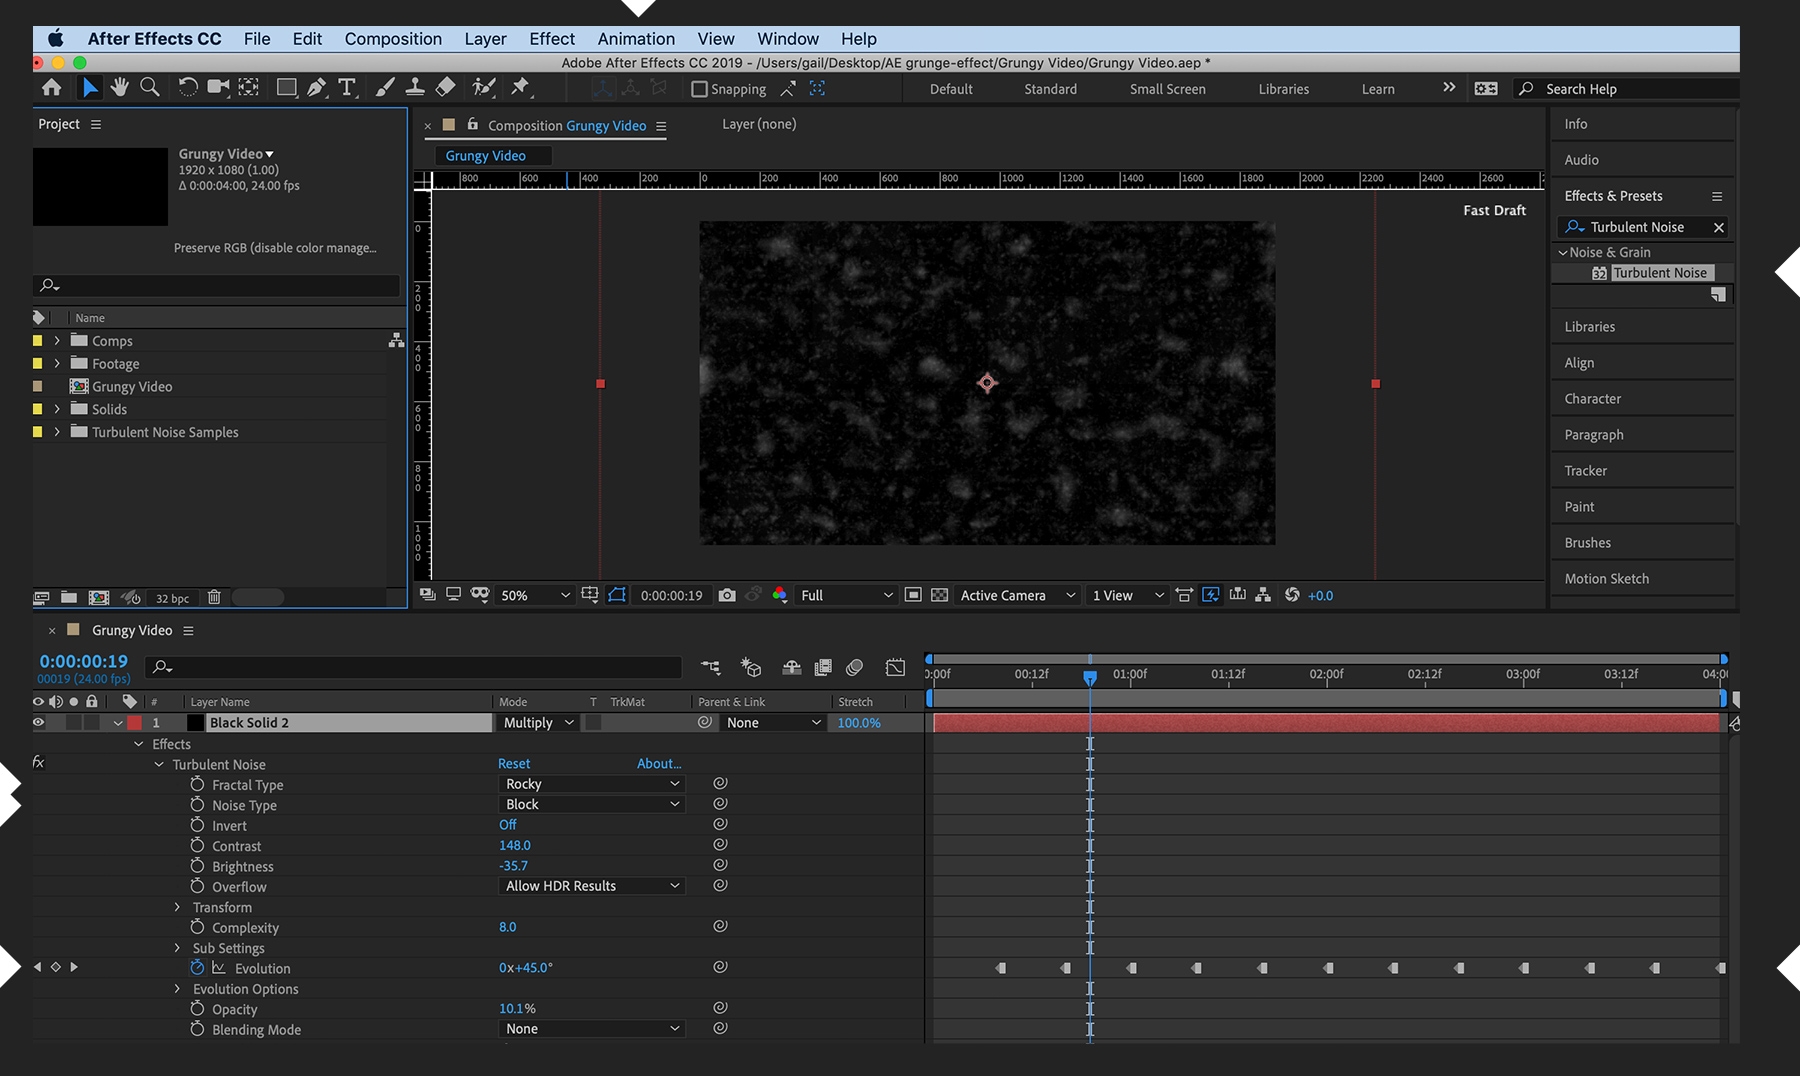
To create a blocky, digital texture, add Turbulent Noise to a new solid layer and this time set Fractal Type to Rocky and set Noise Type to Block. Play with the other parameters to achieve something you like. Set various keyframes along the timeline for Evolution, a key parameter that brings a natural progressive movement to the texture. If you change the keyframes to hold frames (Animation > Toggle Hold Keyframe), you’ll see the effect stutter rather than progress smoothly.

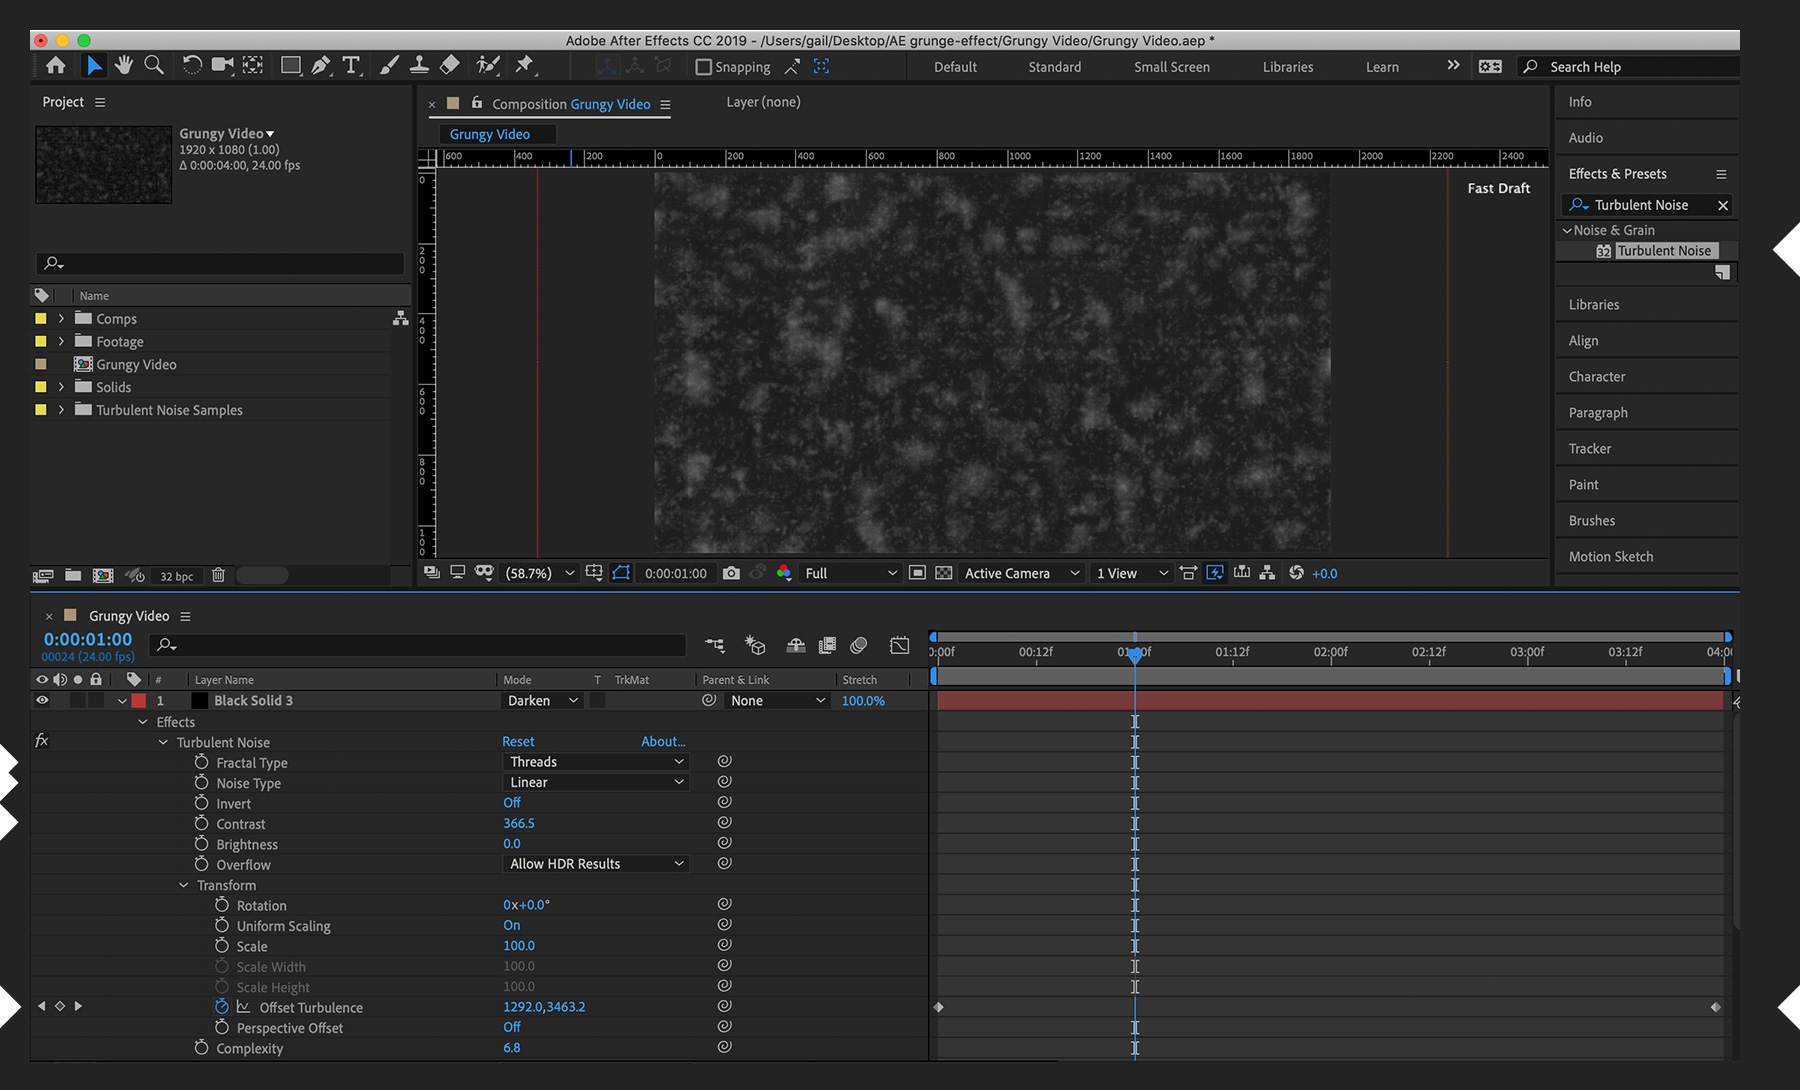
To make a dirty texture, add Turbulent Noise to a new solid layer and set Fractal Type to Threads, set Noise Type to Linear, and increase Contrast. Give the effect a “rolling film damage” look by setting keyframes for Transform > Offset Turbulence, one on the first and one on the last frame of the comp, and then altering the Y value from one extreme to another (at least –7,000 to 7,000). Play around with the order of your Turbulent Noise layers to see how the effect changes.

Now that you’ve got an interesting grunge look, apply it to some footage by dragging a clip to the bottom of the Timeline. You can reference the skateboarder clip in our sample file or use your own. Play around with the various blending modes of the Turbulent Noise layers (especially Add, Darken, Multiply, and Overlay) to see how the combined effect impacts the scene.
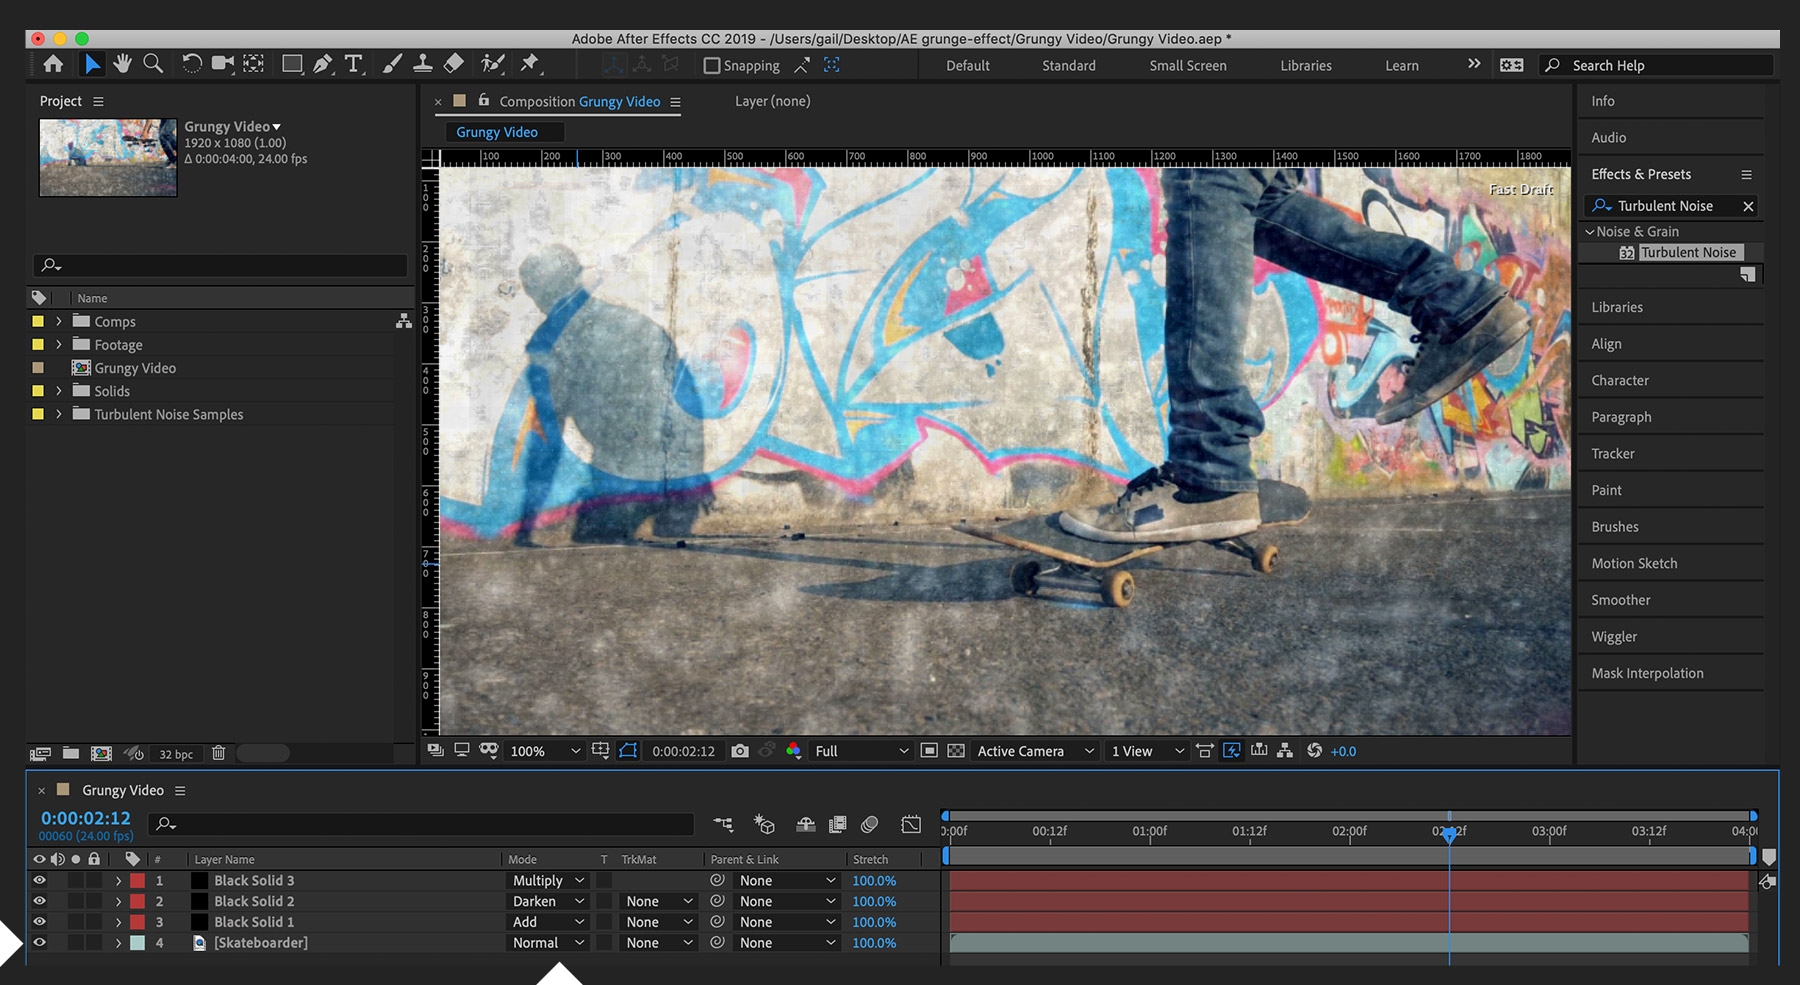

Adding a filmic texture layer (dirty film and scratches) on top of the Turbulent Noise layers and adjusting its blend mode and transparency can improve the distressed film look you’re after. Consider applying some color adjustments and a subtle vignette to your footage using the Lumetri Color effect. See what we achieved in the following video.
With Adobe Stock, you have access to more than 100 million high-quality, royalty-free images including photos, graphics, videos, and templates to jump-start your creative projects. Try Adobe Stock and get 10 free images.