Blend two scenes as a transition by adjusting the Color Key effect over time in Adobe Premiere Pro.


Kas jums nepieciešams
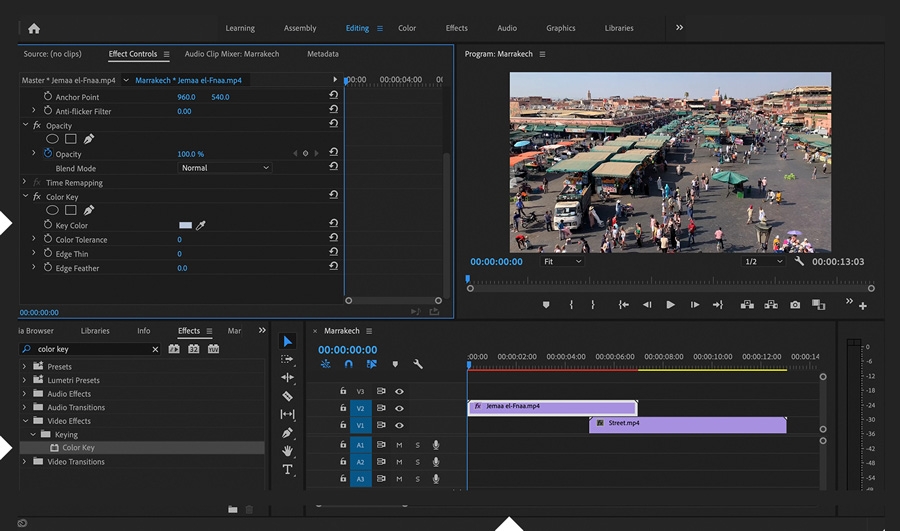
In this project, you’ll create a transition between two clips that looks very different from a typical cross-dissolve. Starting in the Editing workspace, place your clips on the timeline so that the first (“outgoing”) clip overlaps the second (“incoming”) clip. The length of overlap should be at least as long as you want the dissolve effect to last.


Apply the Color Key effect to the top, outgoing clip. In the Effect Controls panel, click the Key Color eyedropper to sample the color you want to use to start the transition effect. For a dramatic look, choose one that dominates the scene — such as the sky.


Keyframe the Color Tolerance value from zero to the maximum (255) over a brief period — half as long as the overlap. You’ll see the outgoing clip gradually disappear, revealing the incoming clip underneath it.


Select the Color Key effect in the Effect Controls panel and duplicate it (press Command/Control+C followed by Command/Control+V). In the lower copy, drag-select and then move the Color Tolerance keyframe pair ahead so that the first keyframe aligns with the second keyframe in the upper copy. Change the Key Color to the color still appearing in the outgoing clip. Zoom in if it helps you sample the color. Play the sequence. Adding that second Color Key effect should remove all traces of the outgoing clip, fully revealing the incoming clip. If it doesn’t, increase the Edge Thin value slightly.


Experiment with different starting key colors to see how they affect the transition. You can also use a color matte (or any graphic) as the incoming clip to make the outgoing clip gradually dissolve into something other than another video.