Make conflicting assets work together in Adobe Premiere Pro by conforming media to match your sequence, setting default frame sizes, and adjusting frame sizes manually.


المتطلبات
This sample file is an Adobe Stock asset you can use to practice what you learn in this tutorial. If you want to use the sample file beyond this tutorial, you can purchase a license on Adobe Stock. Check out the ReadMe file in the folder for the terms that apply to your use of this sample file.
Dealing with footage from disparate cameras may provide creative challenges when you’re editing a project, but combining clips in multiple formats on the same timeline is easy.
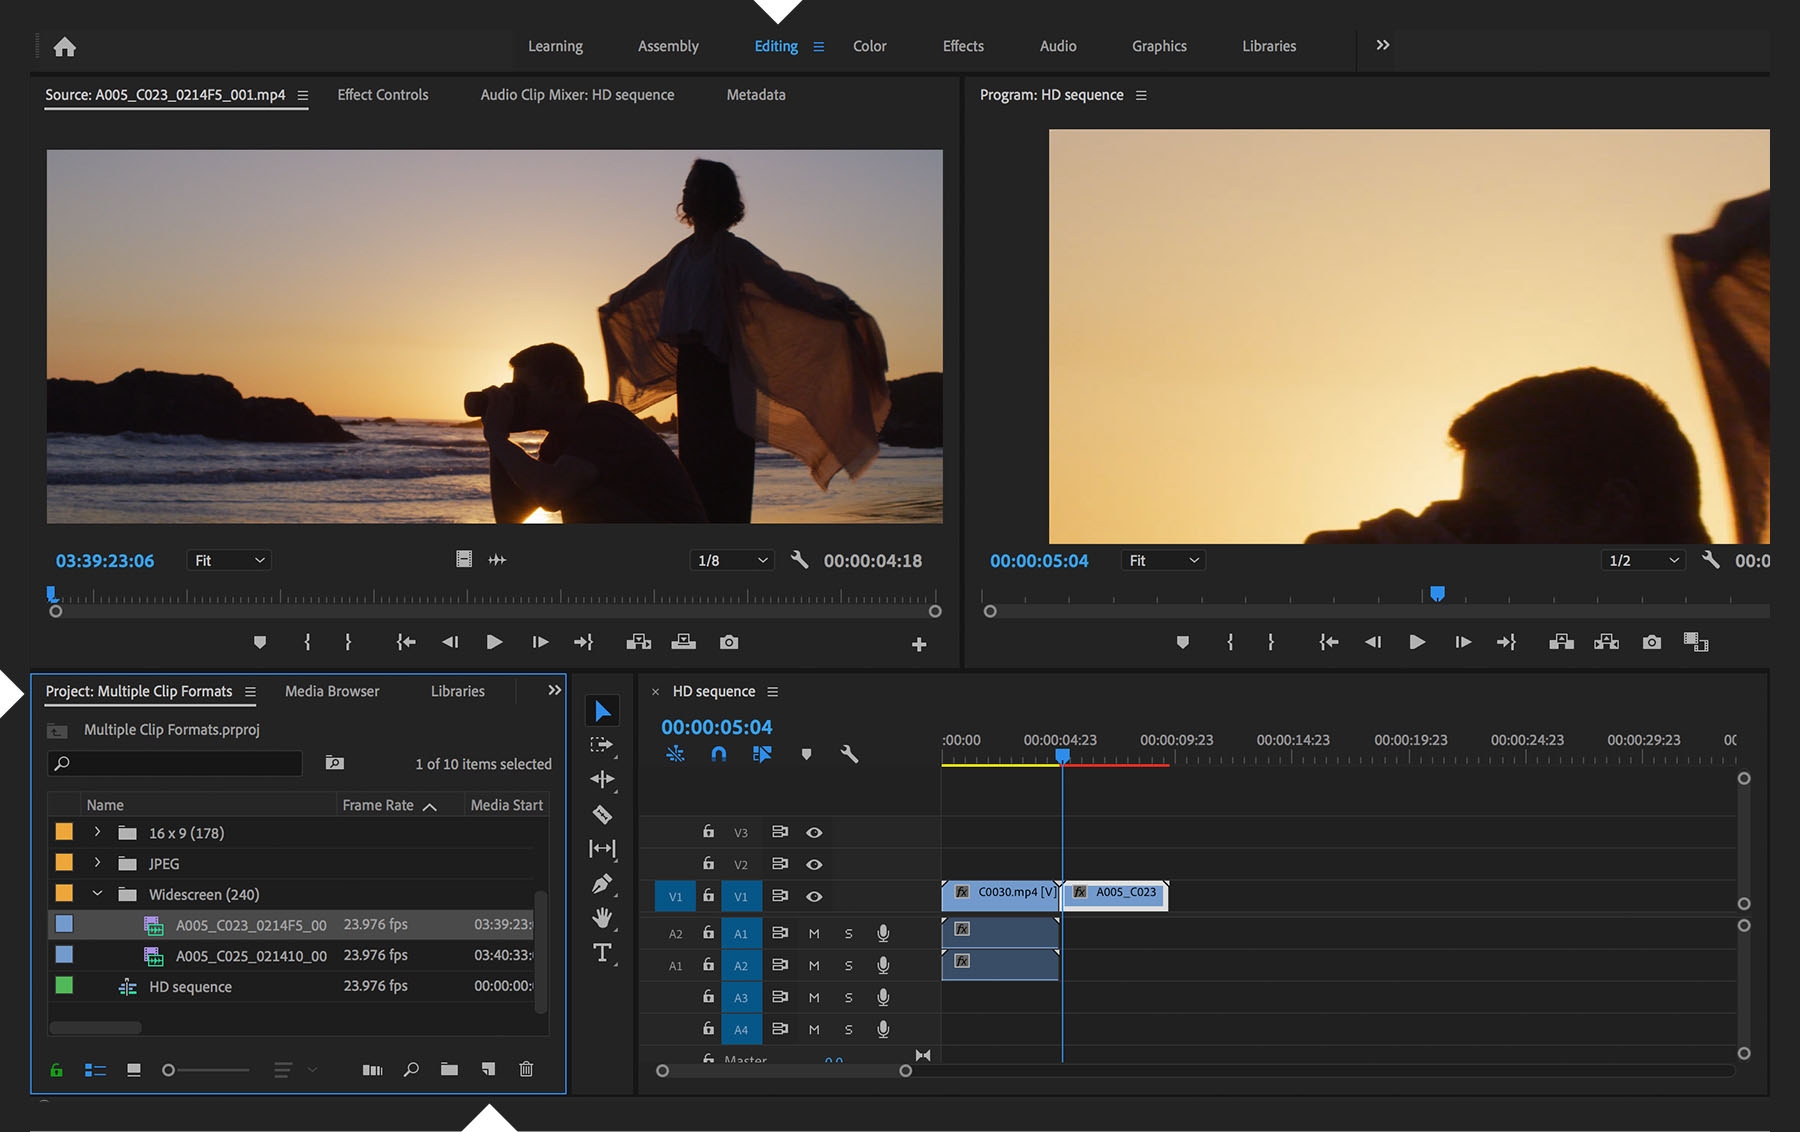
Create a sequence from the start that matches the majority of your footage. Working in the Editing workspace (Window > Workspaces > Editing), select a clip in the Project panel that exemplifies your footage (frame rate, aspect ratio, and so on) and then drag it to the New Item button at the bottom of the panel. This creates a sequence that exactly matches your clip’s properties. Now when you drag any clip or photo into that sequence, Premiere Pro will place it on the timeline at 100% without making any adjustments.


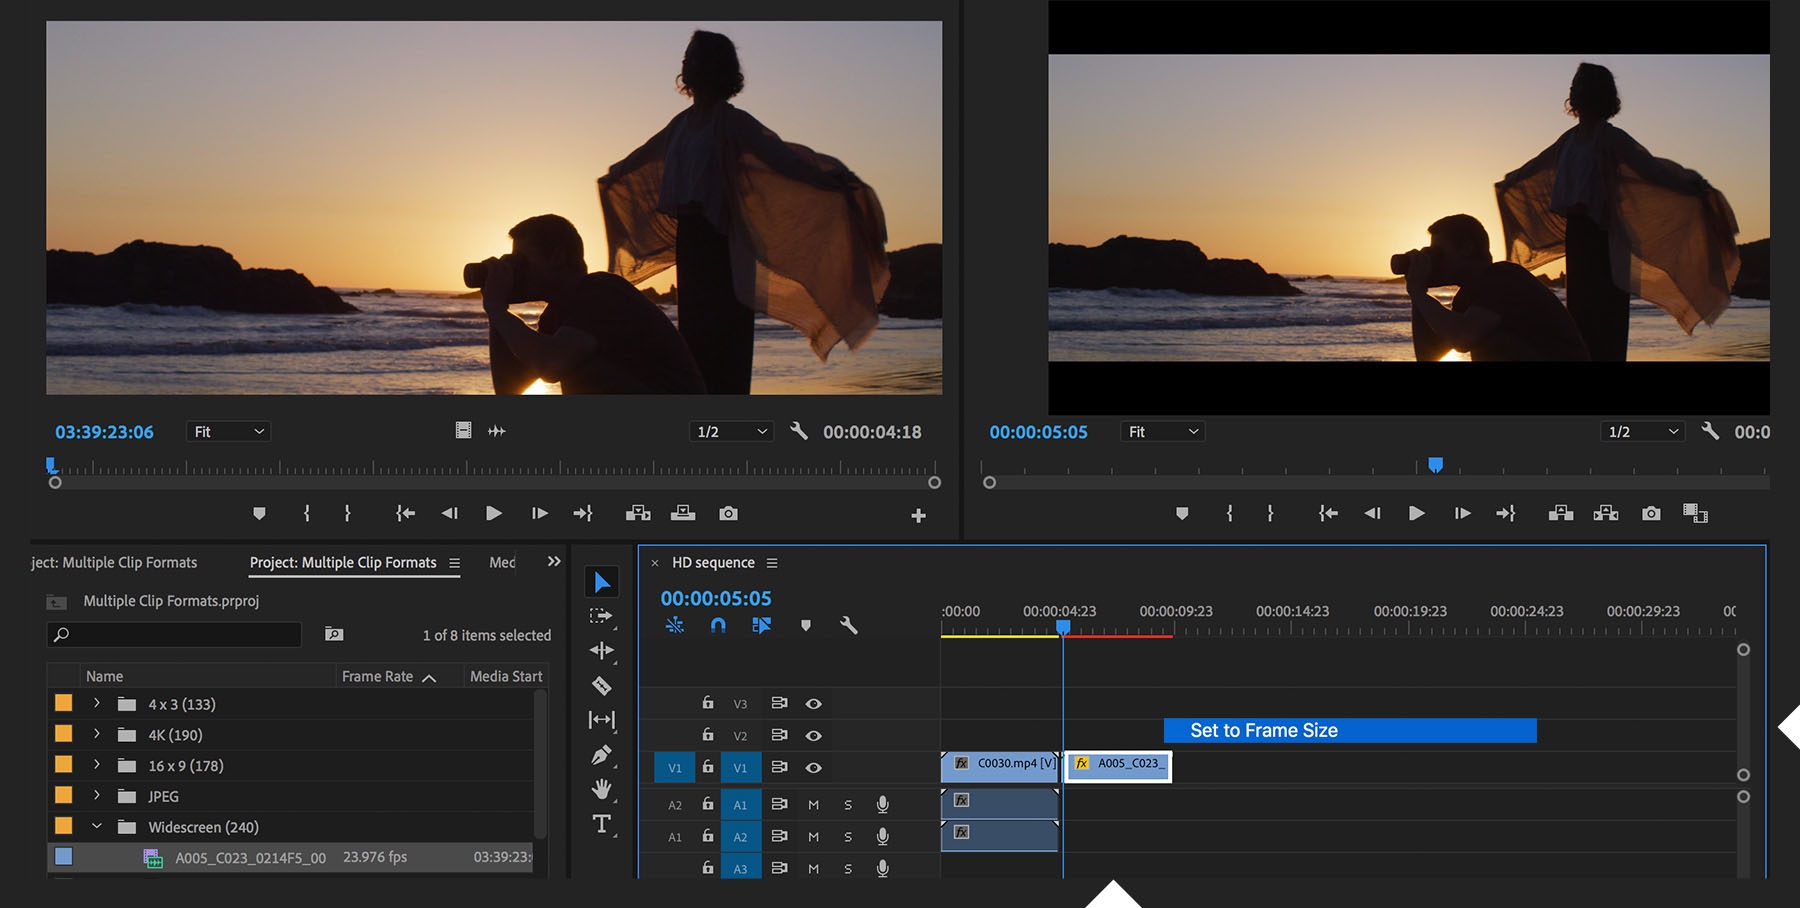
If the clip or photo has a higher resolution than the sequence’s setting (for example, a 4K clip in a 1080p sequence), it’ll appear noticeably cropped; if it’s lower, it’ll appear smaller than the frame size. To fix this, right-click the clip in the sequence and select Set to Frame Size from the pop-up menu. This reduces the clip’s size without rasterizing it, so you can zoom in on it later without sacrificing image quality. However, it will require more computer resources to play back smoothly. (If computer resources are an issue for you, choose Scale to Frame Size, which rasterizes the image at the resolution of the sequence.)


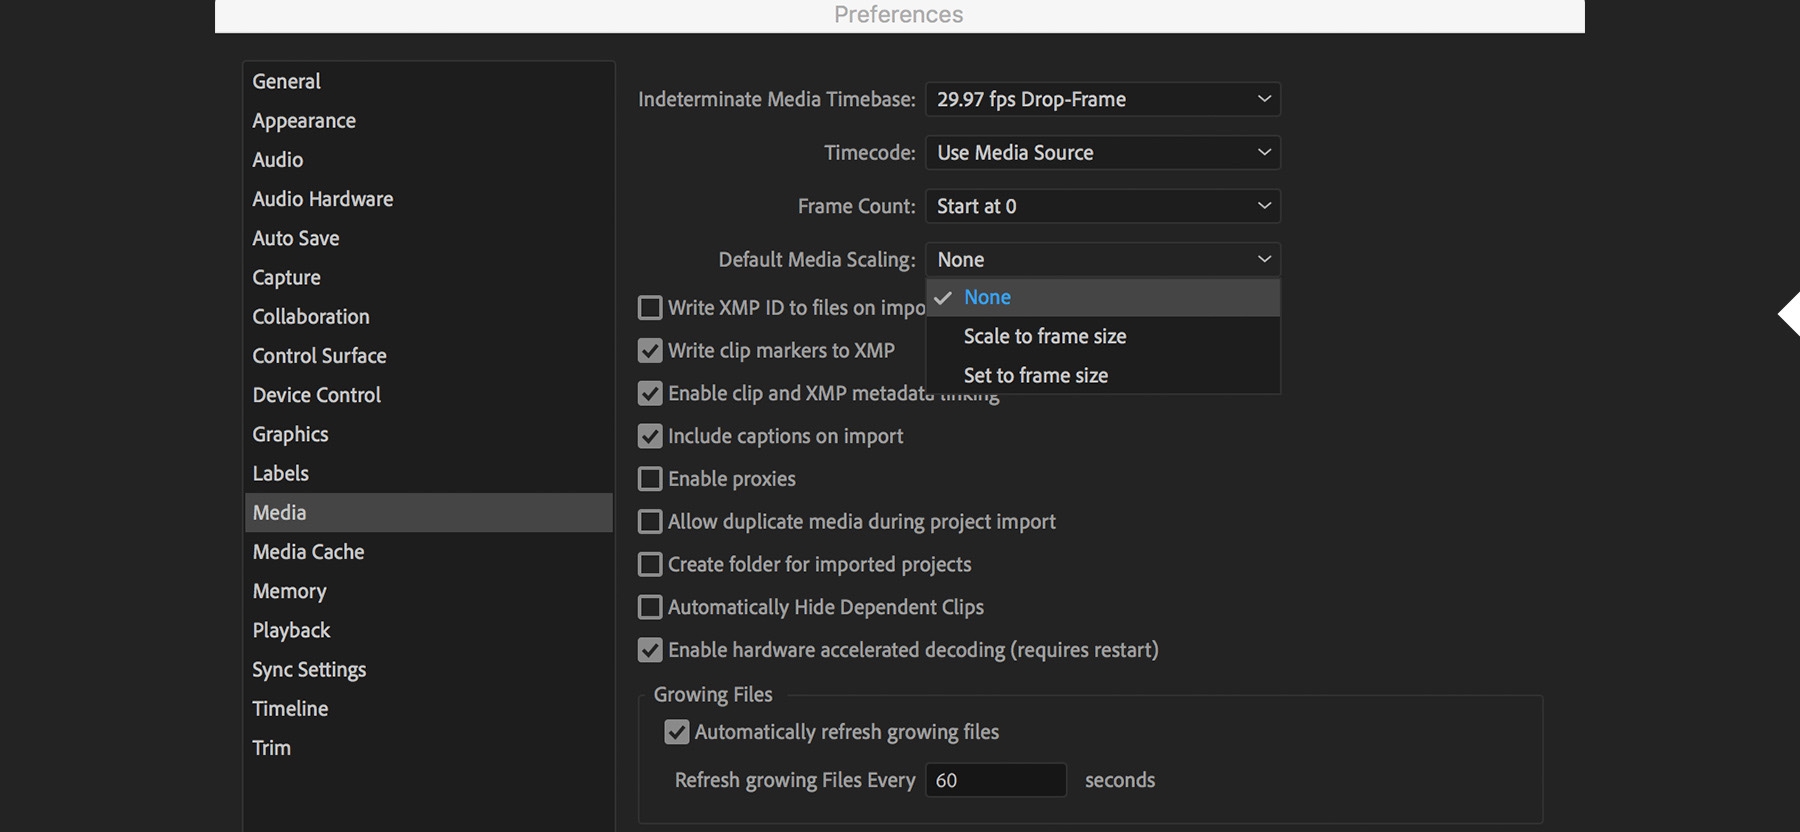
You can change the default clip-dragging, scaling behavior by going to Premiere Pro Preferences, choosing Media, and then changing Default Media Scaling from None to your preferred method.


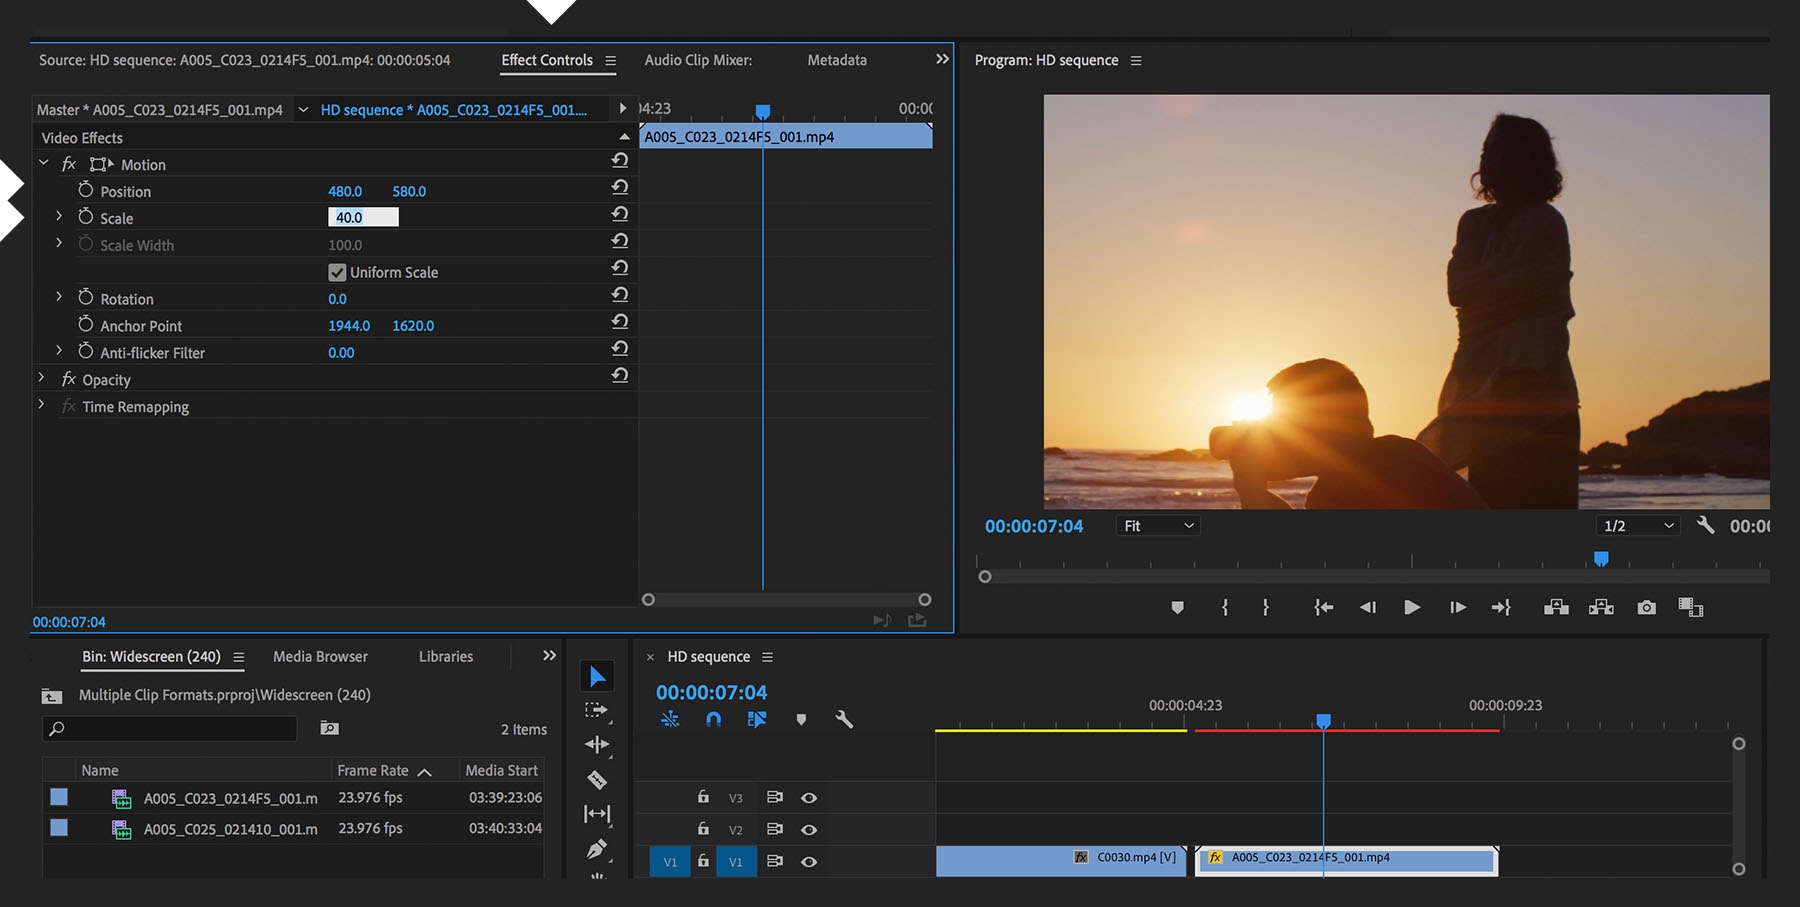
After changing the frame size to match the sequence setting, you may find that your clip still doesn’t fit perfectly within the frame because its aspect ratio differs from the sequence. In that case, you’ll see either letterboxing or black pillars on the sides of the inserted clip. Manually adjust the scaling by dragging the Scale setting in the Effect Controls panel for the selected clip. You may also want to adjust the Position values to frame the scene more aesthetically.


With Adobe Stock, you have access to more than 100 million high-quality, royalty-free images including photos, graphics, videos, and templates to jump-start your creative projects. Try Adobe Stock and get 10 free images.