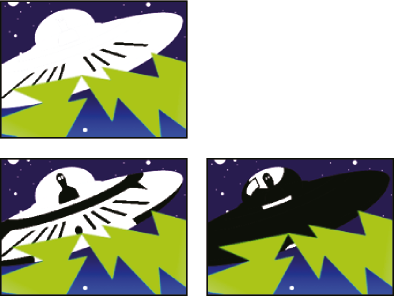
CC Block Load effect (CS6 or later)
CC Burn Film effect
CC Glass effect
CC Kaleida effect
CC Mr. Smoothie effect
CC Plastic effect (CS6 or later)
CC RepeTile effect
CC Threshold effect
CC Threshold RGB effect
The Brush Strokes effect applies a rough painted look to an image. You can also use this effect to achieve a pointillist style by setting the length of the brush strokes to 0 and increasing the stroke density. Although you specify the direction of strokes, they’re scattered randomly by a small amount to give a more natural result. This effect alters the alpha channel, as well as the color channels; if you masked out a portion of the image, the brush strokes paint over the edges of the mask.
This effect works with 8-bpc color.
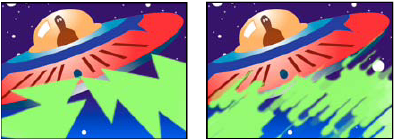
Stroke Angle
The direction in which the strokes are made. The image is effectively shifted in this direction, potentially causing some clipping at the layer boundaries. Applying the Grow Bounds effect before the Brush Strokes effect effectively extends the boundaries of the layer to prevent this clipping.
Stroke Randomness
Creates nonuniform strokes. The more randomness, the more the strokes vary from the brush and stroke settings you’ve specified.
Blend With Original
The transparency of the effect. The result of the effect is blended with the original image, with the effect result composited on top. The higher you set this value, the less the effect affects the layer. For example, if you set this value to 100%, the effect has no visible result on the layer; if you set this value to 0%, the original image doesn’t show through.
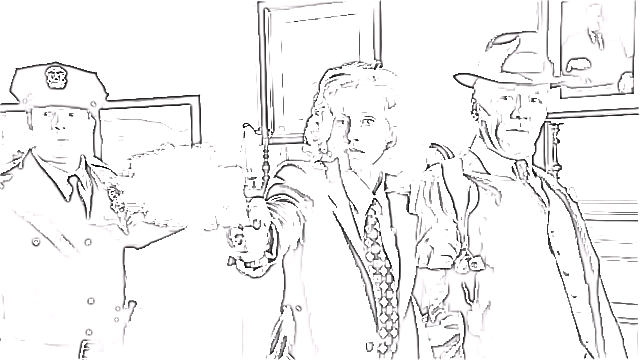
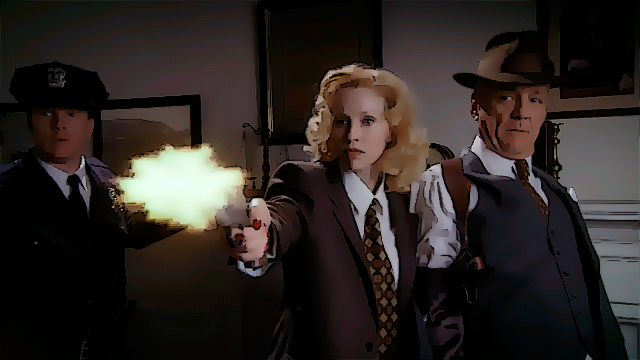
The Cartoon effect simplifies and smooths the shading and colors in an image and adds strokes to the edges between features. The overall result is to decrease contrast in areas with low contrast and increase contrast in areas with high contrast. The result can be an image that resembles a sketch or cartoon, or the result can be more subtle. You can use the Cartoon effect to simplify or abstract an image for stylistic purposes, to call attention to areas of detail, or to obscure the poor quality of the original footage.
An advantage that the Cartoon effect has over some other effects and techniques that provide a similar result is the superior temporal coherence that the Cartoon effect provides. This means that the result of applying the Cartoon effect does not vary greatly from one frame to the next if the two frames are very similar.
This effect works with 8-bpc, 16-bpc, and 32-bpc color.
The Cartoon effect works in three stages:
Opomba:
Begin with Render set to Fill Only, and first achieve the result that you want for the colors of the image. Next, choose either Edges or Fill & Edges, and establish the basic appearance that you want for the edges. Use the properties in the Advanced property group to fine-tune the appearance after you’ve established the basic appearance using the other controls.
As with any other properties, you can animate the properties of the Cartoon effect. Settings that work well for one part of a scene may not be optimal for another part of a scene. For example, you may want fewer colors and thicker edge strokes for a close-up of a face than for an action scene with many subjects and a lot of detail.
Opomba:
Before applying the Cartoon effect, consider either setting the composition to a lower frame rate or using the Posterize Time effect on the layer if you're trying to make a movie look like a cartoon. Consider that cartoons have much lower frame rates than live action footage.


Render
Fill, Edges, or Fill & Edges. Determines which operations to perform and which results to display.
Detail Radius
The radius for the blurring operation that is used to smooth the image and remove details before the operation to find edges. A larger radius for a blur means that more pixels are averaged together to determine each pixel value, so increasing the Detail Radius value increases the blurriness.
Detail Threshold
The blur operation that the Cartoon effect performs is similar to that used by the Bilateral Blur effect. (See Bilateral Blur effect.) The radius of the blur is automatically decreased in areas where an edge or other prominent detail exists. The Detail Threshold value determines how the Cartoon effect decides what areas contain features to be preserved and what areas should be blurred by the full amount. A lower Detail Threshold value causes more fine details to be preserved. A higher Detail Threshold value causes a more simplistic cartoon-like result, with fewer details preserved.
Fill
The luminance values in the image are quantized (posterized) according to the settings of the Shading Steps and Shading Smoothness properties. If the Shading Smoothness value is 0, then the result is very similar to a simple posterization, with sharp transitions between values. A higher Shading Smoothness value causes the colors to blend together more naturally, with more gradual transitions between posterized values, preserving gradients.
The smoothing phase considers the amount of detail that exists in the original image so that areas that are already smooth (such as the gradient of a sky) are not quantized unless that Shading Smoothness value is low.
Edge
These properties determine the basics of what is considered an edge and how the stroke applied to an edge appears.
Edge Black Level
When this property is 0, only the pixels that have been identified as being part of an edge receive a stroke; when Render is set to Edges, the image is white except in areas with a pure black stroke. Increase the Edge Black Level property by a small amount to add shades of gray in the Edges phase of rendering. Increase this property by a larger amount to approach a result that resembles white strokes on a black background.
The Color Emboss effect works like the Emboss effect, without suppressing the original colors of the image.
This effect works with 8-bpc and 16-bpc color.
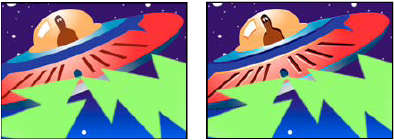
The Emboss effect sharpens the edges of objects in an image and suppresses colors. The effect also highlights the edges from a specified angle. The quality setting of the layer influences the Emboss effect by controlling the Relief setting. Relief is calculated at the subpixel level in Best quality and rounded off to the pixel level in Draft quality.
This effect works with 8-bpc and 16-bpc color.

Relief
The apparent height of the embossing, in pixels. The Relief setting actually controls the maximum width of highlighted edges.
Blend With Original
The transparency of the effect. The result of the effect is blended with the original image, with the effect result composited on top. The higher you set this value, the less the effect affects the clip. For example, if you set this value to 100%, the effect has no visible result on the clip; if you set this value to 0%, the original image doesn’t show through.
The Find Edges effect identifies the areas of an image that have significant transitions and emphasizes the edges. Edges can appear as dark lines against a white background or colored lines against a black background. With the Find Edges effect applied, images often look like sketches of the original.
Invert
Inverts the image after the edges are found. If Invert isn’t selected, edges appear as dark lines on a white background. If selected, edges appear as bright lines on a black background.
The Glow effect finds the brighter parts of an image and then brightens those pixels and surrounding pixels to create a diffuse, glowing aura. The Glow effect can also simulate overexposure of brightly lit objects. You can base the glow on either the original colors of the image or on its alpha channel. Glows based on alpha channels produce diffuse brightness only at the edges of the image, between the opaque and transparent regions. You can also use the Glow effect to create a gradient glow between two colors (A and B colors) and to create multicolor effects with looping.
Rendering the Glow effect at Best quality can change the appearance of the layer. This change is especially true if you use Adobe Photoshop arbitrary maps to color the glows. Be sure to preview at Best quality before you render the effect.
Opomba:
Glows tend to be brighter and more realistic in 32-bpc projects, because the high dynamic range in a 32-bpc project prevents the color values of the glow from being clipped. Consider working in 32-bpc color for this reason, even if footage items don’t contain high–dynamic range color values.
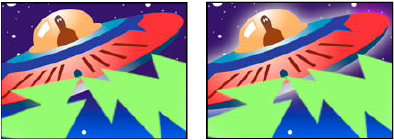
Glow Threshold
Sets a threshold as a percentage brightness to which the glow isn’t applied. A lower percentage produces glow on more of the image; a higher percentage produces glow on less of the image.
Glow Radius
The distance, in pixels, that the glow extends out from the bright areas of the image. Larger values produce diffuse glows; smaller values produce glows with sharp edges.
Composite Original
Specifies how to composite the effect results with the layer. On Top places the glow on top of the image, using the blending method selected for Glow Operation. Behind places the glow behind the image, creating a backlighting result. None separates the glow from the image.
Opomba:
To reduce the layer to the glow only, choose None for Composite Original and None for Glow Operation. To achieve a glow effect for text that knocks out (blocks) all layers below it, choose Silhouette Alpha for Glow Operation. These glow effects are more noticeable if the image has a feathered edge.
Glow Colors
The colors of the glow. A & B Colors creates a gradient glow using the colors specified by Color A and Color B controls.
Color Loops
Creates multicolor ringing in the glow, if you select two or more loops. A single loop cycles through the gradient (or arbitrary map) specified for Glow Colors.
Opomba:
You can create an arbitrary map (.amp) file by applying the Curves effect, selecting the pencil icon, then clicking the save (floppy disk) icon. Use an arbitrary map file in the Glow effect by clicking the Options link, then selecting the .amp file.
Color Phase
Where in the color cycle to begin color loops. By default, color loops begin at the origin of the first loop.
A & B Midpoint
The midpoint specifies the balance between the two colors used in the gradient. Lower percentages use less of the A color. Higher percentages use less of the B color.
The Mosaic effect fills a layer with solid-color rectangles, pixelating the original image. This effect is useful for simulating low-resolution displays and for obscuring faces. You can also animate it for a transition. At Best quality, the edges of the rectangles are anti-aliased.
This effect works with 8-bpc and 16-bpc color.
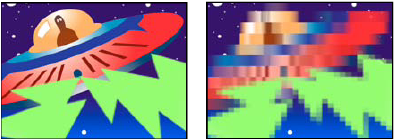
Sharp Colors
Gives each tile the color of the pixel in the center of the corresponding region in the original image. Otherwise, each tile is given the average color of the corresponding region in the original image.
The Motion Tile effect replicates the source image across the output image. When you change the placement of the tiles, it uses motion blur to accentuate the movement if motion blur is enabled.
This effect works with 8-bpc color.
Output Width, Output Height
Dimensions of the output image as a percentage of the input layer dimensions.
Mirror Edges
Flips adjacent tiles to form mirror images. If Phase is set to 0, selecting this option causes the edges of the layer to be mirrored with the surrounding tiles.
The Posterize effect posterizes colors; the number of colors is reduced and gradual color transitions are replaced by abrupt color transitions. You specify the number of tonal levels (or brightness values) for each channel in an image. The Posterize effect then maps pixels to the closest matching level. For example, choosing two tonal levels in an RGB image gives you two tones for red, two tones for green, and two tones for blue. Values range from 2 to 255.
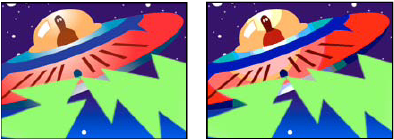
The Roughen Edges effect makes an alpha channel rough and can add color to simulate rust and other kinds of corrosion. This effect gives rasterized text or graphics a naturally rough look, like the look of old typewriter text.
This effect works with 8-bpc color.
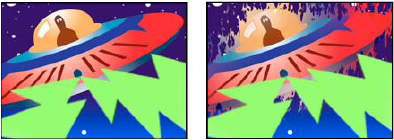
Edge Color
The color to apply to the edge for Rusty Color or Roughen Color, or to the fill for Photocopy Color.
Offset (Turbulence)
Determines the portion of the fractal shape that is used to create the roughness.
Opomba:
Increasing complexity results in longer rendering times. Reduce the Scale value rather than increasing Complexity to achieve similar results.
Opomba:
Although the Evolution value is set in units called revolutions, it’s important to realize that these revolutions are progressive. The Evolution state continues to progress infinitely at each new value. Use the Cycle Evolution option to return the Evolution setting to its original state at each revolution.
Evolution Options
Evolution Options provide controls that render the effect for one short cycle and then loop it for the duration of your layer. Use these controls to pre-render your roughen elements into loops, and thus speed up rendering time. Use the following controls to create a smooth, progressive, nonrepeating loop:
Opomba:
The Cycle control affects only the state of the fractal, not geometrics or other controls, so you can get different results with different Size or Offset settings.
Opomba:
Create new roughness animations by reusing previously created Evolution cycles and changing only the Random Seed value. Using a new Random Seed value alters the noise pattern without disturbing the Evolution animation.
The Scatter effect scatters the pixels in a layer, creating a blurry or smeared appearance. Without changing the color of each individual pixel, the Scatter effect redistributes the pixels randomly, but in the same general area as their original positions.
This effect works with 8-bpc and 16-bpc color.
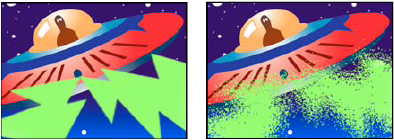
Grain
The direction in which to scatter the pixels—horizontally or vertically. Select None to scatter pixels in all directions.
Scatter Randomness
Specifies whether scattering changes at each frame. To animate scattering without keyframes or expressions, select the Randomize Every Frame option.
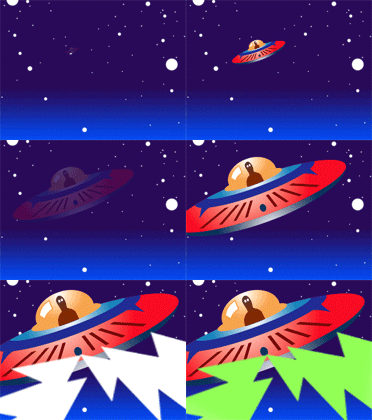
The Strobe Light effect performs an arithmetic operation on a layer or makes the layer transparent at periodic or random intervals. For example, every 5 seconds the layer could become completely transparent for one-tenth of a second, or the colors of a layer could invert at random intervals.
This effect works with 8-bpc color.
Blend With Original
The transparency of the effect. The result of the effect is blended with the original image, with the effect result composited on top. The higher you set this value, the less the effect affects the layer. For example, if you set this value to 100%, the effect has no visible result on the layer; if you set this value to 0%, the original image doesn’t show through.
Strobe
Choose Makes Layer Transparent for each strobe to make the layer transparent. Choose Operates On Color Only to use the operation specified by Strobe Operator.
The Texturize effect gives a layer the appearance of having the texture of another layer. For example, you could make the image of a tree appear as if it had the texture of bricks, and control the depth of the texture and the apparent light source. At Best quality, the texture layer is positioned and scaled with subpixel precision.
Chris Zwar provides an example project on his website that uses the Displacement Map effect, the Turbulent Displace effect, the Texturize effect, and a combination of Blur and Color Correction effects to create a transition in which an image appears as a watercolor image washed onto a rough piece of paper.
This effect works with 8-bpc color.
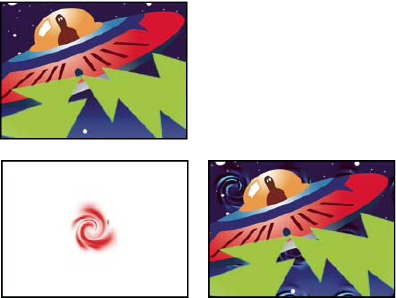
The Threshold effect converts grayscale or color images to high-contrast, black-and-white images. Specify a certain level as a threshold; all pixels lighter than the threshold convert to white and all pixels darker convert to black.
This effect works with 8-bpc and 16-bpc color.
