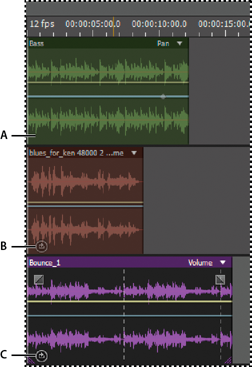
In many musical styles, you’ll find loops used for everything from basic rhythm tracks to entire compositions. With Adobe Audition, you can either create your own loops or choose from thousands supplied for free via the Resource Central panel.
Loops let you create extremely flexible multitrack sessions. Though loops typically contain only one or two bars of music (four to eight beats), you can extend and repeat them by simply dragging with the mouse.

A. No loop B. Single loop C. Extended (repeated) loop
To better synchronize a loop‑based session, use the Bars And Beats time format and enable snapping. Then add loops to create a rhythmic foundation, which you can build upon by recording new audio clips. (You can also add existing audio clips, but only their start or end points will align with loop beats.)
-
Depending on how far you drag, you can make the loop repeat fully or partially. For example, you might drag a loop that is one bar long so that it extends 3‑1/2 bars, ending on a beat within the loop. As you cross each bar, a white vertical line appears in the clip. This is the snap‑to line, indicating perfect alignment to beats in other tracks.
 Extending a loop
