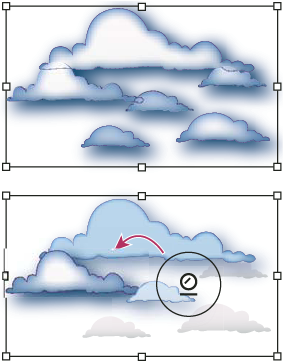
A symbol set is a group of symbol instances that you create with the Symbol Sprayer tool. You can create mixed sets of symbol instances by using the Symbol Sprayer tool with one symbol and then using it again with another symbol.

As you work with symbol sets, keep in mind that the symbolism tools affect only the symbol or symbols selected in the Symbols panel. For example, if you create a mixed symbol instance set that represents a meadow with grass and flowers, you can change the orientation of just the grass by selecting the grass symbol in the Symbols panel and then using the Symbol Spinner tool. To change the size of both the grass and the flowers, select both symbols in the Symbols panel and then use the Symbol Sizer tool.
Opomba:
When you select a mixed symbol set on the artboard, the symbol instance most recently added to the set is automatically selected in the Symbols panel.
The Symbol Sprayer acts like a particle sprayer—letting you add a large number of identical objects to the artboard at one time. For example, use the symbol sprayer to add hundreds of grass blades, wildflowers, bees, or snowflakes.
You use the symbolism tools to modify multiple symbol instances in a set. For example, you can disperse instances over a larger area using the Symbol Scruncher tool or gradually tinting the color of instances to make them look more realistic.
Although you can use symbolism tools on individual symbol instances, they are most effective when used on symbol sets. When working with individual symbol instances, most of these tasks are easily accomplished using the tools and commands you use on regular objects.
-
Click or drag in the set where you want to increase the size of the symbol instances.
Hold down Alt (Windows) or Option (Mac OS), and click or drag where you want to decrease the size of the symbol instances.
Hold down Shift as you click or drag to preserve the density of the symbol instances while resizing.
Staining a symbol instance changes the hue toward the tint color, while preserving the original luminosity. (It works in the same way as the Tints and Shades colorization method of tinting brushes.) This method uses the luminosity of the original color and the hue of the colorization color to generate the resulting color. Consequently, colors with very high or very low luminosity change very little; black or white objects don’t change at all.
Opomba:
To achieve a method of colorization that will also affect black and white objects, use the Symbol Styler tool with a graphic style that uses the desired fill color.
-
Click or drag over the symbol instances you want to stain with the colorization color. The amount of colorization gradually increases, and the symbol instance’s color gradually changes to the colorization color.
Hold down Alt (Windows) or Option (Mac OS) as you click or drag to decrease the colorization amount and reveal more of the original symbol color.
Hold down Shift as you click or drag to keep the colorization amount constant, while gradually changing the color of the symbol instances to the colorization color.
note: Using the Symbol Stainer tool results in increased file size and decreased performance. When memory or exported Flash/SVG file size is a concern, do not use this tool.
The Symbol Styler tool lets you apply or remove a graphic style from a symbol instance. You can control the amount and location of the application. For example, you can apply a style gradually so that some symbol instances display the style at full strength and others display the style at partial strength.

Opomba:
You can switch to the Symbol Styler tool when using any other symbolism tool by clicking a style in the Graphic Styles panel.
-
Click or drag where you want to apply the style to the symbol set. The amount of style applied to the symbol instances increases, and the style gradually changes.
Hold down Alt (Windows) or Option (Mac OS) as you click or drag to decrease the style amount and reveal more of the original, unstyled symbol.
Hold down Shift as you click or drag to keep the amount of style constant, while gradually changing the symbol instance style to the selected style.
note: It is very important to perform steps 1 and 2 in the specified order. If you select a style while a tool other than the symbolism tool is selected, the style will apply immediately to the entire selected symbol instance set.
You access symbolism tool options by double-clicking a symbolism tool in the Tools panel.
General options, such as diameter, intensity, and density, appear at the top of the dialog box. Tool-specific options appear at the bottom of the dialog box. To switch to options for a different tool, click a tool icon in the dialog box.
General options
The General options appear at the top of the Symbolism Tools Options dialog box regardless of which symbolism tool is selected.
Symbol Sprayer options
The Symbol Sprayer options (Scrunch, Size, Spin, Screen, Stain, and Style) appear under the General options in the Symbolism Tools Options dialog box only when the Symbol Sprayer tool is selected, and control how new symbol instances are added to symbol sets. Each of these offers two choices:
Symbol Sizer options
The Symbol Sizer options appear under the General options in the Symbolism Tools Options dialog box only when the Symbol Sizer tool is selected.
