Kendall Plant isolates color channels in a black and white image to create a color glitch. See how she creates this effect in Adobe Photoshop.
Kendall Plant is a designer, content creator, and art director whose unique creations incorporate nature, street photography, and even skulls. She works at Adobe as an associate creative director.
Kaj boste potrebovali
This sample file has Adobe Stock images you can use to practice what you learn in this tutorial. If you want to use the sample file beyond this tutorial, you can purchase a license on Adobe Stock. Check out the ReadMe file in the folder for the terms that apply to your use of this sample file.
Make it black and white
To prepare the image, Plant made sure the image mode was set to RGB (Image > Mode > RGB Color), then converted it to black and white (Image > Adjustments > Black & White).


Take two
Plant dragged the Model layer to the New Layer icon to duplicate it.


Change the channel
She double-clicked the new layer and turned off the Green and Blue channels in the Layer Style dialog.


Prepare the image
To prep the image so she could distort it in the next step, she selected the Liquify filter (Filter > Liquify) and brushed over the model’s face with the Freeze Mask tool to protect it from warping as she liquified the rest of the photo.
In the Properties panel, she checked Pin Edges to prevent pulling in too much of the edge of the image when she used the Warp brush. Finally, she clicked Show Backdrop to preview the distortion before committing to any changes she made.


Distort the view
Plant used the Forward Warp tool to offset areas of the photo. She used the [ ] keys on her keyboard to adjust the size of the brush as she worked — primarily using a large brush. When she was happy with the results, she clicked OK to exit Liquify.


Customize contrast
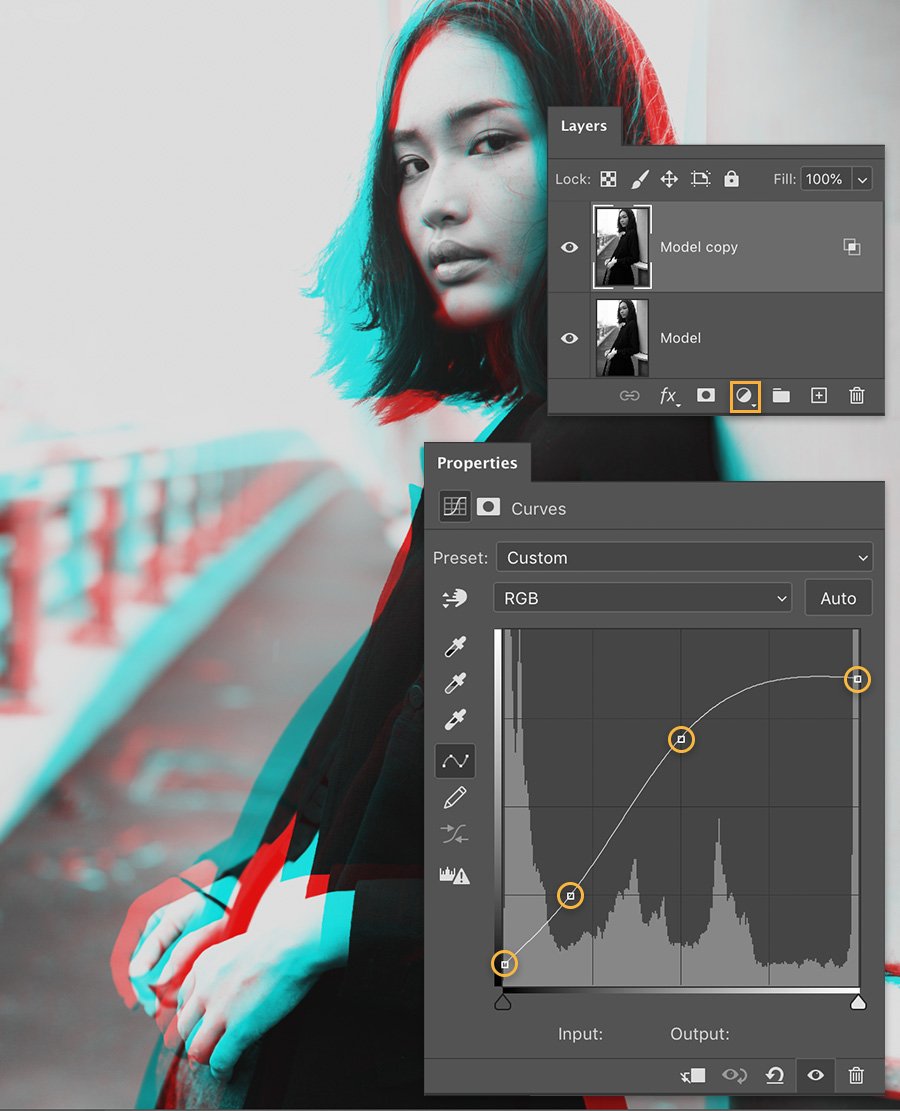
Next, Plant wanted to adjust the highlights and shadows to enhance contrast. To do this, she chose Curves from the Adjustment Layer icon, then moved the points along the curve until she got the balance right.


Make some noise
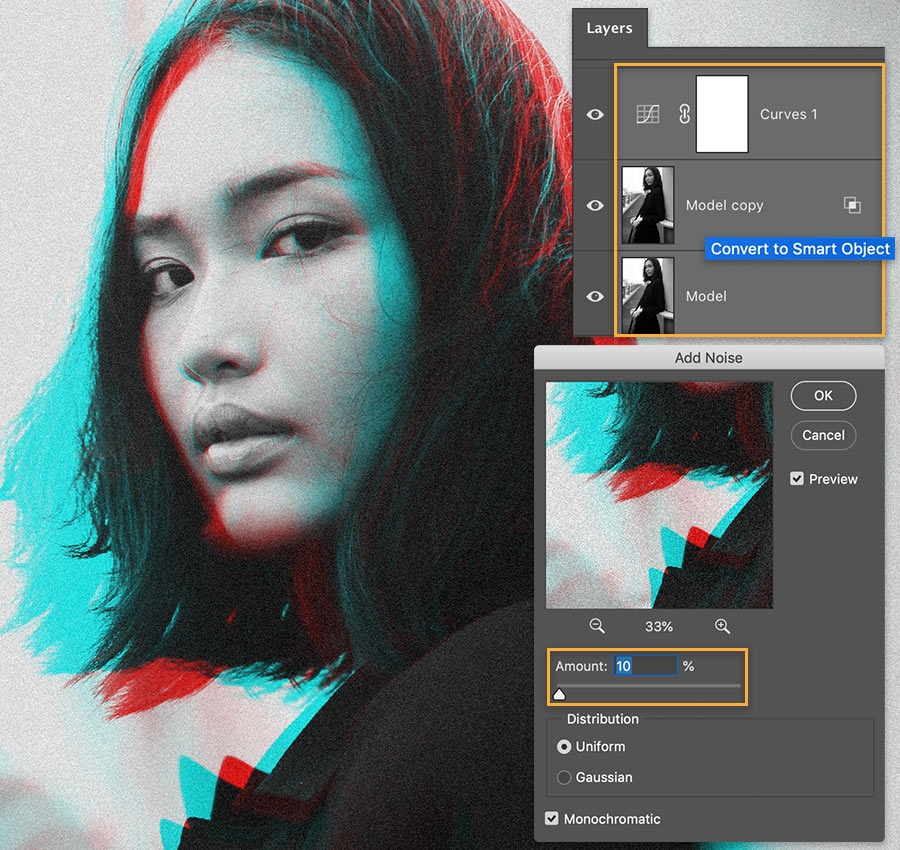
Plant added grain to blend the effect, then used Shift+click to select all of the layers, right-clicked, and chose Convert to Smart Object. She used Filter > Noise > Add Noise to adjust the Amount and checked Monochromatic to get the look she wanted.


Create modern retro
Separate color channels and distort layers to create stylized chromatic effects.


Note: Project files included with this tutorial are for practice purposes only.