Add visual panache to your footage by applying color presets in Adobe Premiere Pro and then fine-tuning the adjustments to get the color effect you want.


Čo budete potrebovať
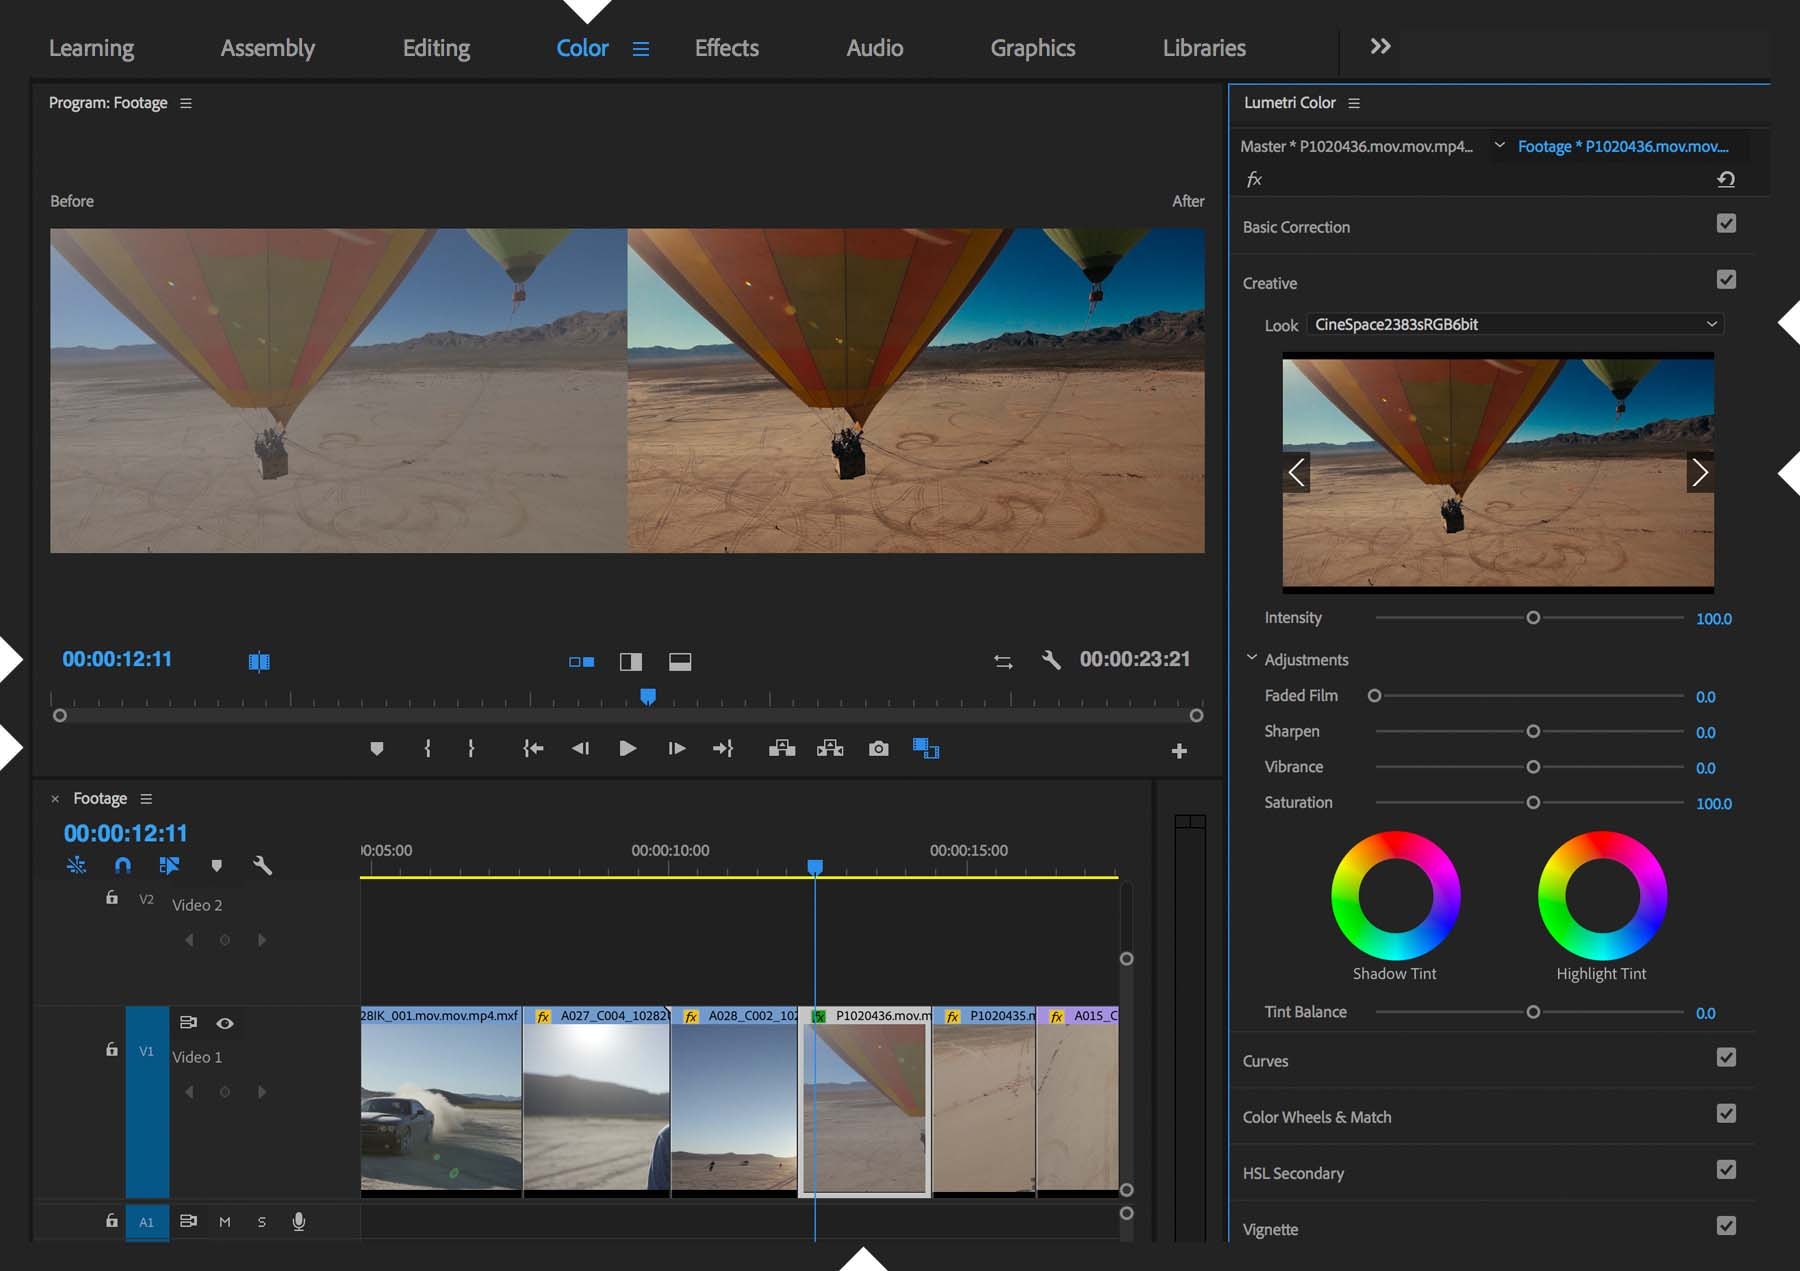
Kick-start your color scheme by applying a preset to your footage. With your sequence or our sample Balloon sequence open in the Timeline panel, switch to the Color workspace. In the Program Monitor, click the Comparison View button (click the >> expander if you don’t see it) and then toggle the Shot/Frame Comparison button on so you see Before and After views of the currently selected clip. Click the Creative header of the Lumetri Color panel, if it’s not already expanded, and cycle through the available Look presets. When you find one you like, click its preview image to apply the Look to the current clip.


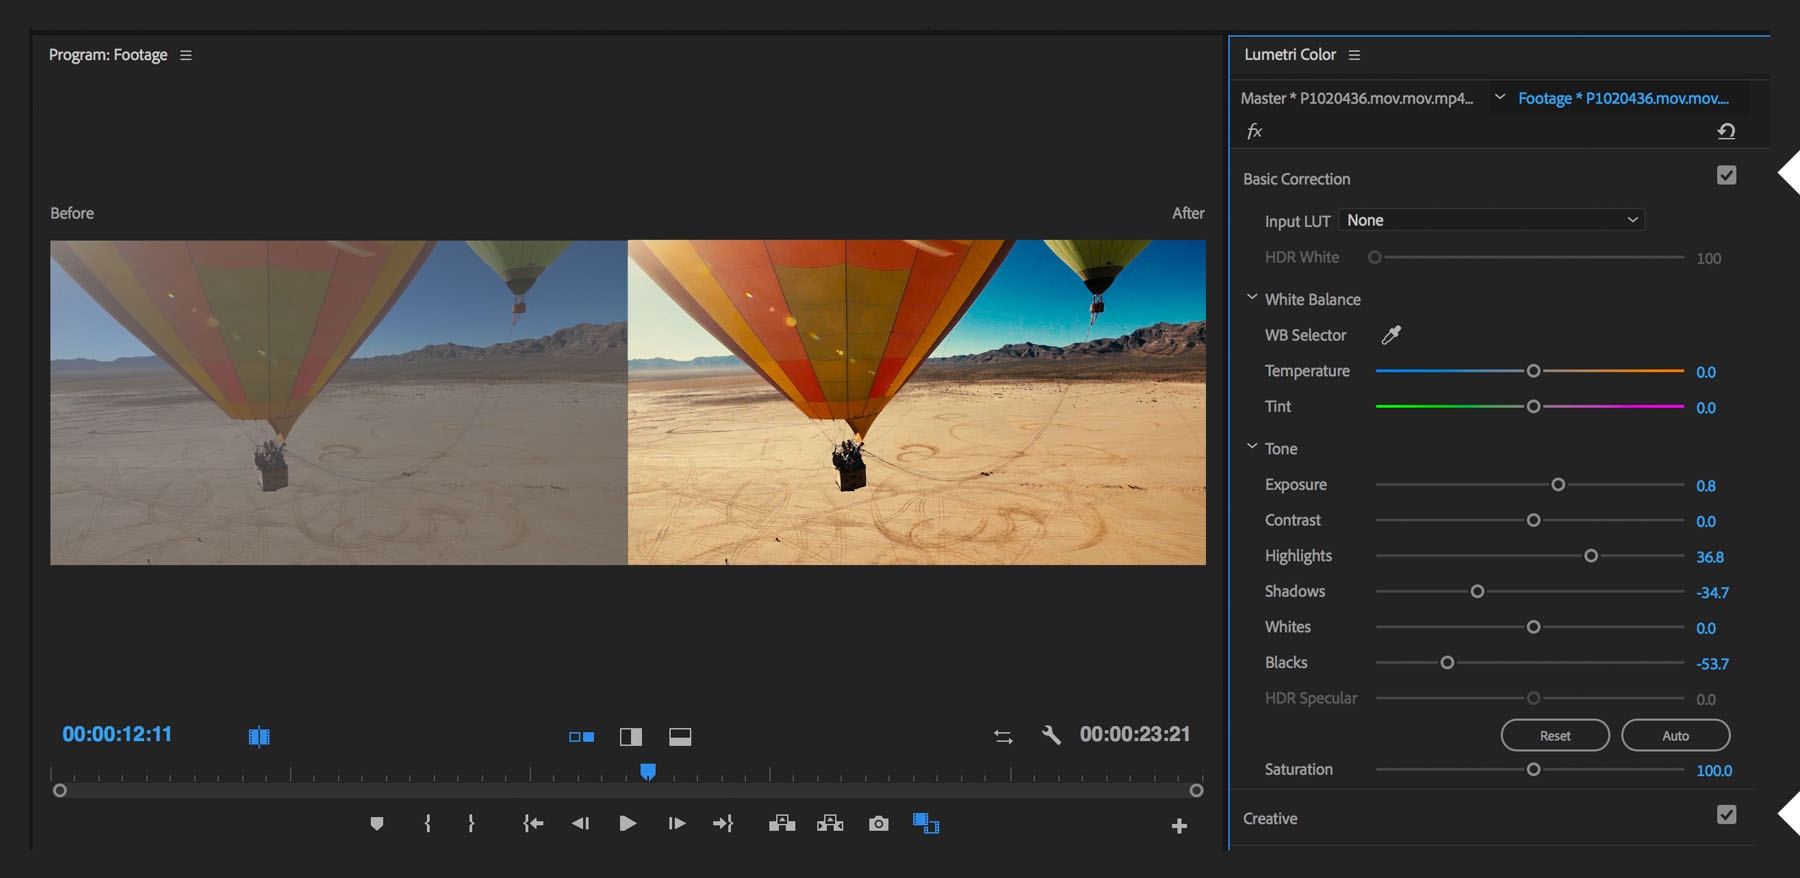
Without moving the playhead, expand the Basic Correction section and adjust the settings to finesse the applied Look. Try to give your shot a feeling of greater depth. Check out other sections of the Lumetri Color panel and adjust the settings till you like what you see. You can always double-click a slider to reset it, as well as toggle groups of effects by clicking the checkboxes in the Lumetri Color panel’s sections.


Because the playhead hasn’t moved, you’ve changed the color of only one clip. To give the other clips the same treatment, right-click the clip and choose Copy. Marquee-select the other clips, right-click, and choose Paste Attributes. Select the Lumetri Color effect and click OK.


Try out other Look presets to see how they can alter the appearance your clip in dramatic ways.