Visually accent an existing composition by animating simple shapes in Adobe After Effects.


Bạn cần những gì
This sample file is an Adobe Stock asset you can use to practice what you learn in this tutorial. If you want to use the sample file beyond this tutorial, you can purchase a license on Adobe Stock. Check out the ReadMe file in the folder for the terms that apply to your use of this sample file. Any reference to “Bop Skip & Jump” is for demonstration purposes only and is not intended to refer to any actual organization, products, services, or creative work.
Adding visual flourishes to an existing composition in After Effects can be as simple as taking a relatively mundane shape animation and then looping it, duplicating it, and applying distortion effects to create a burst of activity that looks strikingly different.
Starting in a blank composition, choose Layer > New > Shape Layer and then select the Pen tool. Draw a simple shape, making sure the anchor point remains approximately in the center. (Our example shows a teardrop.) Keyframe the Position and Path variables to move the shape. Also consider transforming how the shape looks by repositioning its points at various keyframes, as well as changing the Scale variable. Select a keyframe and press F9 to add Easy Ease to it. Choose Layer > Pre-compose and give the precomp a name (ours is called Drip Animated). This allows you to iterate it easily later. Play the animation and watch the shape move and transform over time.


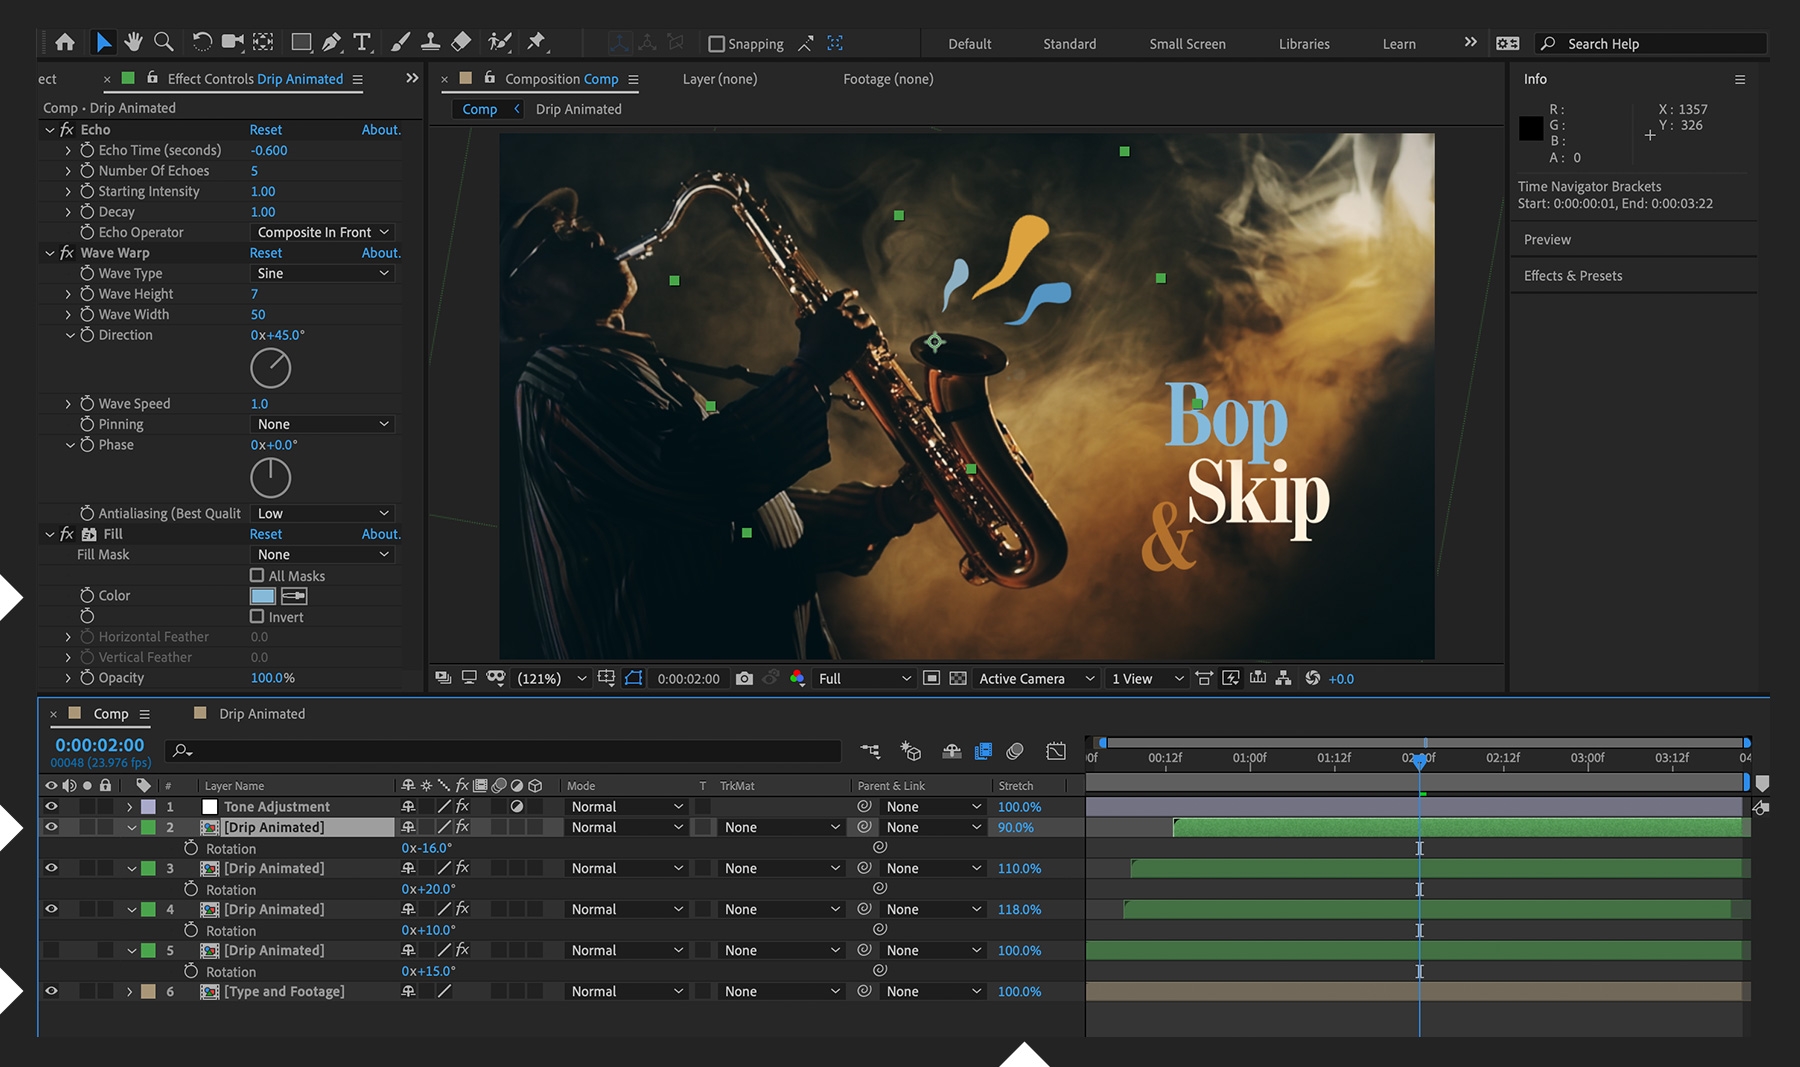
In your main composition (not the precomp), select your precomp layer and choose Effect > Time > Echo to iterate the shape over and over. After setting Echo Operator to Composite in Front, adjust the Echo Time and Number of Echoes values. As one shape reaches the end of the path, one or more will appear behind it. Now distort the shape by choosing Animation > Distort > Wave Warp. Either leave the default values or subtly change Wave Height, Wave Width, and Direction. Finally, add a Fill effect (Effect > Generate > Fill) and leave the default color for now.


When you like your adjusted shape animation, insert the background elements from the rest of the original composition to serve as a reference. Select your animation precomp layer and choose Edit > Duplicate a few times. Make subtle changes to the first duplicated layer: scale it down, rotate it a few degrees, change its fill color (sample an element in the background), or drag its starting position in the timeline to change the timing. Now make additional, subtle changes to the second duplicated layer. Keep doing this a few times until each instance of your basic shape animation behaves somewhat differently. Finally, fine-tune the appearance of the various shape animations by adjusting the Stretch parameter in the Timeline panel. (If necessary, right-click a header and choose Columns > Stretch.)


You can create very different looks simply by changing the shape you start out with. For example, instead of drawing a teardrop shape using the Pen tool, you could use the Rectangle, Ellipse, Polygon, or Star tool to draw your basic starting shape. No matter what you choose at the beginning, you’ll end up with something quite different at the end — without further adjustments.
With Adobe Stock, you have access to more than 100 million high-quality, royalty-free images including photos, graphics, videos, and templates to jump-start your creative projects. Try Adobe Stock and get 10 free images.