- After Effects User Guide
- Beta releases
- Getting started
- Workspaces
- Projects and compositions
- Importing footage
- Preparing and importing still images
- Importing from After Effects and Adobe Premiere Pro
- Importing and interpreting video and audio
- Preparing and importing 3D image files
- Importing and interpreting footage items
- Import SVG files
- Working with footage items
- Detect edit points using Scene Edit Detection
- XMP metadata
- Text and Graphics
- Text
- Motion Graphics
- Work with Motion Graphics templates in After Effects
- Use expressions to create drop-down lists in Motion Graphics templates
- Work with Essential Properties to create Motion Graphics templates
- Replace images and videos in Motion Graphics templates and Essential Properties
- Animate faster and easier using the Properties panel
- Variable Font Axes
- Drawing, Painting, and Paths
- Overview of shape layers, paths, and vector graphics
- Paint tools: Brush, Clone Stamp, and Eraser
- Taper shape strokes
- Shape attributes, paint operations, and path operations for shape layers
- Use Offset Paths shape effect to alter shapes
- Creating shapes
- Create masks
- Remove objects from your videos with the Content-Aware Fill panel
- Roto Brush and Refine Matte
- AI-powered Object Matte
- Create Nulls for Positional Properties and Paths
- Layers, Markers, and Camera
- Animation, Keyframes, Motion Tracking, and Keying
- Animation
- Keyframe
- Motion tracking
- Keying
- Transparency and Compositing
- Adjusting color
- Effects and Animation Presets
- Effects and animation presets overview
- Effect list
- Effect Manager
- Simulation effects
- Stylize effects
- Audio effects
- Distort effects
- Perspective effects
- Channel effects
- Generate effects
- Time effects
- Transition effects
- The Rolling Shutter Repair effect
- Blur and Sharpen effects
- 3D Channel effects
- Utility effects
- Matte effects
- Noise and Grain effects
- Detail-preserving Upscale effect
- Obsolete effects
- Cycore plugins
- Expressions and Automation
- Expressions
- Expression basics
- Understanding the expression language
- Using expression controls
- Syntax differences between the JavaScript and Legacy ExtendScript expression engines
- Editing expressions
- Expression errors
- Using the Expressions editor
- Use expressions to edit and access text properties
- Expression language reference
- Expression examples
- Automation
- Expressions
- Immersive video, VR, and 3D
- Construct VR environments in After Effects
- Apply immersive video effects
- Compositing tools for VR/360 videos
- Advanced 3D Renderer
- Import and add 3D models to your composition
- Import 3D models from Creative Cloud Libraries
- Create parametric meshes
- Image-Based Lighting
- Animated Environment Lights
- Enable lights to cast shadows
- Extract and animate lights and cameras from 3D models
- Tracking 3D camera movement
- Adjust Default Camera Settings for 3D compositions
- Cast and accept shadows
- Embedded 3D model animations
- Shadow Catcher
- 3D depth data extraction
- Enable in‑engine Depth of Field in Advanced 3D
- Modify materials properties of a 3D layer
- Apply Substance 3D materials
- Work in 3D Design Space
- 3D Transform Gizmos
- Single 3D Gizmo for multiple 3D layers
- Do more with 3D animation
- Preview changes to 3D designs real time with the Mercury 3D engine
- Stereoscopic 3D in After Effects
- Add responsive design to your graphics
- Views and Previews
- Rendering and Exporting
- Basics of rendering and exporting
- H.264 Encoding in After Effects
- Export an After Effects project as an Adobe Premiere Pro project
- Converting movies
- Multi-frame rendering
- Automated rendering and network rendering
- Rendering and exporting still images and still-image sequences
- Using the GoPro CineForm codec in After Effects
- Working with other applications
- Collaboration: Frame.io, and Team Projects
- Memory, storage, performance
- Knowledge Base
Use the Legacy or Advanced Puppet tools to quickly add natural motion to raster images and vector graphics, including still images, shapes, and text characters.
On this page:
Though the Puppet tools work within an effect (the Puppet effect), you don’t apply the effect using the Effect menu or the Effects & Presets panel. Use the Puppet tools in the Tools panel to directly apply and work with the effect in the Layer or Composition panels.
The Puppet effect works by deforming part of an image according to the positions of pins that you place and move. These pins define what parts of the image move, what parts remain rigid, and what parts are in front when parts overlap.
Each Puppet tool is used to place and modify a specific type of pin:
Puppet Pin tool
![]() Use this tool to place and move Deform pins.
Use this tool to place and move Deform pins.
Puppet Overlap tool
![]() Use this tool to place Overlap pins, which indicate which parts of an image should appear in front of others when distortion causes parts of the image to overlap one another.
Use this tool to place Overlap pins, which indicate which parts of an image should appear in front of others when distortion causes parts of the image to overlap one another.
Puppet Starch tool
![]() Use this tool to place Starch pins, which stiffen parts of the image so that they are distorted less.
Use this tool to place Starch pins, which stiffen parts of the image so that they are distorted less.
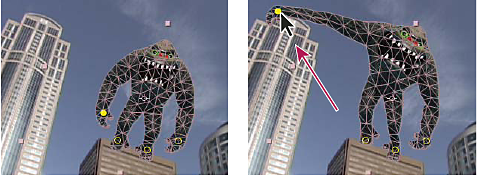

When you place the first pin, the area within an outline is automatically divided into a mesh of triangles. An outline is only visible when the Puppet effect has been applied, and a Puppet tool pointer is over the area that the outline defines. (See How the Puppet effect creates outlines.) Each part of the mesh is also associated with the pixels of the image, so the pixels move with the mesh.
To show the mesh, select Show in the Tools panel.
When you move one or more Deform pins, the mesh changes shape to accommodate this movement while keeping the overall mesh as rigid as possible. The result is that a movement in one part of the image causes natural, life-like movement in other parts of the image.
For example, if you place Deform pins in a person’s feet and hands and then move one of the hands to make it wave, the motion in the attached arm is large, but the motion in the waist is small, just as in the real world.
If a single animated Deform pin is selected, its Position keyframes are visible in the Composition and Layer panels as a motion path. You can work with these motion paths as you work with other motion paths, including setting keyframes to rove across time. (See Smooth motion with roving keyframes.)
You can have multiple meshes on one layer. Having multiple meshes on one layer is useful for deforming several parts of an image individually—such as text characters—as well as for deforming multiple instances of the same part of an image, each with a different deformation.
The original, undistorted mesh is calculated at the current frame at the time at which you apply the effect. The mesh does not change to accommodate motion in a layer based on motion footage, nor does the mesh update if you replace a layer’s source footage item.
Don’t animate the position or scale of a continuously rasterized layer with layer transformations if you’re also animating the layer with the Puppet tools. The render order for continuously rasterized layers—such as shape and text layers—differs from the render order for raster layers. You can precompose the shape layer and use the Puppet tools on the precomposition layer, or you can use the Puppet tools to transform the shapes within the layer. (See Render order and collapsing transformations and Continuously rasterize a layer containing vector graphics.)
The motion created by the Puppet tools is sampled by motion blur if motion blur is enabled for the layer and the composition, though the number of samples used is half of the value specified by the Samples Per Frame value. (See Motion blur.)
You can use expressions to link the positions of Deform pins to motion tracking data, audio amplitude keyframes, or any other properties.
The stopwatch switch ![]() is automatically set for the Position property of a Deform pin as soon as the pin is created. Therefore, a keyframe is set or modified each time you change a Deform pin's position. This auto-keyframing is unlike most properties in After Effects, for which you must explicitly set the stopwatch switch by adding a keyframe or an expression to animate each property. The auto-animation of Deform pins makes it convenient to add them and animate them in the Composition or Layer panel without manipulating the properties in the Timeline panel.
is automatically set for the Position property of a Deform pin as soon as the pin is created. Therefore, a keyframe is set or modified each time you change a Deform pin's position. This auto-keyframing is unlike most properties in After Effects, for which you must explicitly set the stopwatch switch by adding a keyframe or an expression to animate each property. The auto-animation of Deform pins makes it convenient to add them and animate them in the Composition or Layer panel without manipulating the properties in the Timeline panel.
-
Select the layer that contains the image to animate.
-
Using the Puppet Pin tool
 , do one of the following in the Composition or Layer panel:
Select any nontransparent pixel of a raster layer to apply the Puppet effect and create a mesh for the outline created by auto-tracing the alpha channel of a layer.
Select within a closed path on a vector layer to apply the Puppet effect and create a mesh for the outline defined by that path.
Select within a closed, unlocked mask to apply the Puppet effect and create a mesh for the outline defined by the mask path.
Select outside all closed paths on a vector layer to apply the Puppet effect without creating a mesh. Outlines are created for paths on the layer, though an outline is only visible when a Puppet tool pointer is over the area that the outline defines. Place the pointer over the area enclosed by a path to view the outline where a mesh will be created if you select that point. (See How the Puppet effect creates outlines.) Select within an outline to create a mesh.
A Deform pin is placed where you select to create the mesh.
TipIf an image is too complex for the Puppet effect to generate a mesh with the current Triangle value, a Mesh Generation Failed message appears in the Info panel. Increase the Triangle value in the Tools panel and try again.
-
Select one or more places within the outline to add more Deform pins.
Use as few pins as possible to achieve your desired result. The natural deformation provided by the Puppet effect can be lost if you over-constrain the image. Add pins to the parts of the figure that you know you want to control. For example, when animating a person waving, add a pin to each foot to hold them to the ground, and add a pin to the waving hand.
-
Go to another time in the composition, and move the position of one or more of the Deform pins by dragging them in the Composition or Layer panel with the Puppet Pin tool. Repeat this step until you have completed your animation.
You can modify the motion paths of the Deform pins using the same techniques you use to modify any other motion paths.
After Effects no longer draws the tinted fill for the original layer region when hovering using the Puppet Pin tool.
You can sketch the motion path of one or more Deform pins in real-time—or at a speed that you specify—much as you can sketch the motion path of a layer using Motion Sketch.
If your composition contains audio, you can sketch motion in time with the audio.
Before you begin recording motion, you may want to configure settings for recording. To open the Puppet Record Options dialog box, select Record Options in the Tools panel.
Speed
The ratio of the speed of the recorded motion to the speed of playback. If the Speed is 100%, the motion is played back at the speed at which it was recorded. If the Speed is greater than 100%, the motion plays back slower than it was recorded.
Smoothing
Set this value higher to remove more extraneous keyframes from the motion path as it’s drawn. Creating fewer keyframes makes motion smoother.
Use Draft Deformation
The distorted outline that is shown during the recording does not take Starch pins into account. This option can improve performance for a complex mesh.
This procedure assumes that you have already placed Deform pins in the object to animate. For information on placing Deform pins, see Manually animate an image with the Puppet tools.
-
Select one or more Deform pins.
-
Go to the time at which to begin recording motion.
-
In the Composition or Layer panel, hold the Ctrl (Windows) or Command (macOS) key to activate the Puppet Sketch tool. Ctrl-drag (Windows) or Command-drag (macOS) the pins to animate.
Recording of motion begins when you click to begin the drag. Recording ends when you release the mouse button.
The color of the outline for the mesh for which motion is being sketched is the same as the color of the pin (yellow). Reference outlines, for other meshes on the same layer, match the label color of the layer.
The current-time indicator returns to the time recording began, so you can repeat the recording operation with more Deform pins or redo the recording operation with the same pins.
You can modify the motion paths of the Deform pins using the same techniques you use to modify any other motion paths. The motion path for a pin is shown only if it's the only pin selected.
Try creating several duplicate meshes and sketching motion for each mesh. When you have multiple meshes in the same instance of the Puppet effect, you can sketch motion for one mesh while seeing the reference outlines of the others, allowing you to follow their movements, either roughly or precisely.
When a Puppet mesh is created, its boundaries are determined by an outline, which can be defined by any of the following types of closed paths:
An unlocked mask path
A shape path on a shape layer
A text character’s outline
If a layer has no unlocked masks, shapes, or text characters when you apply the Puppet effect, it uses Auto-trace to create paths from the alpha channel. These paths are only used by the Puppet effect in the determination of outlines and do not appear as masks on the layer. If the layer is a raster layer with no alpha channel, the result is a single rectangular path around the bounds of the layer. For a complex image or to configure Auto-trace settings, use Auto-trace before using the Puppet tools. (See Create a mask from channel values with Auto-trace.)
A text character that consists of multiple disjoint closed paths (such as the letter i) is treated as multiple separate paths.
The stroke of a shape or text character is not used in the determination of outlines, and only the path is used. To encompass a stroke within a mesh created from such items, increase the Expansion value. The default value of three pixels for Expansion encompasses a stroke that extends three pixels or less from its path.
Apply paint strokes to a layer using the Brush tool with the Paint On Transparent option. Painting with this option selected creates a raster layer with only the paint strokes, defined by an alpha channel. You can then use the Puppet tools to animate the paint strokes. Do not use a mask on the layer.
If multiple masks, shapes, or characters overlap on the same layer, an outline is created from the union of the overlapping shapes, overlapping characters, or overlapping masks. If a mask overlaps a text character or shape, outlines are created for the entire character or shape, for the portion of the character or shape inside the mask, and for the mask itself.
To distort multiple disjoint characters or shapes as one object, surround the individual objects with a mask (with mask mode set to None) and use the mask path as the outline with which to create the mesh. You can delete the mask after you have created the mesh.
If the Puppet effect has already been applied to a layer, outlines appear with a yellow highlight as you move a Puppet tool pointer over them. You can choose the outline to place an initial pin to create a mesh. A mesh is created each time you select within an outline with a Puppet tool.
If the Puppet effect has not already been applied to a layer, outlines for that layer have not yet been calculated. When you select, the Puppet effect calculates outlines and determines whether you have clicked within an outline. If so, it creates a mesh defined by the outline you clicked. Otherwise, you can move the pointer around in the layer to select the outline to place a pin and create a mesh. Moving the pointer around in the layer is useful for seeing the outlines of various objects and choosing which outlines to use to create a mesh.


- To show the mesh for the Puppet effect, select Show in the options section of the Tools panel.
- To select or move a pin, select or drag it with the Move tool
 . To activate the Move tool, place the pointer on a pin while either the Selection tool
  or the corresponding Puppet tool is active.
 - To select multiple pins, Shift-click them, or use the Marquee-selection tool
 to drag a Marquee-selection box around them. To activate the Marquee-selection tool, place the pointer for a Puppet tool outside all meshes and outlines or hold the Alt (Windows) or Option (macOS) key.
 - To select all pins of one kind (Deform, Starch, or Overlap), select one pin of that kind and press Ctrl+A (Windows) or Command+A (macOS).
- To delete selected pins, press the Delete key. If the pin has multiple keyframes, and only the keyframe at the current time is selected, pressing Delete deletes only that keyframe and pressing Delete again deletes the pin.
- To reset Deform pins to their original locations at the current time, select Reset for the Puppet effect in the Timeline or Effect Controls panel. To remove all pins and meshes from an instance of the Puppet effect, select Reset again.
Sometimes, you want to animate an image from an initial position, through an intermediate position, and back to the initial position. Rather than manually dragging the pins back to their initial positions at the end of the animation, place the current-time indicator at the end time and select Reset. Only the keyframes at the current time are reset.
- To increase or decrease the number of triangles used in a mesh, modify the Triangle value in the options section of the Tools panel or in the Timeline panel. Modifying the Triangle value sets the value for a selected mesh or, if no mesh is selected, sets the value for meshes created later.
- A higher number of triangles gives smoother results but takes longer to render. Small objects like text characters usually distort well with only 50 triangles, whereas a large figure may require 500. The number of triangles used may not match the Triangle value exactly; this value is a target only.
- To expand the mesh beyond the original outline, increase the Expansion property in the options section of the Tools panel or in the Timeline panel. Modifying the Expansion property sets the value for a selected mesh or, if no mesh is selected, sets the value for meshes created later. Expanding the mesh is useful for encompassing a stroke.
- To duplicate an object using the Puppet Pin tool, select within the original outline. Clicking within the original outline creates a mesh with its copy of the pixels from within the original outline. You can also duplicate a Mesh group in the Timeline panel to achieve the same result, which is sometimes easier than clicking within the original outline without clicking the mesh to create a pin.
When distorting one part of an image, you may want to control which parts of the image appear in front of other parts. For example, you may want to keep an arm in front of the face as you make the arm wave. Use the Puppet Overlap tool to apply Overlap pins to the parts of an object you want to control apparent depth.
You apply Puppet Overlap pins to the original outline, not the deformed image.
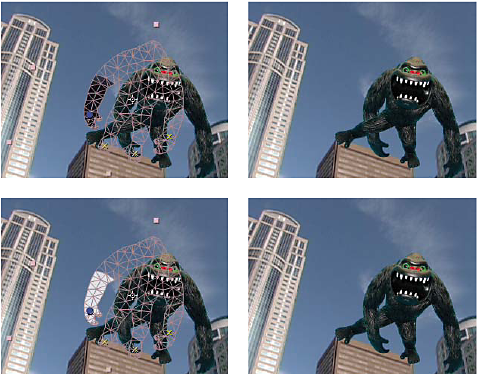

Each Overlap pin has the following properties:
In Front
The apparent proximity to the viewer. The influence of Overlap pins is cumulative, meaning that the In Front values are added together for places on the mesh where extents overlap. You can use negative In Front values to cancel out the influence of another Overlap pin at a specific location.
An area of the mesh not influenced by Overlap pins has an implicit In Front value of zero. The default value for a new Overlap pin is 50.
When animating the In Front value, you should usually use Hold keyframes. You do not typically want to interpolate gradually from an element in front to an element in the back.
Extent
How far from the Overlap pin its influence extends. The influence ends abruptly. It does not decrease gradually with distance from the pin. The extent is indicated visually by a fill in the affected parts of the mesh. The fill is dark if In Front is negative, and the fill is light if In Front is positive.
When distorting one part of an image, you may want to prevent other parts from being distorted. For example, you may want to preserve the rigidity of an arm as you move a hand to make it wave. Use the Puppet Starch tool to apply Starch pins to the part of an object that you want to keep rigid.
You apply Puppet Starch pins to the original outline, not the deformed image.
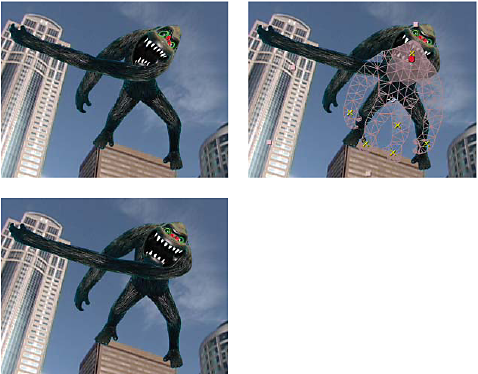

Each Starch pin has the following properties:
Amount
The strength of the stiffening agent. The influence of Starch pins is cumulative, meaning that the Amount values are added together for places on the mesh where extents overlap. You can use negative Amount values to cancel out the influence of another Starch pin at a specific location.
If you notice an image tearing near a Deform pin, use a Starch pin with a minimal Amount value (less than 0.1) near the Deform pin. Small Amount values are good for maintaining image integrity without introducing much rigidity.
Extent
How far from the Starch pin its influence extends. The influence ends abruptly. It does not decrease gradually with distance from the pin. Extent is indicated visually by a pale fill in the affected parts of the mesh.
In addition to animating still images, you can use the Puppet effect on a layer with motion footage as its source. For example, you could distort the contents of the entire composition frame to match the motion of an object within the frame. In this case, consider creating a mesh for the entire layer, using the layer boundaries as the outline, and using the Puppet Starch tool around the edges to prevent the edges of the layer from distorting.
The Puppet tools and Puppet effect in After Effects use an enhanced puppet engine called the Advanced Puppet Tool, and the old engine is called the Legacy puppet engine. In After Effects 15.1 and later, the Advanced puppet engine is the default engine for your projects. Projects saved in earlier After Effects versions use the Legacy puppet engine by default. To access the Advanced Puppet Tools, select the Pin icon in the Toolbar, and the Puppet group is displayed in the Timeline panel.
At the core, the Advanced puppet engine uses a similar concept as the legacy puppet engine, the differences being:
- New pin behaviors and pin types
- Smoother and customizable deformations
- Enhanced density
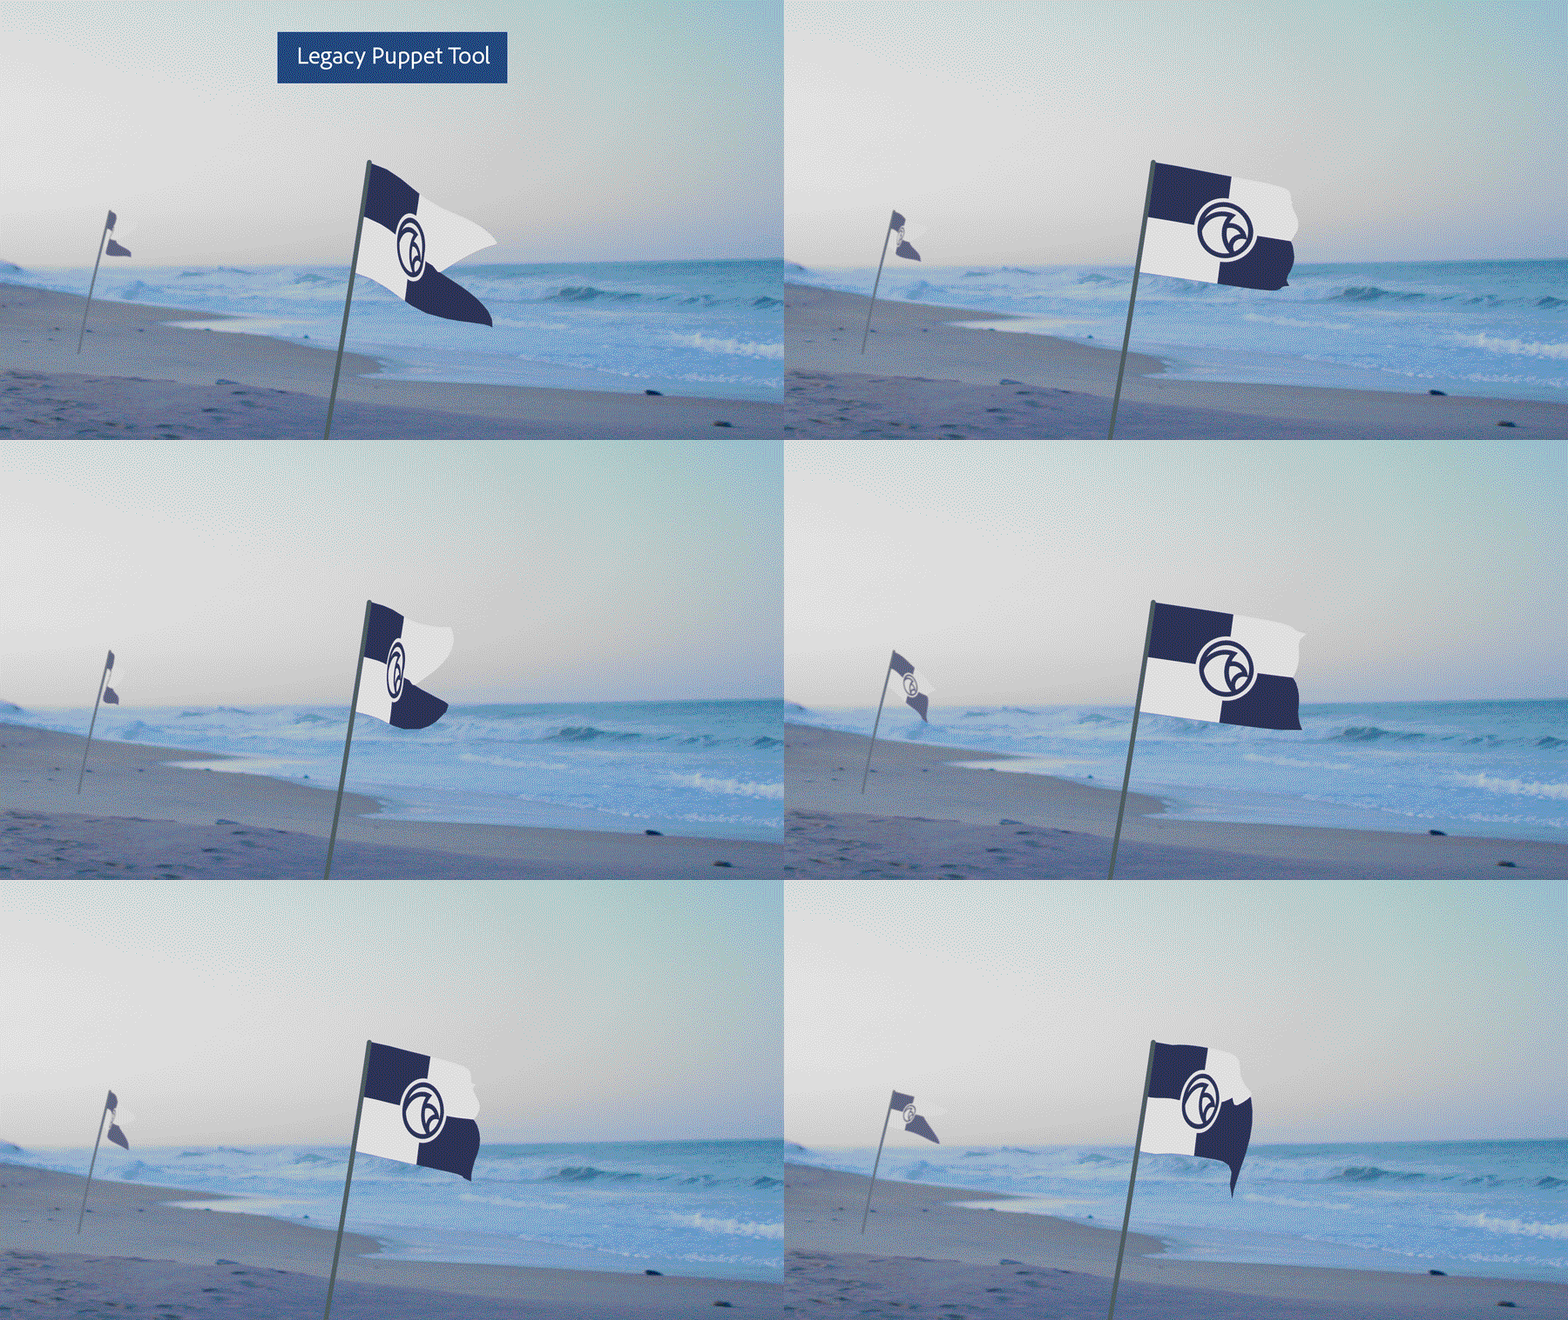

See the table below to understand the key differences between the Legacy and Advanced puppet engines:
|
Legacy puppet engine |
Advanced puppet engine |
|---|---|
|
Triangle control: Specifies the highest number of triangles allowed for a mesh. Legacy Puppet Tool uses smart triangle placement in the mesh with a higher density of triangles to achieve better results. |
Density control replaces Triangle control. Density controls the layout, size, and amount of triangles automatically calculated within a mesh. With higher density, the maximum and minimum triangle sizes reduce, you can add more triangles between pins, and the maximum number of triangles allowed has increased. Lower the density, the triangle size increases and creates a sparse mesh. |
|
Starch pins are under the Stiffness group. |
Starch pin are under the Deform group and the Stiffness group is discontinued. |
|
Starch pins have Extent control to manipulate the extent to which the pin impacts the puppet. |
Starch pins do not have Extent control but can impact the stiffness in the region between Starch pins and other pins. The Advanced puppet engine interprets the Starch pins as Position pins. |
|
You cannot convert Starch pins into any other form of pins. |
You can convert Starch pins into Position pins with the Pin Type property. |
|
No option of Mesh Rotation Refinement. |
Mesh Rotation Refinement, specifies the maximum amount any position or starch pin rotates to minimize deformation. Higher the value, higher is the amount of rotation (flexible deformation), and lower the value, lower is the amount of rotation (stiff deformation). |
You can use the Puppet Engine control to choose between the Advanced puppet engine and the Legacy puppet engine. To choose, in the Timeline panel, select the drop-down list next to Puppet engine, and select the engine. You can switch between the two engines, but After Effects recommends that you avoid switching after you place or animate pins for the following reasons:
- As the two engines interpret pins differently, switching could change the deformation.
- Starch pins differ in the Advanced puppet engine, so the Legacy puppet engine treats advanced starch pins as normal position pins. The Advanced puppet engine ignores legacy starch pins.
The Advanced Puppet Tool offers the following types of pins to animate your puppets. To apply these pins, select the pin type in the Puppet Tool menu in the toolbar.
- Puppet Position Pin Tool: The pins you place with this tool can only control the position of the pin. These pins display as yellow circles in the user interface.
- Puppet Starch Pin Tool: These pins appear as red circles in the user interface.
- Puppet Overlap Pin Tool: These pins appear as blue circles in the user interface.
- Advanced Pins: This enables you to control the position, scale, and rotation of the pin. This allows significant control over how the Puppet effect mesh deforms around that pin. The mesh can create noticeable shearing if you do not animate all three properties. For example, you can use an advanced pin to animate the head of a character to move to the side and look downwards. However, if you do not animate the rotation manually, the head continues to point in the same direction and creates a stretched appearance. These pins display as blue-green circles in the user interface.
- Bend Pins: These pins automatically calculate their location from the surrounding pins, similar to starch pins, while allowing you to control the scale and rotation of the pin. You can use the bend pins to create the appearance of the chest of the character breathing or a wagging tail. Another case can be where you scale or rotate a part of the mesh but have the position of the pin automatically move with the rest of the puppet. These pins display as orange-brown circles in the user interface.
Work with advanced pins and bend pins
The advanced pins and bend pins have controls to adjust scale and rotation:
When you select bend or advanced pins in the Puppet Tool panel, it displays a rotation and scale control - a larger, outer circle with a single square handle.
Use the following steps to change the rotation and scale controls:
-
Select anywhere on the outer circle to change rotation and drag around the circle.
-
Hold the Shift key while you drag to constrain rotation to 15-degree increments.
-
To change the scale, select the square handle and drag in or out from the outer circle.
-
Hold the Shift key while you drag to constrain scale to 5% increments.
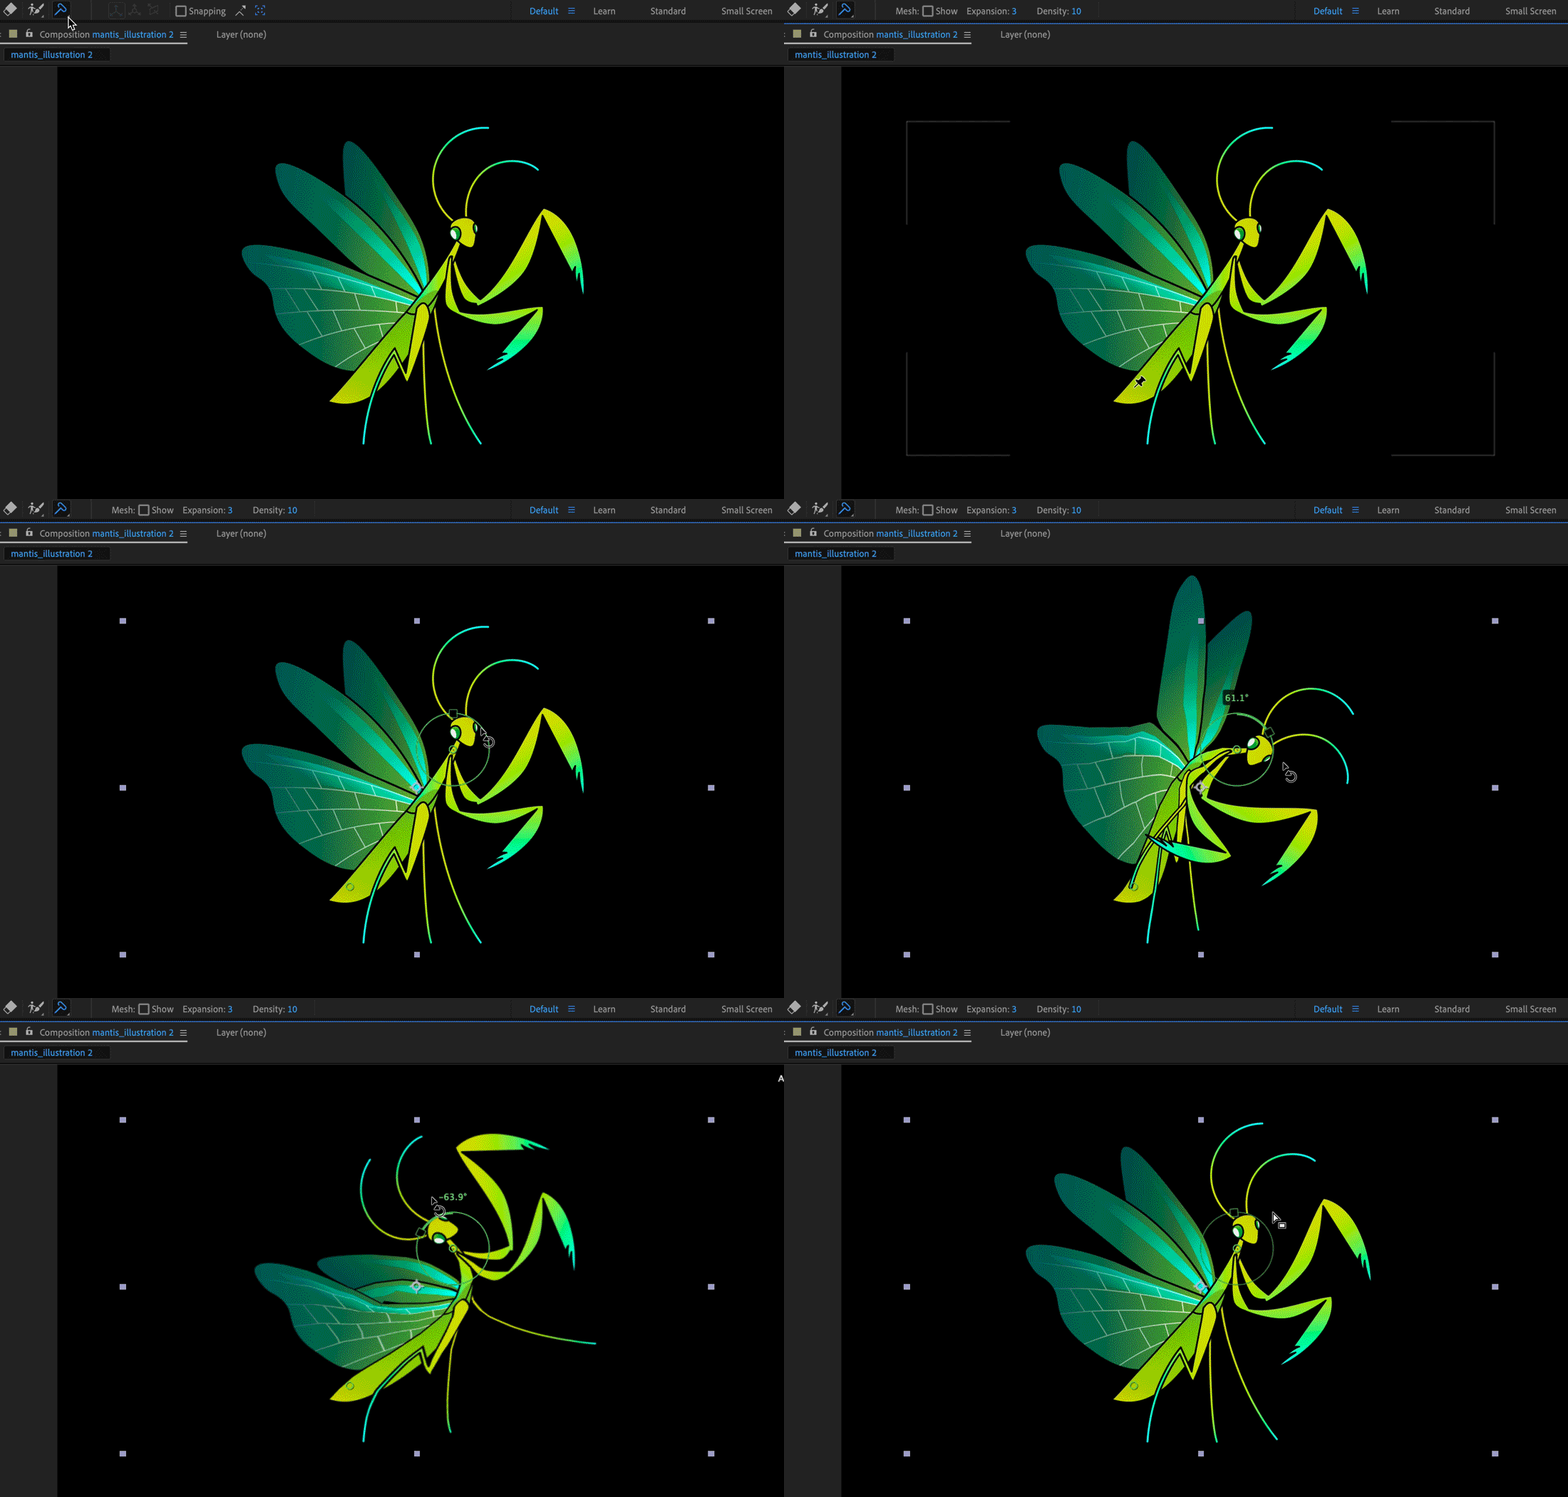

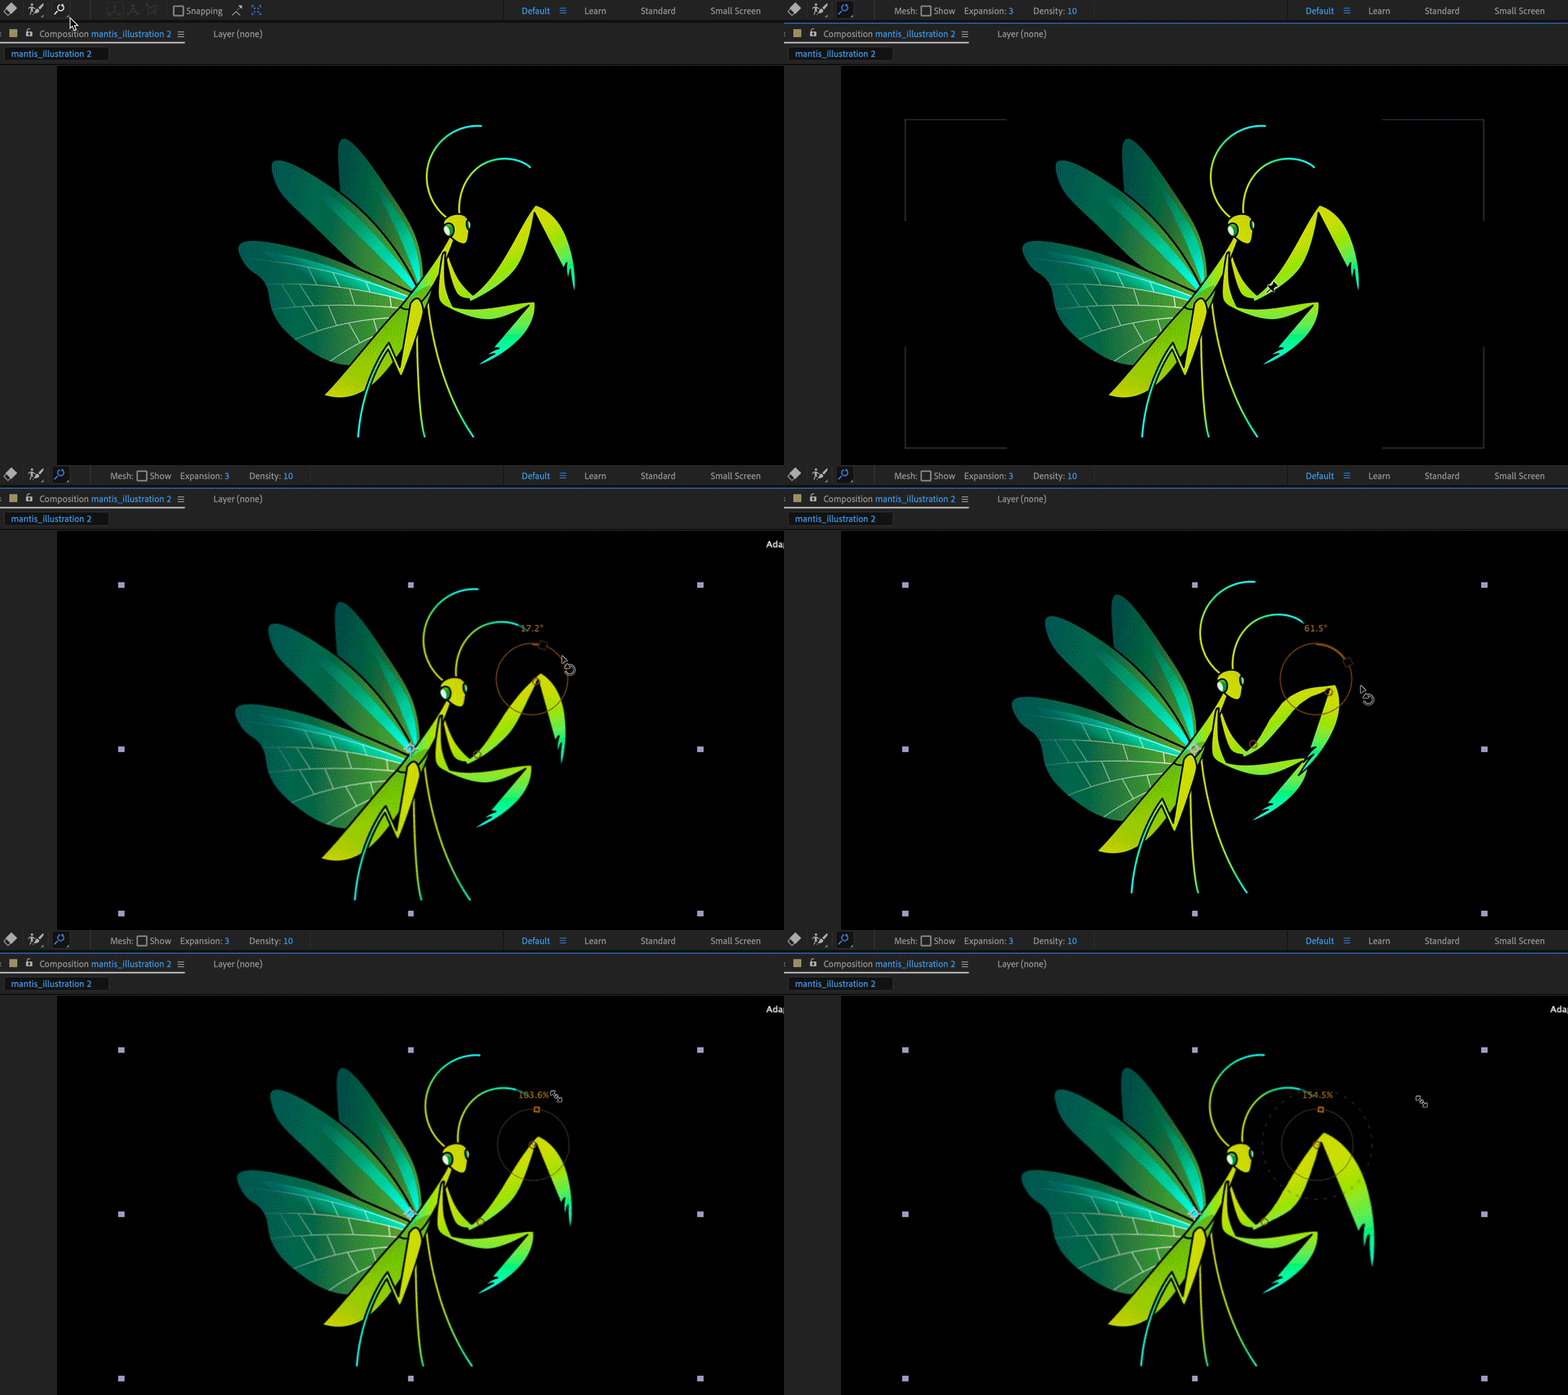

Other enhancements to Advanced Puppet Tool
- You can switch the existing pin types between Position and Starch.
- The Puppet Starch tool has a different icon and is second in the list of Puppet tools in the Toolbar panel.
- Path Point and Handle Size options in Preferences > Appearance affect pin size. Also, when you hover the mouse over the pins, they increase in size.
- The Puppet effect ignores masks set to None or any mask used by an effect as a mask reference (Effect properties > Compositing Options > Mask Reference) when calculating the mesh outline.