Automatically adjust levels for different types of audio in Adobe Premiere Pro, and then finesse tracks manually to make your project sound its best.

المتطلبات
The “Going Home” sample project is also installed with Adobe Premiere Pro:
macOS: Hard Drive > Users > Shared > Adobe > Premiere Pro > 13.0 > Tutorial > Going Home project
Windows: C:\Users\Public\Documents\Adobe\Premiere Pro\13.0\Tutorial\Going Home project
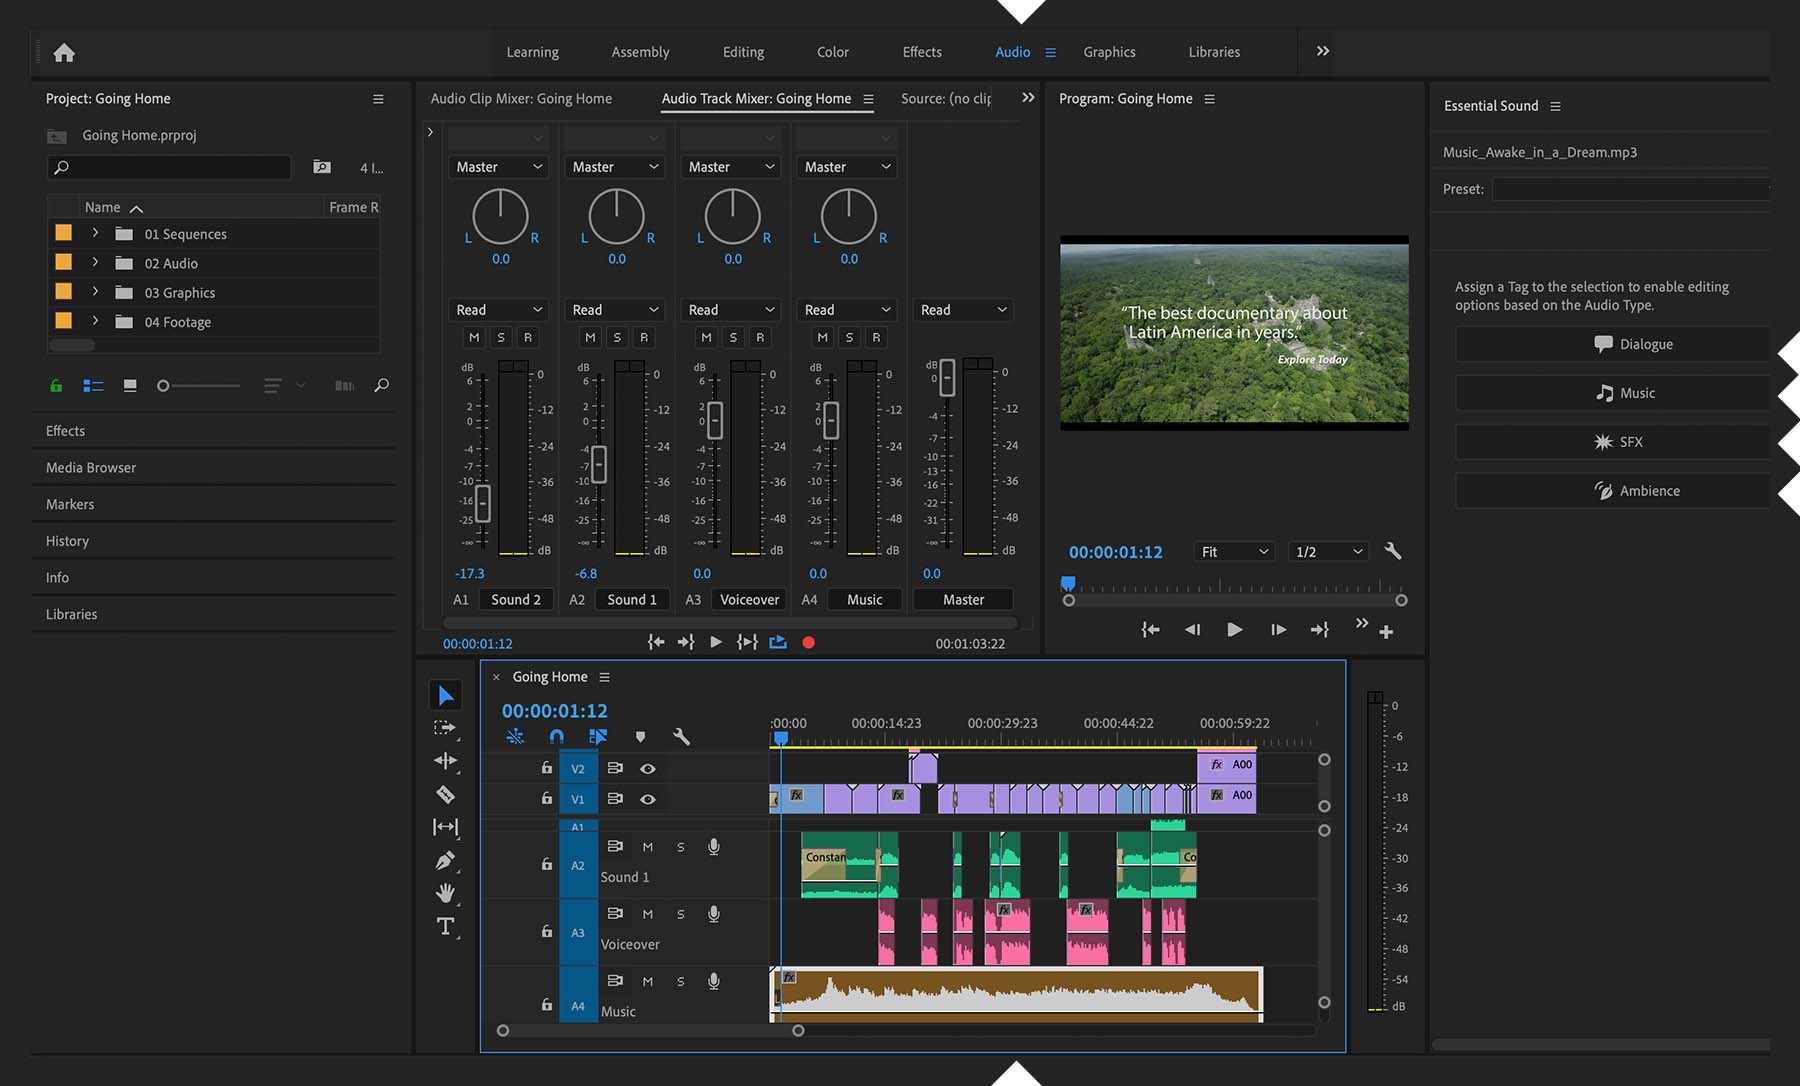
After placing your dialogue, music, sound effects, and ambient sound clips on separate audio tracks, you’ll need to tell Premiere Pro what’s what. Starting in the Audio workspace (Window > Workspaces > Audio), select all the clips in a given track and then click the appropriate audio type from among the choices in the Essential Sound panel.

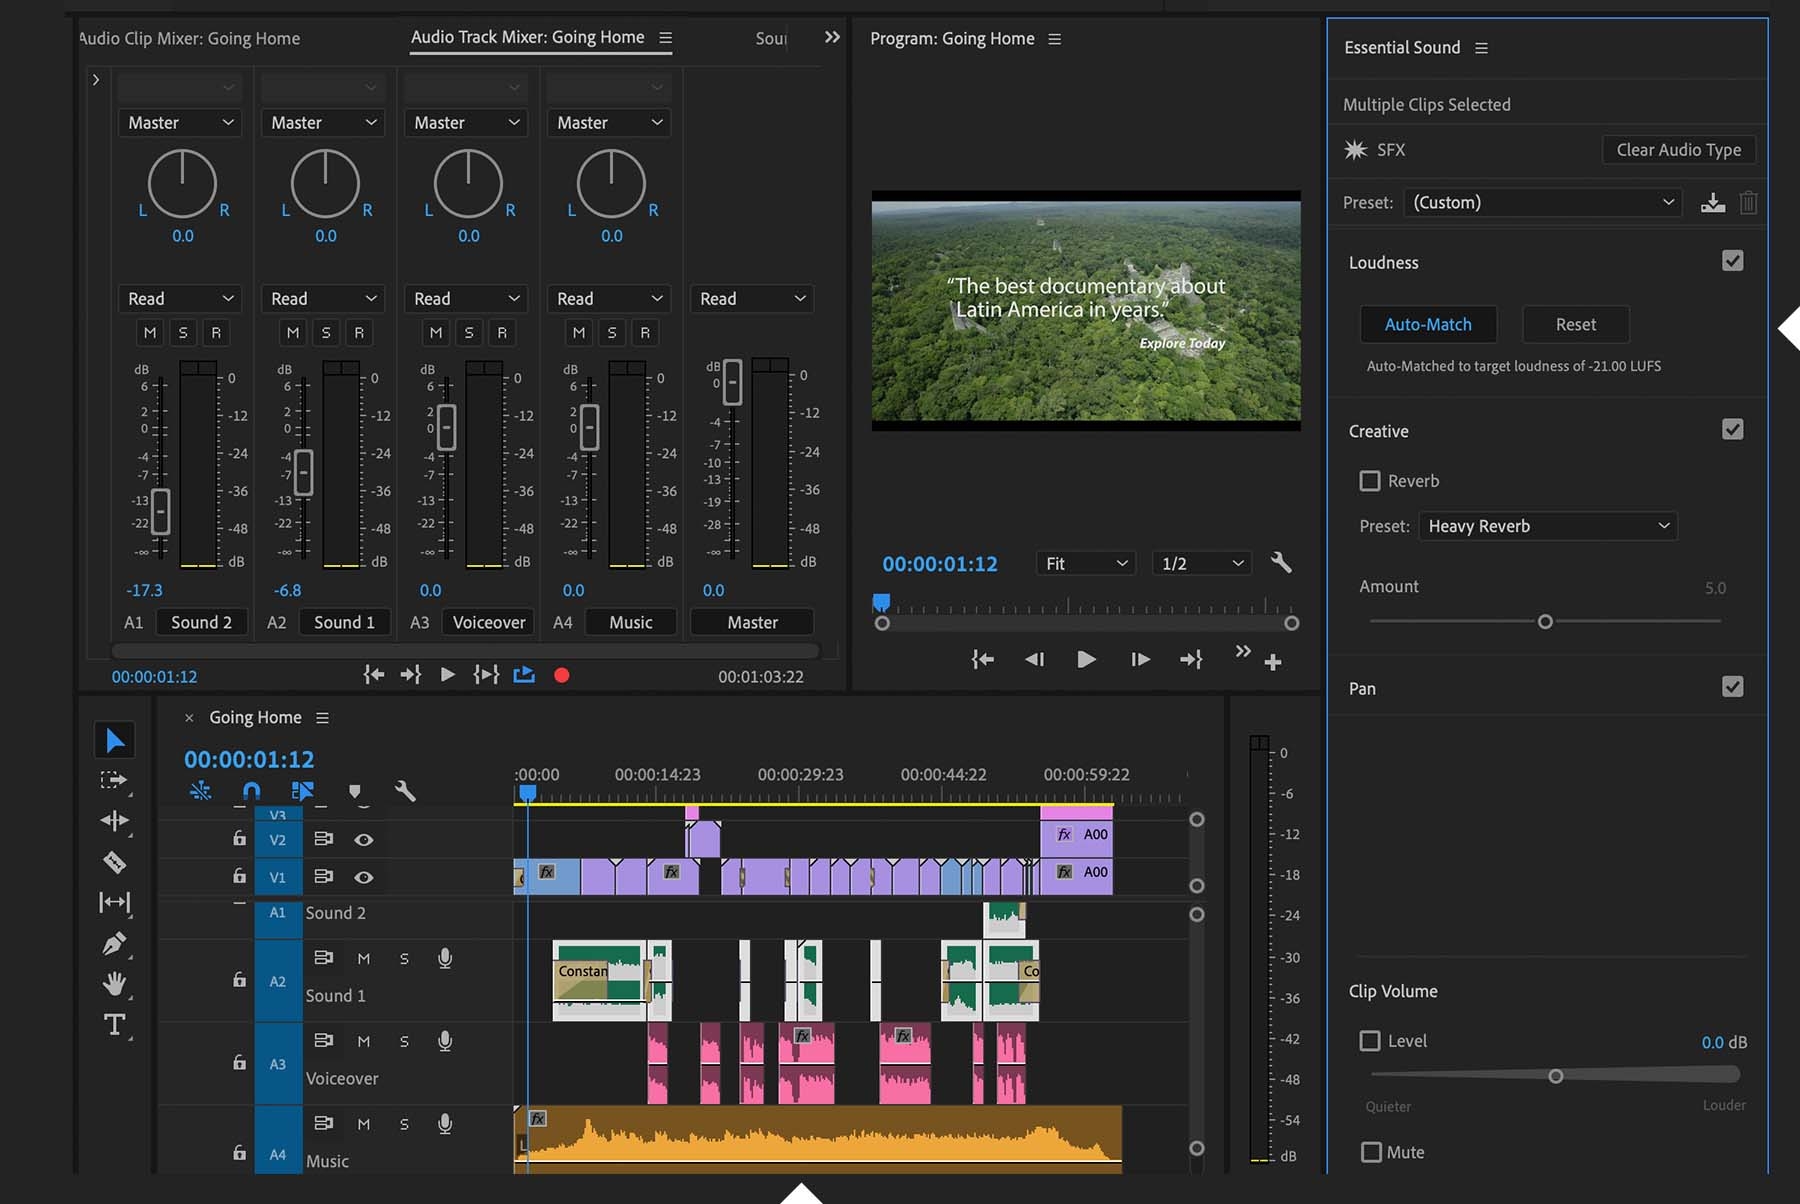
Once you designate the audio track’s type this way, you can adjust levels and apply effects much more easily than you would by modifying each individual clip. For example, in the Loudness section, click Auto-Match to quickly match all the clips on the track to a standard loudness level.

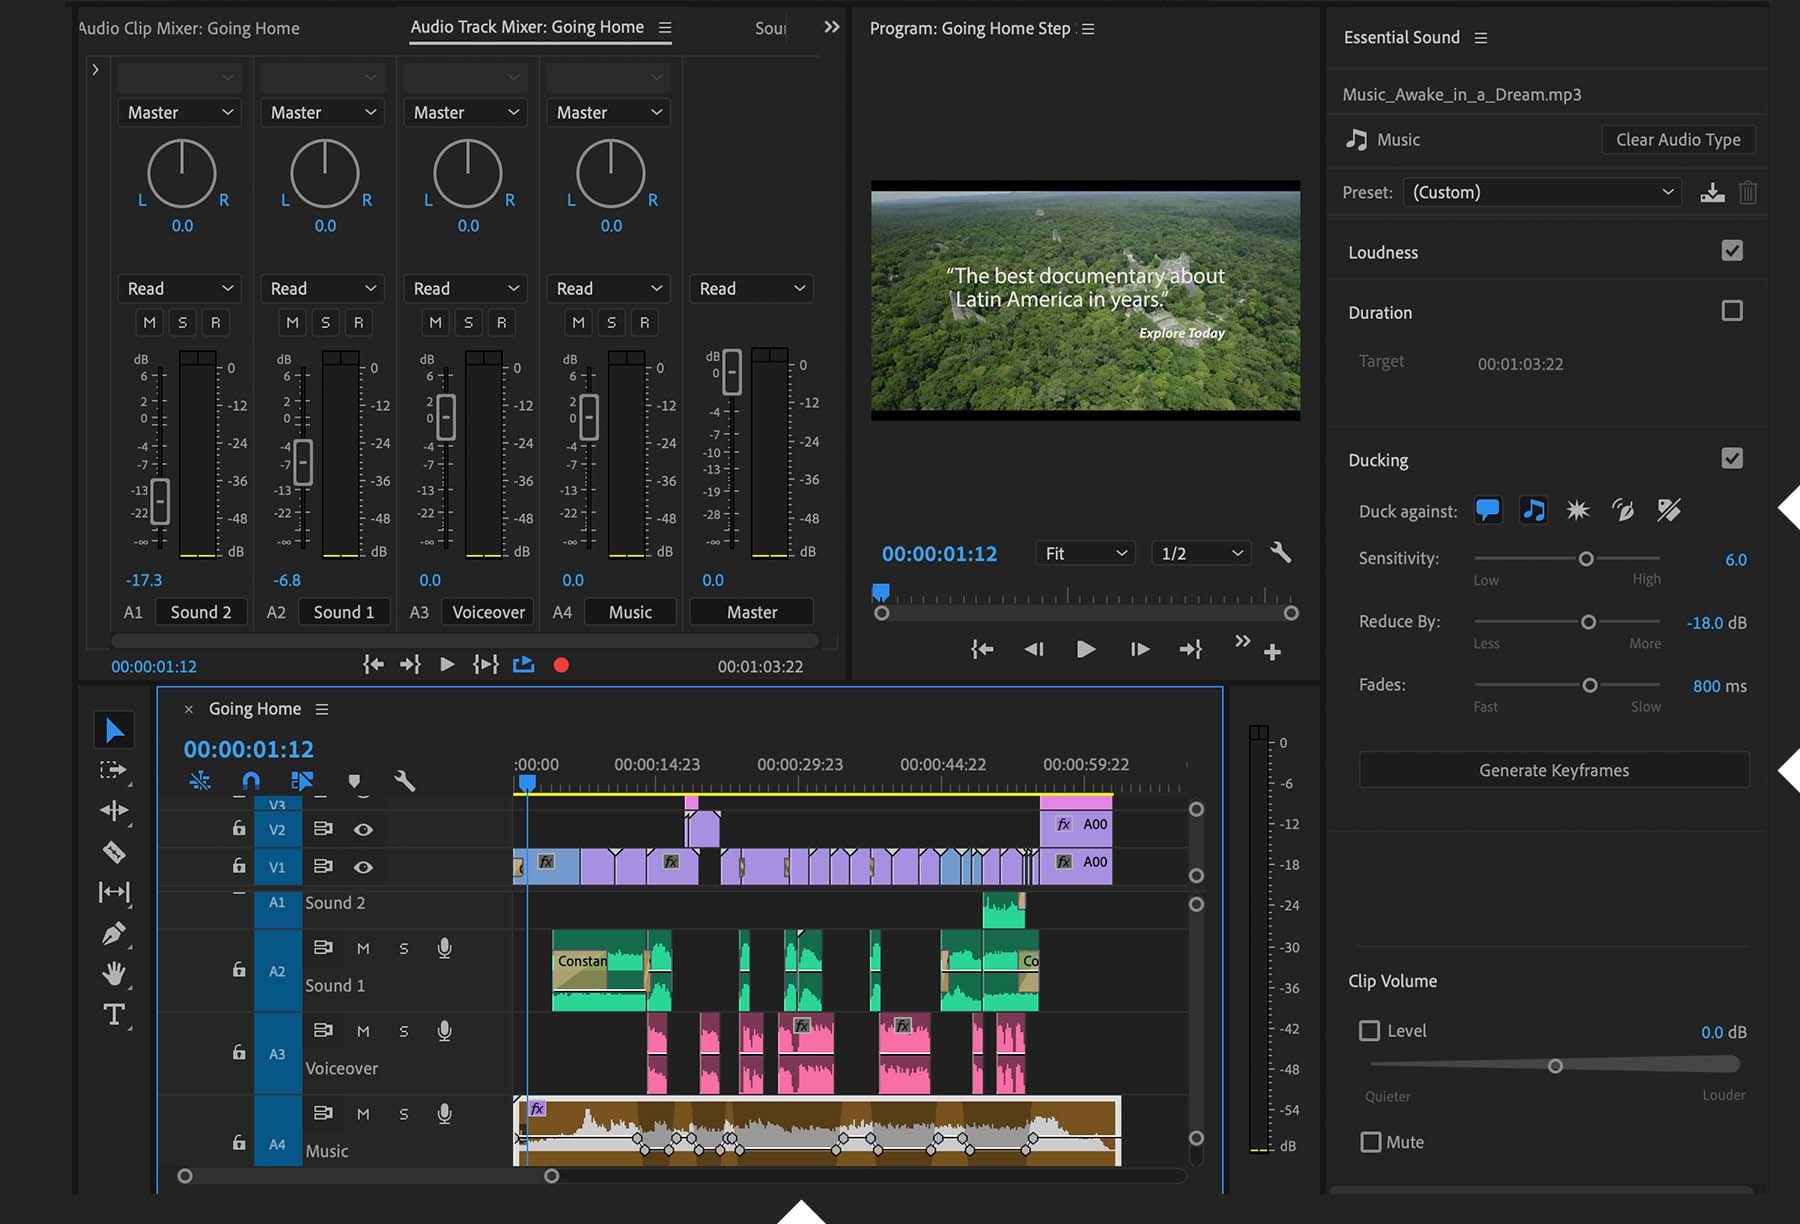
One great benefit of designating audio types is the ability to adjust one track relative to another. For example, “ducking” makes a voiceover track stand out from background music. After identifying which tracks to duck against, click Generate Keyframes. Later you can fine-tune those keyframes to precisely match the timing and level of the background music and voiceover clips.

EQ presets also help vocals stand out from music. As with the other settings, you can drag the Amount slider to increase or decrease the intensity of the applied effect. Additionally, as you play your sequence, adjust the vertical sliders in the Audio Track Mixer panel. For example, drag a slider down to make all clips on that track softer.
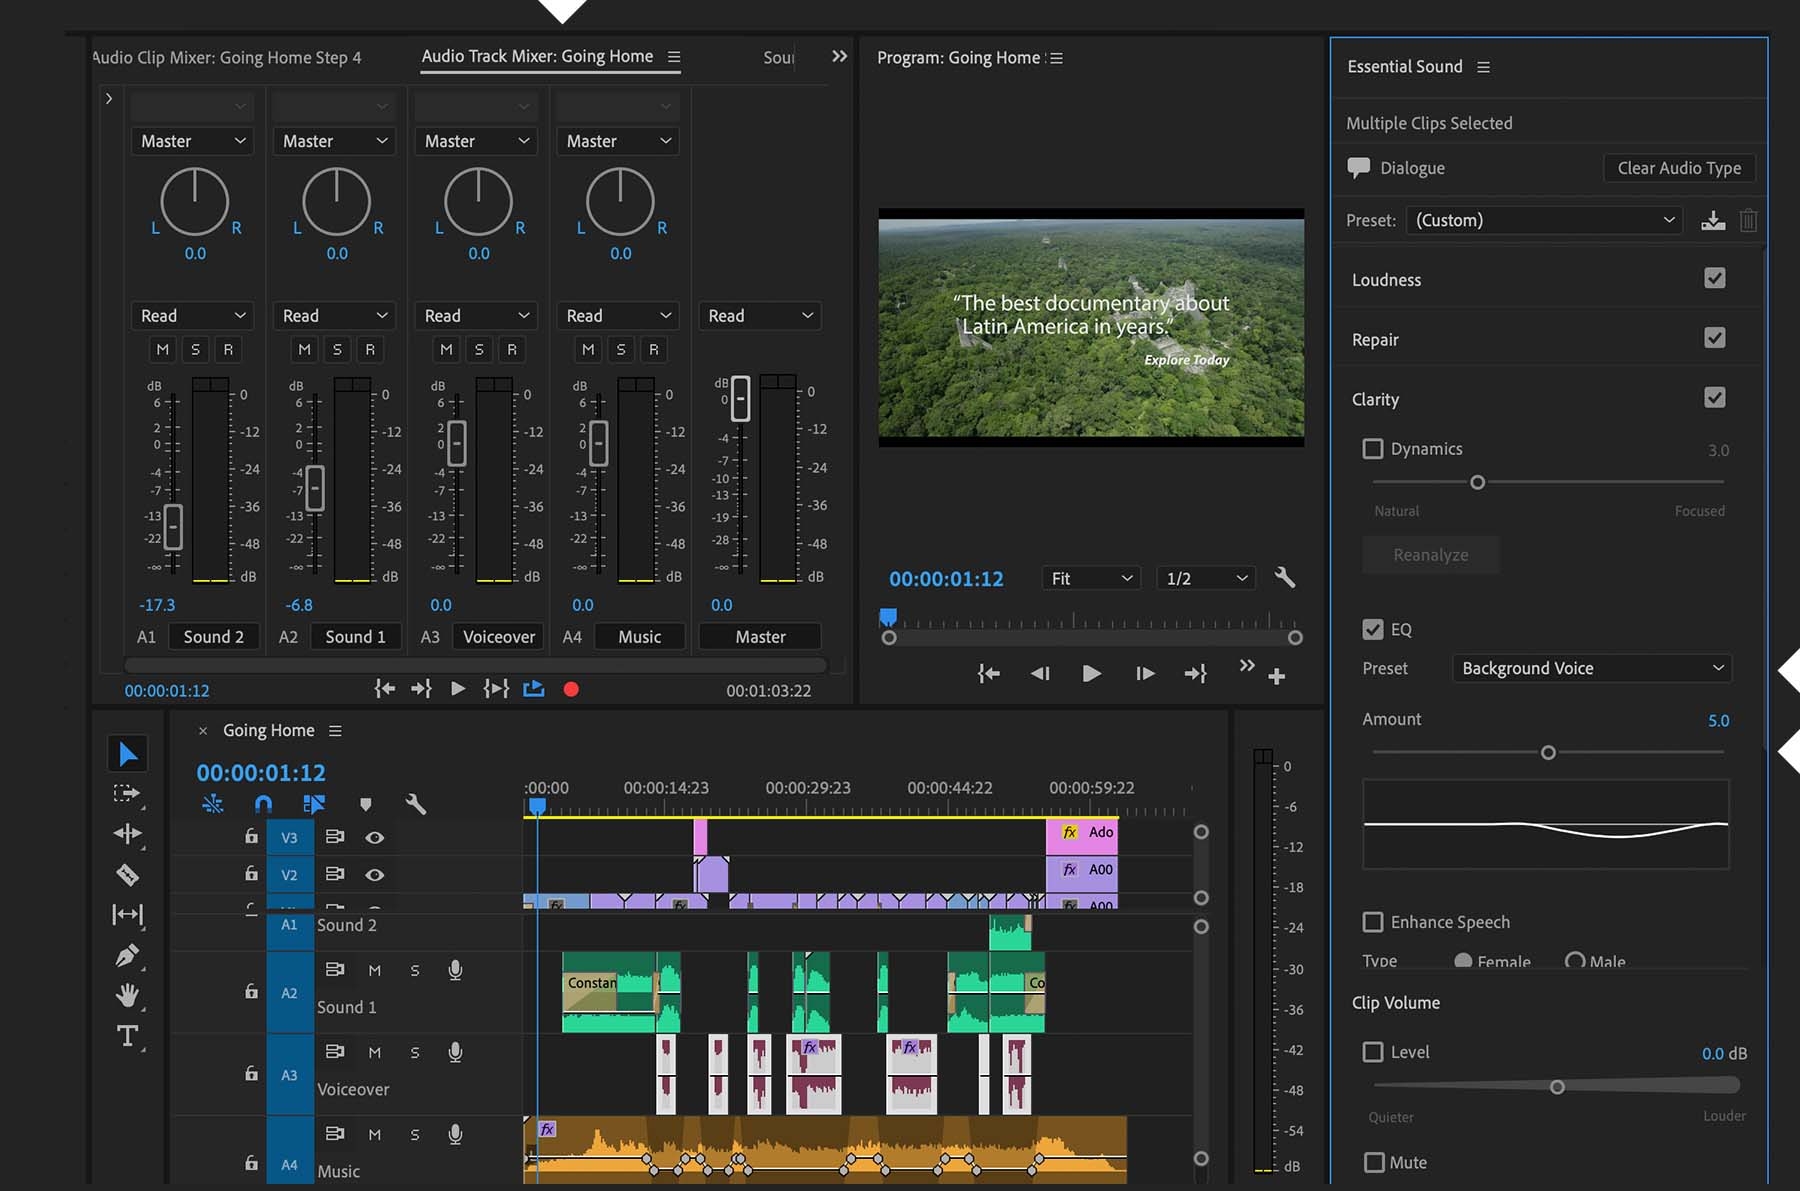

Adjustments are nondestructive, so play around and experiment. Click Clear Audio Type at the top of the Essential Sound panel to undo your changes and bring things back to their original state.