In the Timeline or Composition panel, select the layer.
- After Effects User Guide
- Beta releases
- Getting started
- Workspaces
- Projects and compositions
- Importing footage
- Text and Graphics
- Text
- Motion Graphics
- Work with Motion Graphics templates in After Effects
- Use expressions to create drop-down lists in Motion Graphics templates
- Work with Essential Properties to create Motion Graphics templates
- Replace images and videos in Motion Graphics templates and Essential Properties
- Animate faster and easier using the Properties panel
- Drawing, Painting, and Paths
- Overview of shape layers, paths, and vector graphics
- Paint tools: Brush, Clone Stamp, and Eraser
- Taper shape strokes
- Shape attributes, paint operations, and path operations for shape layers
- Use Offset Paths shape effect to alter shapes
- Creating shapes
- Create masks
- Remove objects from your videos with the Content-Aware Fill panel
- Roto Brush and Refine Matte
- Layers, Markers, and Camera
- Animation, Keyframes, Motion Tracking, and Keying
- Animation
- Keyframe
- Motion tracking
- Keying
- Transparency and Compositing
- Adjusting color
- Effects and Animation Presets
- Effects and animation presets overview
- Effect list
- Effect Manager
- Simulation effects
- Stylize effects
- Audio effects
- Distort effects
- Perspective effects
- Channel effects
- Generate effects
- Time effects
- Transition effects
- The Rolling Shutter Repair effect
- Blur and Sharpen effects
- 3D Channel effects
- Utility effects
- Matte effects
- Noise and Grain effects
- Detail-preserving Upscale effect
- Obsolete effects
- Expressions and Automation
- Expressions
- Expression basics
- Understanding the expression language
- Using expression controls
- Syntax differences between the JavaScript and Legacy ExtendScript expression engines
- Editing expressions
- Expression errors
- Using the Expressions editor
- Use expressions to edit and access text properties
- Expression language reference
- Expression examples
- Automation
- Expressions
- Immersive video, VR, and 3D
- Construct VR environments in After Effects
- Apply immersive video effects
- Compositing tools for VR/360 videos
- Advanced 3D Renderer
- Import and add 3D models to your composition
- Import 3D models from Creative Cloud Libraries
- Image-Based Lighting
- Extract and animate lights and cameras from 3D models
- Tracking 3D camera movement
- Cast and accept shadows
- Embedded 3D model animations
- Shadow Catcher
- 3D depth data extraction
- Modify materials properties of a 3D layer
- Work in 3D Design Space
- 3D Transform Gizmos
- Do more with 3D animation
- Preview changes to 3D designs real time with the Mercury 3D engine
- Add responsive design to your graphics
- Views and Previews
- Rendering and Exporting
- Basics of rendering and exporting
- H.264 Encoding in After Effects
- Export an After Effects project as an Adobe Premiere Pro project
- Converting movies
- Multi-frame rendering
- Automated rendering and network rendering
- Rendering and exporting still images and still-image sequences
- Using the GoPro CineForm codec in After Effects
- Working with other applications
- Collaboration: Frame.io, and Team Projects
- Memory, storage, performance
- Knowledge Base
Time-stretching, time-remapping, and the Timewarp effect are all useful for creating slow motion, fast motion, freeze frame, or other retiming results.
Time-stretch a layer
Speeding up or slowing down an entire layer by the same factor throughout is known as time-stretching. When you time-stretch a layer, the audio and the original frames in the footage (and all keyframes that belong to the layer) are redistributed along the new duration. Use this command only when you want the layer and all layer keyframes to change to the new duration.


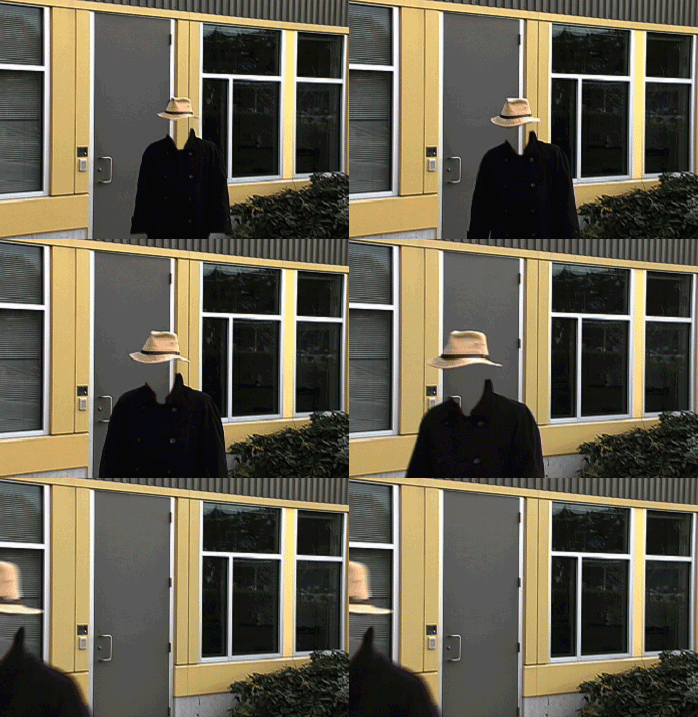
Before Time Stretch is applied to a layer.


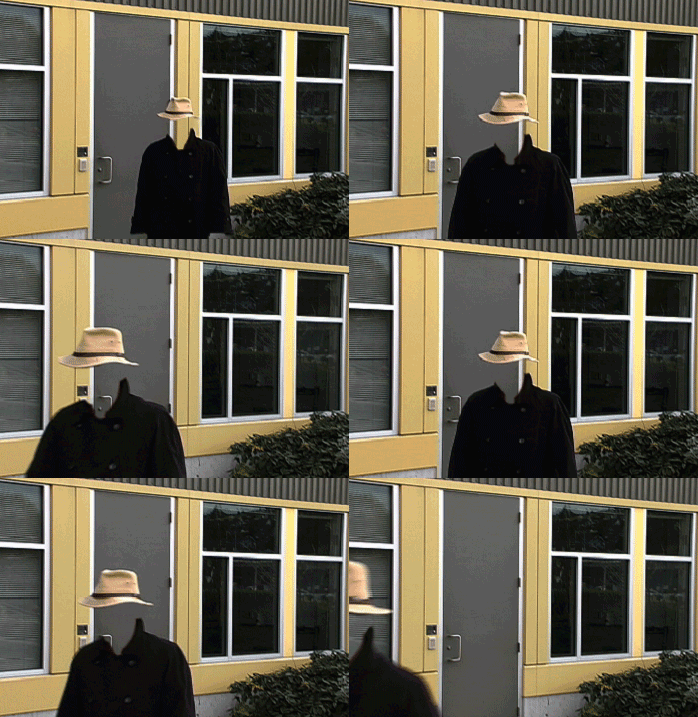
After Time Stretch is applied to a layer.
If you time-stretch a layer so that the resulting frame rate is very different from the original frame rate, the quality of motion within the layer may suffer. For best results when time-remapping a layer, use the Timewarp effect.
Time-stretch a layer from a specific time
-
-
Select Layer > Time > Time Stretch.
-
In the Time Stretch dialog, enter a new duration for the layer, or type a Stretch Factor.
Adjust Stretch Factor or New Duration to change the duration of a layer and speed up or slow down your animation. Adjust Stretch Factor or New Duration to change the duration of a layer and speed up or slow down your animation. -
To specify the point in time from which the layer will be time-stretched, select one of the Hold in Place options and then select OK.
Layer In-point
Holds the starting time of the layer at its current value and time-stretches the layer by moving its Out point.
Current Frame
Holds the layer at the position of the current-time indicator (also the frame displayed in the Composition panel), and time-stretches the layer by moving the In and Out points.
Layer Out-point
Holds the ending time of the layer at its current value and time-stretches the layer by moving its In point.
Time-stretch a layer to a specific time
-
In the Timeline panel, move the current-time indicator to the frame where you want the layer to begin or end.
-
You can display the In and Out columns by selecting Columns > In and Out from the Timeline panel menu.
-
Do one of the following:
To stretch the In point to the current time, press Ctrl (Windows) or Command (macOS) as you select the In time for the layer in the In column.
To stretch the Out point to the current time, press Ctrl (Windows) or Command (macOS) as you select the Out time for the layer in the Out column.
Time-stretch a layer but not its keyframes
When you time-stretch a layer, the positions of its keyframes stretch with it by default. You can circumvent this behavior by cutting and pasting keyframes.
-
Make a note of the time at which the first keyframe appears. (Placing a composition marker is a good way to mark the time.)
-
In the Timeline panel, select the name of one or more layer properties containing the keyframes you want to keep at the same time.
-
Select Edit > Cut.
-
Move or stretch the layer to its new In and Out points.
-
Move the current-time indicator to the time at which the first keyframe appeared before you cut the keyframes.
-
Select Edit > Paste.
Reverse the playback direction of a layer
When you reverse the direction at which a layer plays back, all keyframes for all properties on the selected layer also reverse order. The layer itself maintains its original In and Out points relative to the composition.
For best results, precompose the layer and then reverse the layer inside the precomposition.
-
In a Timeline panel, select the layer you want to reverse.
-
Select Layer > Time > Time-Reverse Layer, or use Ctrl+Alt+R (Windows) or Command+Option+R (macOS).
Reverse keyframes without reversing layer playback
You can select and reverse keyframes across multiple layers and properties, but each set of keyframes for a property is reversed only within its original time range and not that of any other selected property. Markers in the Timeline panel are not reversed, so you may need to move markers after reversing keyframes.
-
In the Timeline panel, select a range of keyframes you want to reverse.
-
Select Animation > Keyframe Assistant > Time-Reverse Keyframes.
Time-remapping
You can expand, compress, play backward, or freeze a portion of the duration of a layer using a process known as time-remapping. For example, if you are using footage of a person walking, you can play footage of the person moving forward, and then play a few frames backward to make the person retreat, and then play forward again to have the person resume walking. Time-remapping is good for combinations of slow motion, fast motion, and reverse motion.
The Timewarp effect provides similar features with more control over some aspects of frame blending, but with additional limitations as a result of being applied as an effect.


Frames from non-time-remapped footage are displayed at a constant speed in one direction.


Time-remapping distorts time for a range of frames within a layer.
When you apply time-remapping to a layer containing audio and video, the audio and video remain synchronized. You can remap audio files to gradually decrease or increase the pitch, play audio backward, or create a warbled or scratchy sound. Still-image layers cannot be time-remapped.
You can remap time in either the Layer panel or the Graph Editor. Remapping video in one panel displays the results in both. Each provides a different view of the layer duration:
The Layer panel provides a visual reference of the frames you change, as well as the frame number. The panel displays the current-time indicator and a remap-time marker, which you move to select the frame you want to play at the current time.
The Graph Editor provides a view of the changes you specify over time by marking your changes with keyframes and a graph like the one displayed for other layer properties.
When remapping time in the Graph Editor, use the values represented in the Time Remap graph to determine and control which frame of the movie plays at which point in time. Each Time Remap keyframe has a time value associated with it that corresponds to a specific frame in the layer; this value is represented vertically on the Time Remap value graph. When you enable time remapping for a layer, After Effects adds a Time Remap keyframe at the start and end points of the layer. These initial Time Remap keyframes have vertical time values equal to their horizontal position on the timeline.
By setting additional Time Remap keyframes, you can create complex motion results. Each time you add a Time Remap keyframe, you create another point at which you can change the speed or direction of playback. As you move the keyframe up or down in the value graph, you adjust which frame of the video is set to play at the current time. After Effects then interpolates intermediate frames and plays the footage forward or backward from that point to the next Time Remap keyframe. In the value graph, reading from left to right, an upward angle indicates forward playback, while a downward angle indicates reverse playback. The amount of the upward or downward angle corresponds to the speed of playback.
Similarly, the value that appears next to the Time Remap property name indicates which frame plays at the current time. As you drag a value graph marker up or down, this value changes accordingly, and a Time Remap keyframe is set, if necessary. You can select this value and type a new one or drag the value to adjust it.
The original duration of the source footage may no longer be valid when remapping time because parts of the layer no longer play at the original rate. If necessary, set a new duration for the layer before you remap time.
As with other layer properties, you can view the values of the Time Remap graph as either a value graph or a speed graph.
If you remap time and the resulting frame rate is very different from the original, the quality of motion within the layer may suffer. Apply frame blending to improve time remapping for slow motion or fast motion.
Use the information shown in the Info panel to guide you as you work with time-remapping. The ratio given in the units of seconds/sec indicates the current speed of playback—the number of seconds of the original layer being played for each second after time-remapping.
Time-remap a layer
You can time-remap all or part of a layer to create many different results, such as freeze-frame or slow-motion results.
Freeze the current frame for the duration of the layer
-
In a Composition or Timeline panel, select the layer.
-
Place the current-time indicator on the frame that you want to freeze.
-
Select Layer > Time > Freeze Frame.
Time-remapping is enabled, and After Effects places a Hold keyframe at the position of the current-time indicator to freeze the frame. If you previously enabled time-remapping on the layer, any keyframes you created are deleted when you apply the Freeze Frame command.
Freeze the first frame without changing the speed
-
In a Composition or Timeline panel, select the layer that you want to remap.
-
Select Layer > Time > Enable Time Remapping.
This command adds two Time Remap keyframes by default, one at the beginning of the layer and one at the end.
-
Move the current-time indicator to where you want the movie to begin.
-
Select the Time Remap property name to select the start and end keyframes.
-
Drag the first keyframe to the current-time indicator, which moves the start and end keyframes. (If you are working in the Graph Editor, drag the bounding box, not the keyframe or a handle, so both keyframes move.)
Freeze a frame in the middle of the duration of a layer
-
In a Composition or Timeline panel, select the layer that you want to remap.
-
Select Layer > Time > Enable Time Remapping.
This command adds two Time Remap keyframes by default, one at the beginning of the layer and one at the end.
-
Move the current-time indicator to the frame that you want to freeze, and set a Time Remap keyframe at the current time by selecting the keyframe navigator diamond for the Time Remap property.
-
Select the last two Time Remap keyframes (the second and third keyframes) and drag them to the right.
-
Press F2 to deselect the keyframes, and then select the second (middle) keyframe to select it.
-
Press Ctrl+C (Windows) or Command+C (macOS) to copy the keyframe.
-
Press Ctrl+V (Windows) or Command+V (macOS) to paste the keyframe at the current time. You should not have moved the current-time indicator since step 3.
-
Optionally, to extend the layer so that its duration is increased to accommodate the time added by the freeze-frame operation, press the K key twice to move the current-time indicator to the last Time Remap keyframe, and press Alt+] (Windows) or Option+] (macOS).
The portion of the layer between the first and second keyframes plays at an unaltered rate (the same as for the non-time-remapped layer), as does the portion of the layer between the third and fourth keyframes. The second and third keyframes are identical, so a single frozen frame plays during the time between those two keyframes.
Freeze on the last frame
You can also freeze the last frame of a layer until the end of the composition. After Effects sets time remapping keyframes in the layer and extends the layer duration until the end of the composition.
-
In a Composition or Timeline panel, select the layer.
-
Select Layer > Time > Freeze Frame.
Remap time using the Graph Editor
To switch between Graph Editor mode and layer bar mode, press Shift+F3.
-
In a Composition or Timeline panel, select the layer you want to remap.
-
Select Layer > Time > Enable Time Remapping.
-
In the Timeline panel, select the name of the Time Remap property to select it.
-
Move the current-time indicator to the time at which to add a keyframe, and select the keyframe button in the keyframe navigator to add a keyframe.
-
In the Graph Editor, drag the keyframe marker up or down, watching the Time Remap value as you drag. To snap to other keyframes, Shift-drag.
To slow the layer down, drag the keyframe down. (If the layer is playing in reverse, drag up.)
To speed the layer up, drag the keyframe up. (If the layer is playing in reverse, drag down.)
To play frames backward, drag the keyframe down to a value below the previous keyframe value.
To play frames forward, drag the keyframe up to a value above the previous keyframe value.
To freeze the previous keyframe, drag the current keyframe marker to a value equal to the previous keyframe value so that the graph line is flat. Another method is to select the keyframe and choose Animation > Toggle Hold Keyframe, and then add another keyframe where you want the motion to start again.
Before you move a time-remap keyframe, it’s a good idea to select all subsequent time-remap keyframes in the layer first. This selection will preserve the timing of the rest of the layer when you remap time for the current keyframe.
Remap time in a Layer panel
-
Open the Layer panel for the layer you want to remap.
-
Select Layer > Time > Enable Time Remapping. A second time ruler appears in the Layer panel above the default time ruler and the navigator bar.
-
On the lower time ruler, move the current-time indicator to the first frame where you want the change to occur.
-
On the upper time ruler, the remap-time marker indicates the frame currently mapped to the time indicated on the lower time ruler. To display a different frame at the time indicated on the lower time ruler, move the remap-time marker accordingly.
-
Move the current-time indicator on the lower time ruler to the last frame where you want change to occur.
-
Move the remap-time marker on the upper time ruler to the frame you want to display at the time indicated on the lower time ruler:
To move the preceding portion of the layer forward, set the remap-time marker to a later time than the current-time indicator.
To move the preceding portion of the layer backward, set the remap-time marker to an earlier time than the current-time indicator.
To freeze a frame, set the remap-time marker to the frame you want frozen. Then, move the current-time indicator (lower ruler) to the last point in time where the frame will appear frozen and move the remap-time marker again to the frame you want frozen.
Time-remap audio pitch
The speed graph of the Time Remap property directly relates to the pitch of an audio file. By making subtle changes to the speed graph, you can create a variety of interesting effects. To avoid screeching audio, you may want to keep the Speed value below 200%. When the speed is too high, use the Levels controls, located under the Audio property, to control the volume.
You may hear clicks at the beginning and end of an audio (or an audio and video) layer after setting new In and Out points in the Time Remap graph. Use the Levels controls to remove these clicks.
Change the pitch of an audio layer
-
In a Composition or Timeline panel, select the layer you want to remap.
-
Select Layer > Time > Enable Time Remapping.
-
Select the Graph Editor button in the Timeline panel to display the Graph Editor, if necessary.
-
Select the Choose Graph Type And Options button at the bottom of the Graph Editor and select Edit Speed Graph.
-
Move the current-time indicator to the frame where you want the change to begin, and then select the Add A Keyframe button.
-
On the speed graph below the keyframe, drag a marker, watching the Speed value as you drag.
To lower the pitch, drag the speed graph marker down.
To increase the pitch, drag the speed graph marker up.
Remove clicks from new In and Out points
-
In the Timeline panel, select the audio (or audio and video) layer to which you applied time-remapping.
-
Expand the layer outline to display the Audio property and then the Audio Levels property.
-
Move the current-time indicator to the new In point and choose Animation > Add Audio Levels Keyframe.
-
In the Audio panel, change the decibel value to 0.0.
Note:Select Windows > Audio to enable the Audio panel.
-
Use the Page Up key on your keyboard to move the current-time indicator to the previous frame.
-
In the Audio panel, change the decibel level to -96.0.
-
Move the current time to the new Out point and set the decibel level to 0.
-
Use the Page Down key to move the current-time indicator to the next frame.
-
In the Audio panel, change the decibel level to -96.0.
Note:Select Options from the Audio panel menu to launch the Audio Options dialog box and change the Slider Minimum decibel value.
Frame blending
When you time-stretch or time-remap a layer to a slower frame rate or to a rate lower than the frame rate of its composition, movement can appear jerky. This jerky appearance results because the layer now has fewer frames per second than the composition. Likewise, the same jerky appearance can occur when you time-stretch or time-remap a layer to a frame rate that is faster than the frame rate of its composition. To create smoother motion when you slow down or speed up a layer, use frame blending. Don’t apply frame blending unless the video of a layer has been re-timed—that is, the video is playing at a different frame rate than the frame rate of the source video.
After Effects provides two types of frame blending: Frame Mix and Pixel Motion. Frame Mix takes less time to render, but Pixel Motion provides much better results, especially for footage that has been drastically slowed down.
The Quality setting you select also affects frame blending. When the layer is set to Best quality, frame blending results in smoother motion but may take longer to render than when set to Draft quality.
When working with a frame-blended layer in Draft mode, After Effects always uses Frame Mix interpolation to increase rendering speed.
You can also enable frame blending for all compositions when you render a movie.
Use frame blending to enhance the quality of time-altered motion in a layer that contains live-action footage—video, for example. You can apply frame blending to a sequence of still images, but not to a single still image. If you are animating a layer—for example, moving a text layer across the screen—use motion blur.
You can't apply frame blending to a precomposition layer (a layer that uses a nested composition as its source footage item). You can, however, apply frame blending to the layers within the nested composition if those layers themselves are based on motion footage items, such as video or image sequences.
-
Select the layer in the Timeline panel.
-
Do one of the following:
Select Layer > Frame Blending > Frame Mix.
Select Layer > Frame Blending > Pixel Motion.
A check mark adjacent to the appropriate Frame Blending command (Frame Mix or Pixel Motion) indicates that it's applied to the selected layer. Also, the Frame Blending switch appears in the Switches column for the layer in the Timeline panel. Remove frame blending either by selecting the Frame Blending switch or by choosing the appropriate Frame Blending command again.
Regardless of the state of the layer switches, if frame blending is off for the composition, it's off for all layers in the composition. Set frame blending for the composition by choosing Enable Frame Blending from the Timeline panel menu or by selecting the Enable Frame Blending button at the top of the Timeline panel.
Motion blur can make it harder for Pixel Motion to find discrete objects in each frame, which makes the calculation of motion vectors less reliable. For better results when using Pixel Motion to create slow motion, use footage with less motion blur.
