Learn how to batch extract web-optimized images with multiple resolutions, including images for HiDPI screens, from a Photoshop document.
Effective July 01, 2022, the features in Extract panel will be discontinued in Dreamweaver 21.2 and earlier versions. You can use Adobe Photoshop to extract style information, assets from PSD components, and reuse them in Dreamweaver.

Kaj boste potrebovali
Use the new Batch Extract feature to extract production-ready images with multiple resolutions by opening a Photoshop document inside of Dreamweaver's Extract panel. The benefit of having multiple resolutions for web images is that you can optimize your website to display the best image according to the resolution of the device it is viewed on.

Upload a PSD in Dreamweaver Extract
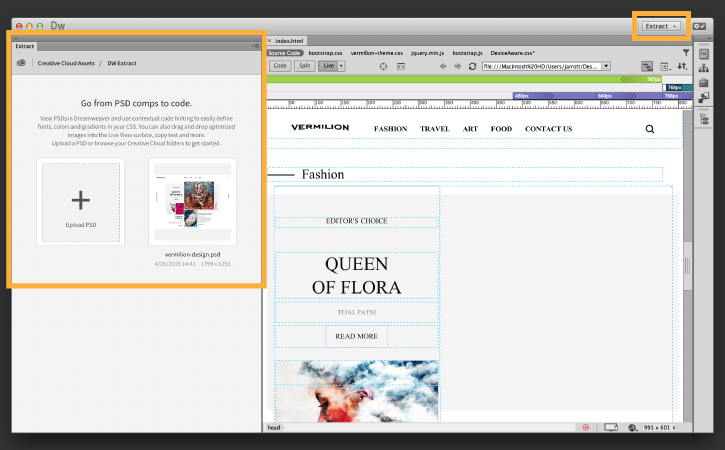
Download and unzip the batch-extract-assets.zip project files. Open index.html in Dreamweaver, and switch to the Extract workspace.
In the Extract panel, click Upload PSD and open vermilion-design.psd, included in the project files.

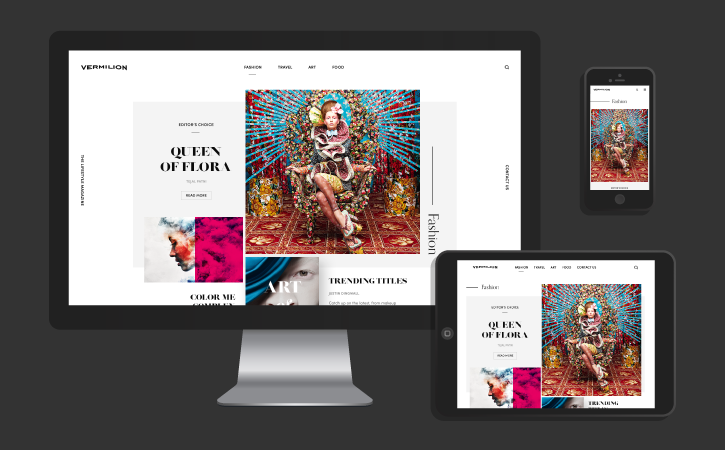
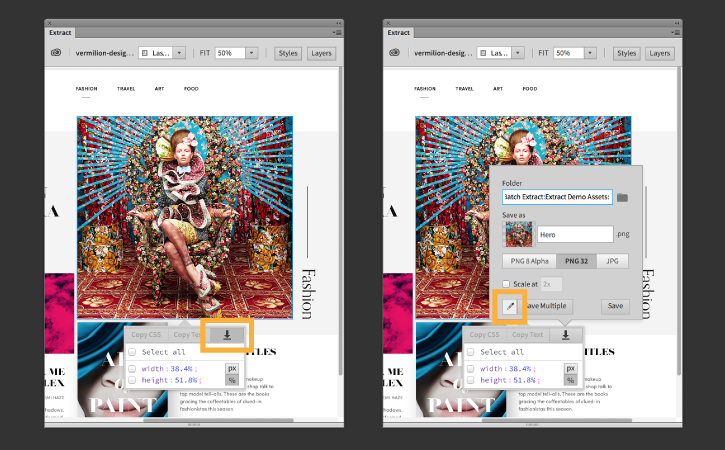
In the Extract panel, select the hero image and click the Extract icon to open the Extract Asset options.
Before you extract images, make sure to check the extract location and file naming properties so that they best fit your site structure. To do so, click the Edit Preferences icon.

Set Extract Preferences
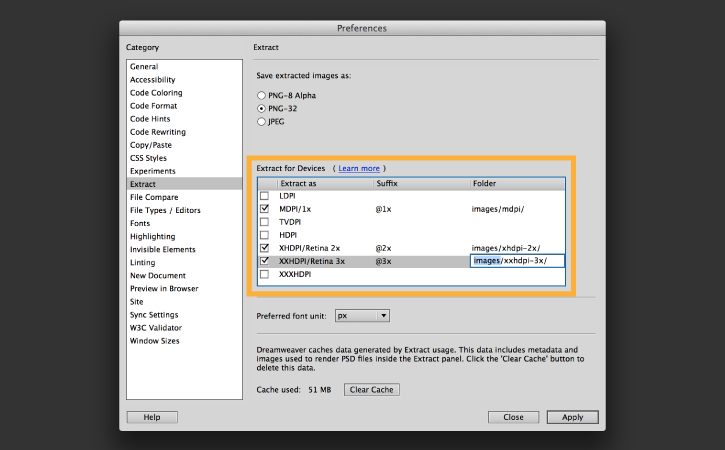
By default, Dreamweaver extracts your image at three different resolutions. MDPI (medium resolution), XHDPI (extra high definition), and XXHDPI (double-extra high definition). In the preferences dialog:
- Specify the resolutions to extract.
- Customize the suffixes that Dreamweaver appends to the filename.
- Choose which folders to save the images.
In the Folder section, add images/ to the beginning of the file path for each of the three resolutions. Click Apply. Then, click Close.

Extract images
In the Extract Asset options, you can set additional details such as asset name and file type.
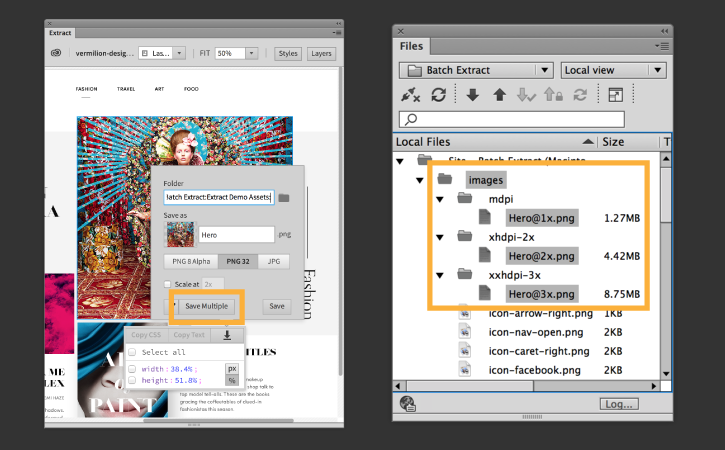
Click Save Multiple.
Once extracted, open the Files panel to see the result of the batch extract process. According to the Extract preferences, Dreamweaver extracts the hero image at 3 different resolutions and adds them to custom folders within the site structure. All with a single click.

Add the images to individual media queries
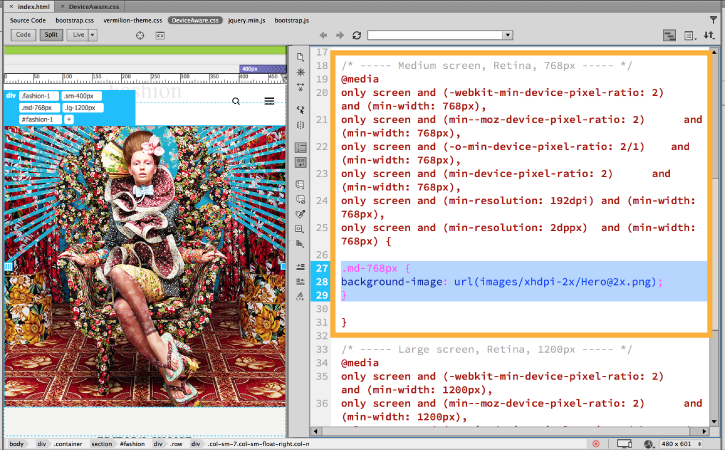
Open DeviceAware.css to see three media queries that define three different screen resolutions (small non-retina, medium retina, large retina). Each media query includes a CSS class. In each class, define the background-image property and browse to the extracted image best suited for each media query.
The example to the right shows the media query defining a medium retina screen, and the corresponding CSS class. For this resolution, it is best to display the XHDPI version of our image.

Use percentages to define image sizes
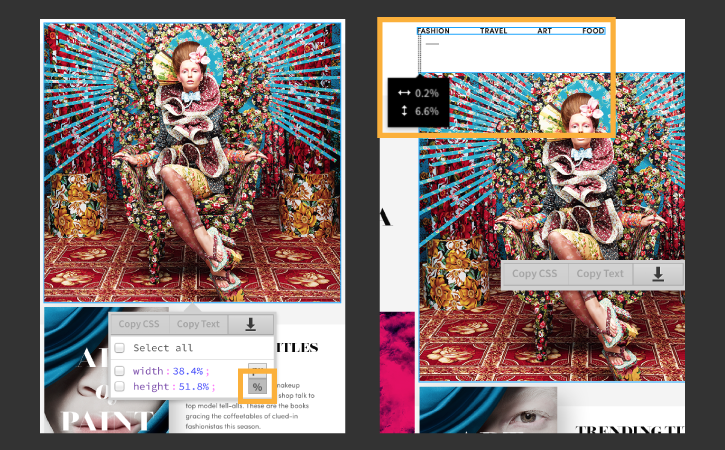
For responsive websites, use percentage values to define width, height, and other positioning properties instead of absolute pixel values.
To change the unit of measurement to percentages in the Extract panel, select the hero image and choose the percent symbol (%).
The width and height properties are now displayed as percentages. If you select two elements, their distances will be defined in percentages. As always, you can select and copy CSS directly from the Extract panel to paste into your code.
