Log in to the Adobe Admin Console as an administrator
- To access the Admin Console from Acrobat online, click on your profile and the “Manage Team” option in the drop-down menu
If you have purchased an Acrobat Pro for Teams or Acrobat Pro with enhanced e-sign for Teams plan, use the Admin Console to manage users and entitlements associated with them. You can also assign multiple administrators to help manage your team or the functional behavior of Adobe Acrobat Sign.
If you have Document Cloud for business, Document Cloud for enterprise, Acrobat Sign – Business or Acrobat Sign – Enterprise plans, see Adobe Acrobat Sign administration for more information.
To configure and administer the Acrobat Sign service, a user with an active license must be enabled with an administrative role.
Elevating a user to an account-level administrative role in Acrobat Sign requires an administrator in the Adobe Admin Console to either:
Log in to the Adobe Admin Console as an administrator


On the Products tab, click on the Assign Users button located on the Acrobat Sign offering card
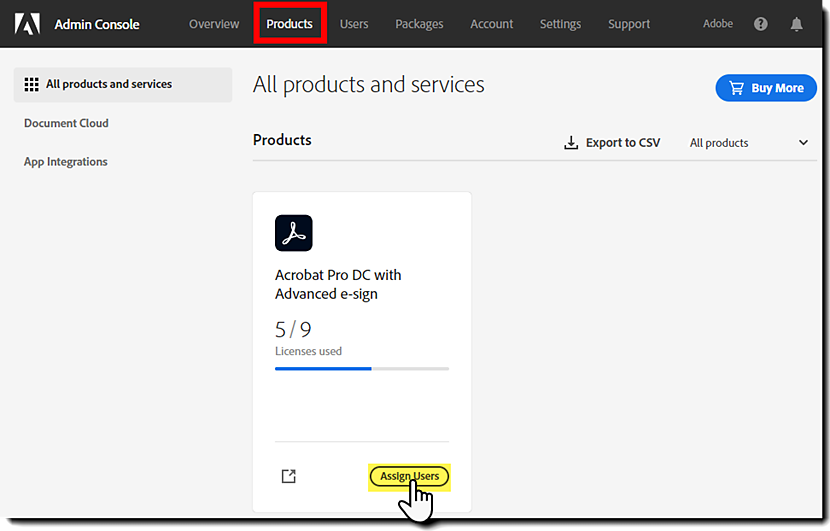

The Add User to Acrobat Sign page loads:


A success message displays when the user rights have been updated in the Admin Console and the user in Acrobat Sign is updated with the new role authority.
If you have many users to add or edit, you can upload a CSV file to make all of the changes programmatically.


Log in to the Adobe Admin Console as an administrator
Navigate to the Acrobat Sign product page: Products > Document Cloud > Acrobat Sign
Identify the user you want to edit.
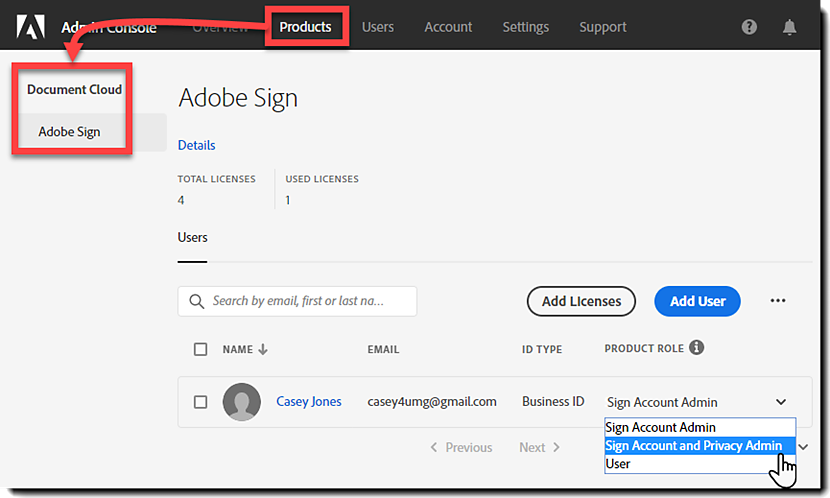

A success message displays when the user rights have been updated in the Admin Console and the user in Acrobat Sign is updated with the new role authority.
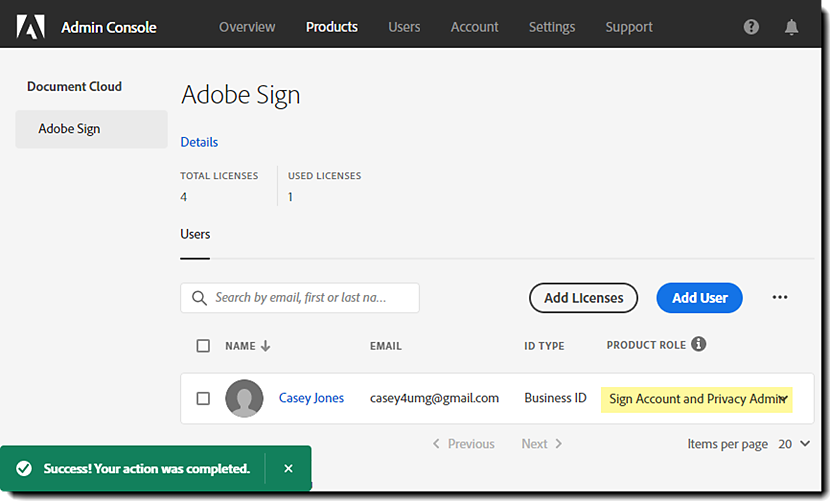

Log in to the Adobe Admin Console as an administrator


On the Products tab, click on Document Cloud in the left rail to expand the menu item
Select your e-sign offering to expose the user list entitled for the service
Select one or more users that are to have their entitlement removed
You will be challenged to ensure you want to remove the user(s) from the service.
Click Remove User
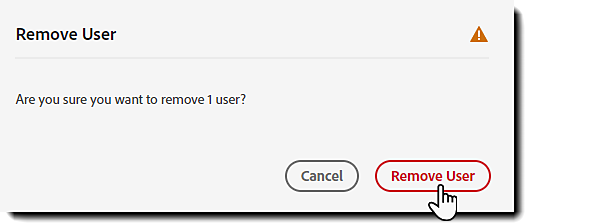

A success message displays when the user rights have been updated.
Log in to the Adobe Admin Console as an administrator
Navigate to the Acrobat Sign product: Products > Document Cloud > Acrobat Sign
Find the user you want to remove admin authority from
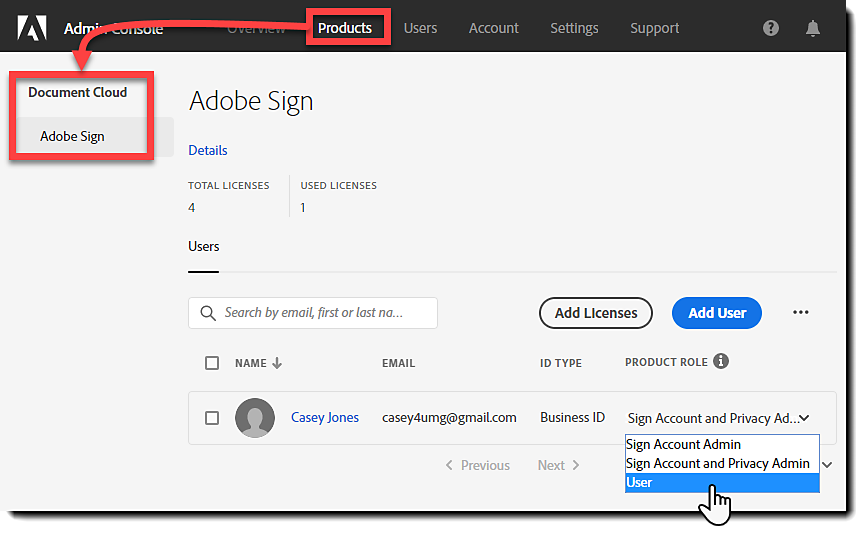

A success message displays when the user rights have been updated in the Admin Console and the user in Acrobat Sign is updated with the new role authority.
There are certain cases that can prevent an admin from successfully delegating an "Acrobat Sign for Teams" seat to an end-user through the team admin console. A team admin might encounter an error like "The user cannot be assigned to this license. Learn more."
If you are getting this error, try delegating again using a different end-user email address, or Contact Support.
Access to the e-sign settings for your users is available through the Settings option on your user profile.
Click your user profile icon in the upper-right corner of the window
Select Settings from the menu options
Click the Edit settings button on the Settings panel


The Acrobat Sign admin menu loads:
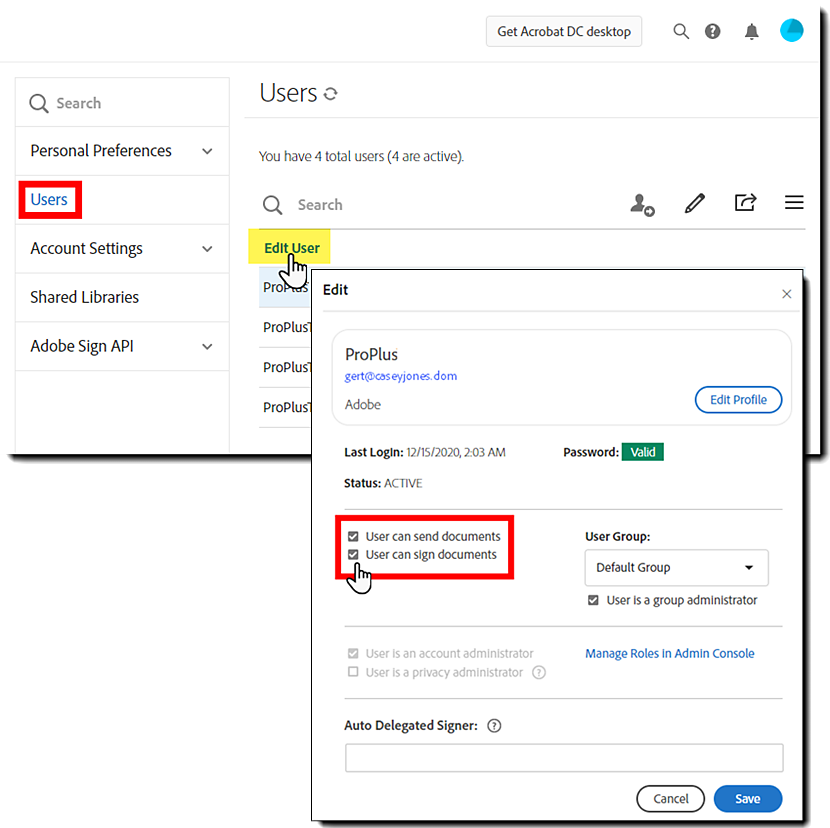
Click the Users tab
Single click the user you want to edit
Click the Edit User link
You can edit the users authority to Sign (and/or Send) agreements as needed.
Click Save when done. The change to the user's authority takes place immediatly.

Click your user profile icon in the upper-right corner of the window
Select Settings from the menu options
Click the Edit settings button on the Settings panel


The Acrobat Sign admin menu loads:
Click the Users tab
Single click the user you want to edit
Click the Edit User link
Click Edit Profile
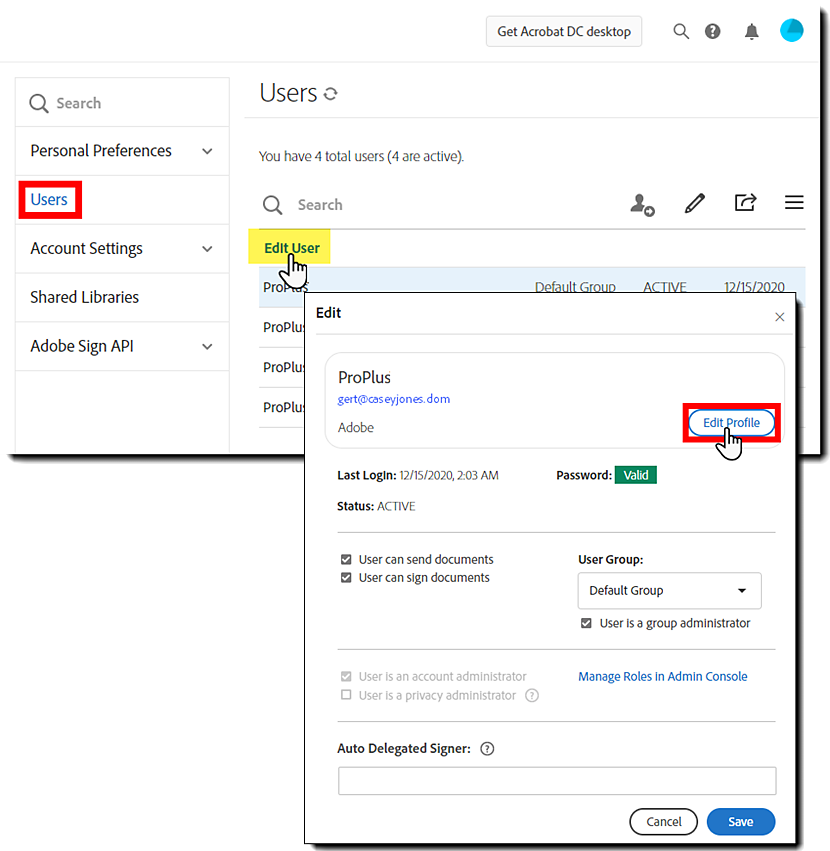

The Edit panel opens, allowing you to edit the:
If you need to edit the Name values of a user, then you must use the CSV update method.
Once all of your edits are in place, click Save


Click your user profile icon in the upper-right corner of the window
Select Settings from the menu options
Click the Edit settings button on the Settings panel


The Acrobat Sign admin menu loads:
Click the Users tab
Click the Export user list icon
This will produce a CSV of every user in the account.


Click the pencil icon to open the option to update users in bulk via CSV
Click the Browse button to search for and attach the CSV with your user updates
Click Save


A Success! message is displayed, showing the numb er of users updated in the process.