Important notice for Mixamo customers.
We’re retiring features and services on this site, learn how this affects you. Visit http://blogs.adobe.com/adobecare/2017/05/23/download-assets-from-mixamo/.
To create a custom clothing for Fuse CC, you begin by choosing the base character on which you want to model your clothing. For the base character, you can either choose the base meshes (.obj) provided in the Content Creator Pack or a custom body that you have created. Then you create a high quality sculpt for your clothing item. You can create clothing items such as tops, bottoms, hats, eyewear, and shoes. Once your sculpt is ready, you extract the texture maps along with a low-resolution mesh of the custom clothing asset from your scuplting software. These files are then imported into Fuse CC.
Before you begin, see Create custom content for Fuse to know about the prerequisites and the general recommendations for creating custom clothing.
Clothing is modeled onto a base character. You can either:
- Model your clothing on the base meshes provided in the Content Creator Pack (MaleFitA.obj and FemaleFitA.obj).
- Model your clothing to fit onto a custom body you have created. See Create a custom body for details. To use the custom clothing in Fuse CC (Beta), first import the custom body.

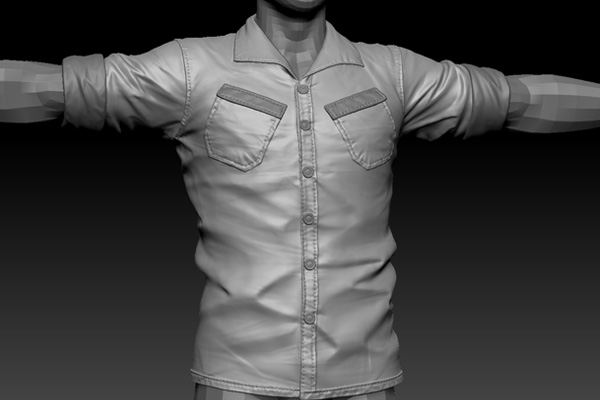
The quality of the sculpt is important to a good clothing asset. Use your digital sculpting software to achieve the highest quality in your sculpt.

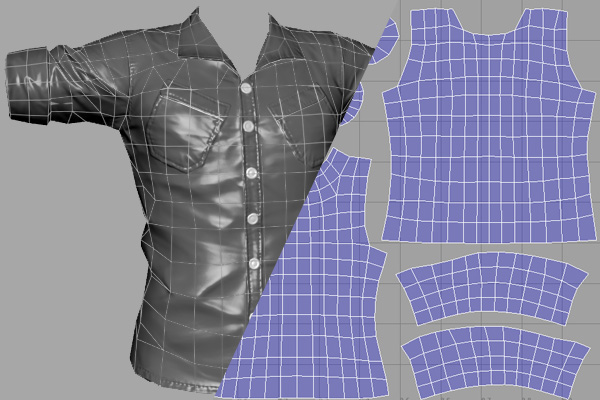
Unlike the custom body, the custom clothing does not have any specific UV requirements. So you can create use topology and UV layout for the custom clothing. However, consider the following pointsfor the low resolution (or low poly) mesh that you create.
- The low polymesh has soft normals (single smoothing group) so that all the hard edged information is held inside the normal map.
- It has a single UV layout per item.
- It does not extend beyond the 0-1 UV space.
- It does not overlap and is not flipped/mirrored.
- It is laid out either horizontally or vertically for consistent substances. For example, if you have the front of the shirt horizontal and the back of the shirt vertical, the substance like horizontal/vertical stripe can look very different from each other.
It is recommended to have the average triangle count in the range mentioned below depending on the custom clothing item that you are creating:
Tops: 2,000 - 4,000
Bottoms: 1,500 - 2,000
Hats: 1,000 - 2,000
Shoes: 2,000
Eyeware: 500 - 1,000
Once you have finished sculpting your custom clothing, you have to extract certain key maps from the digital sculpting software that you are using. These maps are used for generating textures for the custom clothing when you import them in Fuse CC.
The following settings are recommended for the extracted maps:
Map dimension: 2048 x 2048 pixels
Color depth: 8-bit RGB
Image format: PNG
Naming convention for extracted maps
The generic file naming structure for the maps is
Category_CharacterModeledOn_NameofItem_NameofMap. For example,
Top_MaleFitA_RolledSleevesShirt_StdNM.png.

The color mask is unique to the clothing, and important for defining the regions of the custom clothing where separate substances can be used. It is a simple color ID map that you can paint in any appropriate program. Whenever you need individual texture options on the custom clothing, you can mask off with any of the following 8 available color values:
| Color | RGB value | Hexadecimal value |
| Red | 255, 0, 0 | #ff0000 |
| Green | 0, 255, 0 | #00ff00 |
| Blue | 0, 0, 255 | #0000ff |
| Yellow | 255, 255, 0 | #ffff00 |
| Magenta | 255, 0, 255 | #ff00ff |
| Cyan | 0, 255, 255 | #00ffff |
| White | 255, 255, 255 | #ffffff |
| Black | 0, 0, 0 | #000000 |
Note
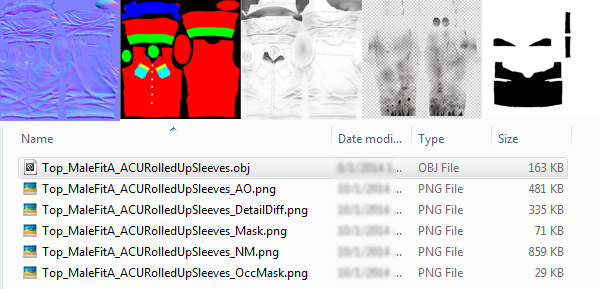
Try to use of all the eight colors in the Color Mask map, even if your default design doesn't need them. Notice how the pockets and sleeves are masked in the image above. Color masking allows further customization and use of a clothing asset.

If there are transparent parts of the custom clothing asset, the transparency should be simply included in the alpha channel of the color mask. To do this in Photoshop CC, see Create and edit alpha channel masks.

The occlusion mask is unique to clothing and hair. It is painted on the base character on which the clothing is fitted over. The occlusion mask excludes the body geometry that is covered by clothing. To create this mask:
- With the clothing item placed over the character, paint the body polygons that you want to delete in black.
- Paint the rest of the polygons in white.

Use the recommended naming convention for filenames for importing them into Fuse CC in an organized manner.
Your clothing geometry: Top_MaleFitA_RolledSleevesShirt.obj
Normal Map: Top_MaleFitA_RolledSleevesShirt_NM.png
Color Mask: Top_MaleFitA_RolledSleevesShirt_Mask.png
Occlusion Mask: Top_MaleFitA_RolledSleevesShirt_OccMask.png
Ambient Occlusion Map: Top_MaleFitA_RolledSleevesShirt_AO.png
Detail Overlay Map: Top_MaleFitA_RolledSleevesShirt_DetailDiff.png

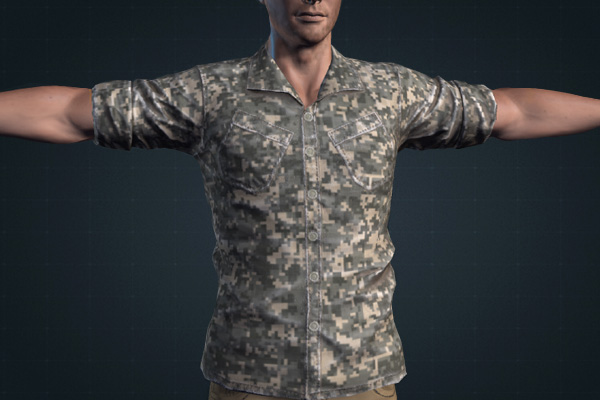
To import custom body files, choose File > Import > Import Clothing option from the menu bar in Fuse CC. See Import custom clothing and hair for details.


