Before you begin
We're rolling out a new, more intuitive product experience. If the screen shown here doesn’t match your product interface, select help for your current experience.
Before you begin
We're rolling out a new, more intuitive product experience. If the screen shown here doesn’t match your product interface, select help for your current experience.
The success of a preflight inspection depends on how well you define the criteria for the inspection. The inspection criteria are packaged in a file called a preflight profile. A preflight profile includes one or more checks, fixups, or both checks and fixups. Each check includes one or more property statements that validate the PDF content. Preflight shows an error only if all the property statements in the check are in error. In the Preflight: Edit Profile dialog box, you can specify which values to use and how to handle mismatches. For example, you can choose a profile that reports mismatches or a profile that automatically fixes a mismatch according to its specified parameters. A profile with a fixup has the filled-in gray wrench icon next to it.
Adobe Acrobat includes several predefined preflight profiles organized into groups, such as Digital Printing, PDF Analysis, Prepress, PDF/A, PDF/E, or PDF/X Compliance. You can use the predefined profiles or modify them to create custom profiles. The checks that make up the profiles (called rules in previous versions of Acrobat) are organized by categories, such as Documents, Pages, Images, and so on. Each check in a category governs a particular document property.
To help you determine what document properties the preflight profile analyzes, you can review information about each selected check in the Preflight Edit Profile dialog box. This information describes the check's criteria to analyze and possibly fix a document property.
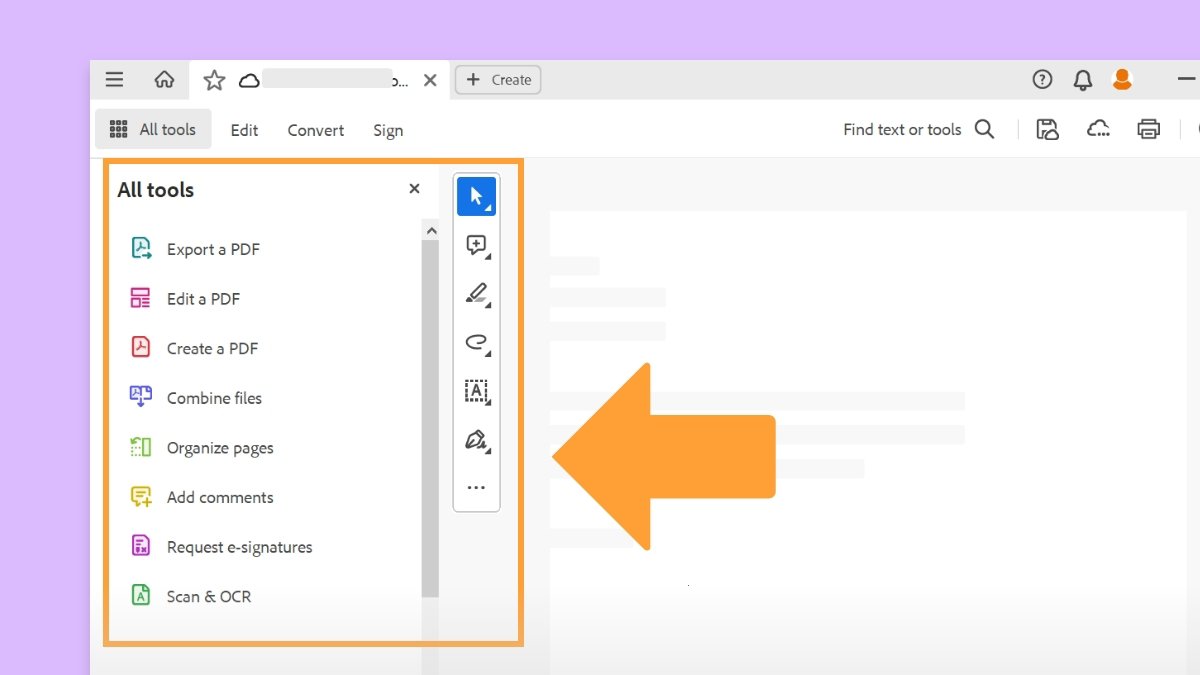
From the Home view in Acrobat, select See all tools > Use print production. Then, from the Use Print Production tools pane, select Preflight.
From the Preflight dialog box, select the Profiles tab if another panel is displayed.
Switch to the desired library using the library drop-down. It's set to Essentials as default.

The list includes all predefined profiles, and any custom profiles you’ve created.
From the Home view in Acrobat, select See all tools > Use print production. Then, from the Use Print Production tools pane, select Preflight.
From the Preflight dialog box, select the Profiles tab if another panel is displayed.
Select a profile, select the flag next to the profile name, and select Favorite.

The Preflight Edit Profile dialog box lists all available profiles and shows which document properties are being analyzed. You can unlock and lock a profile from this dialog box, create a new group for organizing profiles, and specify inspection criteria. You can access additional options and information by expanding your profile.
To open the Preflight Edit Profile dialog box, select the Select Profiles button  in the Preflight dialog box, expand a profile group, and select Edit.

A. Profile B. Predefined set of checks C. More options D. Profile groups
You can create your custom preflight profiles. Before you create a new profile from scratch, review existing profiles for ones that achieve results similar to those you want. If possible, duplicate an existing profile and modify only the relevant portion.
A preflight profile must contain at least one check or fix and one property that validates the PDF content. You can use existing properties or create new ones when you build a check from scratch. For best results when creating and modifying profiles, add as many checks as needed to validate the PDF content and keep the checks and properties simple and straightforward. For example, you can use a PDF/X profile to check for certain criteria and add checks for non-PDF/X criteria, such as image resolution.
From the Home view in Acrobat, select See all tools > Use print production. Then, from the Use Print Production tools pane, select Preflight.
In the Profiles tab of the Preflight dialog box, select the Select Profiles button .
Select Options > Create Profile.
Enter a name and purpose for the new profile and specify other options as desired. Select OK.
By default, newly created profiles appear under Custom profiles, unless you assigned them to a different group.
You can Modify checks (as provided) and add additional checks and ficups by expanding the profile in the column on the left.
From the Home view in Acrobat, select See all tools > Use print production. Then, from the Use Print Production tools pane, select Preflight.
In the Profiles tab of the Preflight dialog box, select the Select Profiles button .
Select an existing profile, and select Options > Duplicate Profile.
The duplicate profile is added to the same group as the original profile.
From the Home view in Acrobat, select See all tools > Use print production. Then, from the Use Print Production tools pane, select Preflight.
In the Profiles tab of the Preflight dialog box, select the Select Profiles button .
Select Edit next to the profile for which you want to create a Preflight profile group.
In the Preflight Edit Profile dialog box, select New Group from Group drop-down list.
Enter a name for the group and select OK.
If you select a group of profiles, all profiles are moved to the new group. You can select multiple profiles to be added in a group using Ctrl-select (windows) or command-select (macOS).
From the Home view in Acrobat, select See all tools > Use print production. Then, from the Use Print Production tools pane, select Preflight.
In the Profiles tab of the Preflight dialog box, select the Select Profiles button .
Select the Profile you want to delete and then select Options in the upper right.
Select Delete Profile.
Preflight profiles can be shared with other users. For example, print service providers can provide them to their customers to ensure that jobs pass an inspection defined by those profiles before the jobs are handed off. Users in a workgroup can create their own profiles as a way to check a document before uploading to the web or printing to a special printer, or to check in-house production.
To exchange a profile, you package it for import and export. The package includes all checks and properties for the selected profile.
From the Home view in Acrobat, select See all tools > Use print production. Then, from the Use Print Production tools pane, select Preflight.
In the Preflight dialog box, select Options, and then select Import Profile.
Using the dialog box that appears, locate the preflight package file (.kfp extension), and select Open. The profile appears in the Profiles list in the Imported Profiles group.
If the imported profile is locked, you can unlock it from the Preflight Edit Profile dialog box. Open the Preflight dialog box and select Edit next to the imported Preflight profile. Select Unlocked from the drop-down menu. You can edit a profile after it's unlocked. If prompted, enter the password.
From the Home view in Acrobat, select See all tools > Use print production. Then, from the Use Print Production tools pane, select Preflight.
In the Preflight dialog box, select Export Profile from the Options menu.
Specify a location for the package, and select Save. Don’t rename the file.
To lock the profile before you export it, select Locked from the drop-down menu in the Preflight Edit Profile dialog box. You can also select Password Protected and enter a password.
If needed, rename the profile in the Preflight Edit Profile dialog box before starting the export process.
You can prevent unauthorized changes to preflight profiles by locking profiles and giving them passwords. This may be useful if preflight profiles are shared among several users. You can lock or password-protect preflight profiles when you first create them or any time you save the preflight profiles. By default, all predefined preflight profiles are locked.

From the Home view in Acrobat, select See all tools > Use print production. Then, from the Use Print Production tools pane, select Preflight.
In the Profiles tab of the Preflight dialog box, select the Profiles button .
Select Edit next to the profile you want to lock.
In the Preflight Edit Profile dialog box, choose Locked from the pop-up menu in the upper-left of the dialog box.
From the Home view in Acrobat, select See all tools > Use print production. Then, from the Use Print Production tools pane, select Preflight.
In the Profiles tab of the Preflight dialog box, select the Profiles button .
Select Edit next to the profile you want to protect with a password.
Choose Password Protected from the drop-down menu in the upper-left of the dialog box.
Enter the password, and select OK. You can use uppercase and lowercase letters, numerals, or punctuation marks.
From the Home view in Acrobat, select See all tools > Use print production. Then, from the Use Print Production tools pane, select Preflight.
In the Profiles tab of the Preflight dialog box, select the Profiles button .
Select Edit next to the profile you want to unlock.
In the Preflight Edit Profile dialog box, select Unlocked from the drop-down menu in the upper-left of the dialog box.
If prompted, enter the correct password, and select OK.
You can change the settings of a single profile.
From the Home view in Acrobat, select See all tools > Use print production. Then, from the Use Print Production tools pane, select Preflight.
In the Profiles tab of the Preflight dialog box, select the Profiles button .
Select Edit next to the profile group for which you want to change the general settings.
If needed, expand the profile group and select a profile.
If the profile is locked, select Unlocked from the drop-down menu.
Enter a new name for the profile, and describe it in the Purpose box.
To apply password protection to the profile, select Password Protected from the drop-down menu. When prompted, enter and re-enter the password, and select OK. Otherwise, select Unlocked.
Enter your name and email address.
Assign the profile to a group. Select an existing group from the menu, or select New Group, enter a name, and select OK. Groups are sorted alphabetically.
When you finish editing a password-protected profile, select Locked from the drop-down menu. You may also want to password-protect it again.
Select OK to save your changes without closing the dialog box.
If the profile is locked, select Unlocked from the drop-down menu.
Select an alert option from the drop-down menu to specify how to handle mismatches during the inspection.
Select OK to save your changes without closing the dialog box.
For each check in a profile, you specify how to handle mismatches during the inspection. You can select from the menu next to each alert icon. The icon for the alert appears next to the check in the Preflight dialog box.
Error
![]()
Generates an error message for this check (or any checks in this category). Choose this option for mismatches that you must correct before proceeding to the next stage in the workflow.
Warning
![]()
Generates a warning message for this check (or any checks in this category). Select this option for mismatches you want to know about and may need to correct before the final output.
Info
![]()
Generates a simple note for this check (or any checks in this category). Select this option for mismatches you want to know about but don't need to correct before the final output.
Inactive
![]()
Never generates an alert message for this check (or any checks in this category). Choose this option for mismatches that will not affect the output quality of the PDF document. To make the text boxes available, you must change the state from Inactive to any other state.
You can view a description of each check and its inspection criteria for a given profile by creating a profile summary.
From the Home view in Acrobat, select See all tools > Use print production. Then, from the Use Print Production tools pane, select Preflight.
In the Profiles tab of the Preflight dialog box, select the Profiles button .
Select a profile in the Preflight dialog box, and select Create Profile Summary from the Options menu.

A profile summary gets created, and you can save it on your device.

Work smarter with Acrobat on your desktop
Create, edit, and organize PDFs with powerful tools that help you stay productive anywhere.