Select a slide in your imported project.
- Captivate User Guide
- Get to know Captivate
- Adobe Captivate releases
- Adobe Captivate 13
- Adobe Captivate 12
- Project setup
- Import from PowerPoint
- Generative AI in Adobe Captivate
- Generative AI overview
- Generative AI FAQs
- Generative credits
- Generate text
- Generate images
- Generate avatar
- Generate transcripts
- Add and edit text
- Add and edit images
- Add and edit media
- Interactive components
- Create quizzes
- Add widgets
- Interactions and animations
- Enhance your e-learning project
- Simulation projects
- Timeline and TOC
- Review and collaborate
- Preview and publish
- Accessibility
- Design options in Adobe Captivate
- Additional resources
Learn to customize shapes from PowerPoint slides in Adobe Captivate. Add text, create interactive buttons, and apply animations to build engaging eLearning content.
Overview
When you import PowerPoint slides into Adobe Captivate, all shapes from the original presentation are automatically converted into editable Captivate shapes. This lets you move beyond static content, where you can customize, animate, and make shapes interactive to create engaging eLearning experiences.
Work with shapes in imported slides
Once converted, shapes in Captivate behave like any other editable object. You can adjust their appearance, add interactivity, and use them to enhance your course design.
Here is what you can do:
- Add new shapes to imported slides to highlight key information or create visual focus.
- Customize appearance and properties, including color, borders, and effects, to align with your design theme.
- Insert text inside shapes for clear and concise labeling.
- Create multi-state objects that respond to learner actions.
- Apply animations and triggers to make content dynamic and interactive.
- Arrange shapes in layers to maintain proper visual hierarchy and control interactions.
Supported shapes:
| Type | Shapes |
|---|---|
| Basic shapes | Rectangles, circles, triangles, stars, and other geometric forms. |
| Line shapes | Straight lines, curves, and connectors. |
| Arrows | Directional indicators and flow arrows. |
| Callouts | Speech bubbles, text callouts, and annotation shapes. |
| Symbols | Icons, markers, and special characters. |
Add new shapes to imported slides
-
-
Select Add shapes from the left toolbar.
Add shapes on imported slides Add shapes on imported slides -
Choose a shape from the available categories, then select anywhere on the slide to insert it.
Shapes can be freely positioned and resized on imported slides to create custom interactive elements Shapes can be freely positioned and resized on imported slides to create custom interactive elements
Position and resize shapes
You can move, resize, and adjust shapes on a slide to create the desired layout and visual balance.
- To move a shape: Drag it anywhere on the slide.
- To resize a shape: Drag the corner handles to increase or decrease its size.
- To modify a shape: Some shapes include a yellow control point. Drag this handle to adjust the curvature or change the shape’s geometry.
Shapes with a control point offer more flexibility, enabling you to fine-tune curves or create variations of the same base shape.


Advanced shape positioning
In the Transform section of the Visual Properties panel, you can:
- Rotate or flip shapes based on the canvas orientation.
- Resize shapes either proportionally or freely.
- Position shapes precisely using numeric input for X and Y coordinates.
- Lock the aspect ratio to maintain consistent proportions.
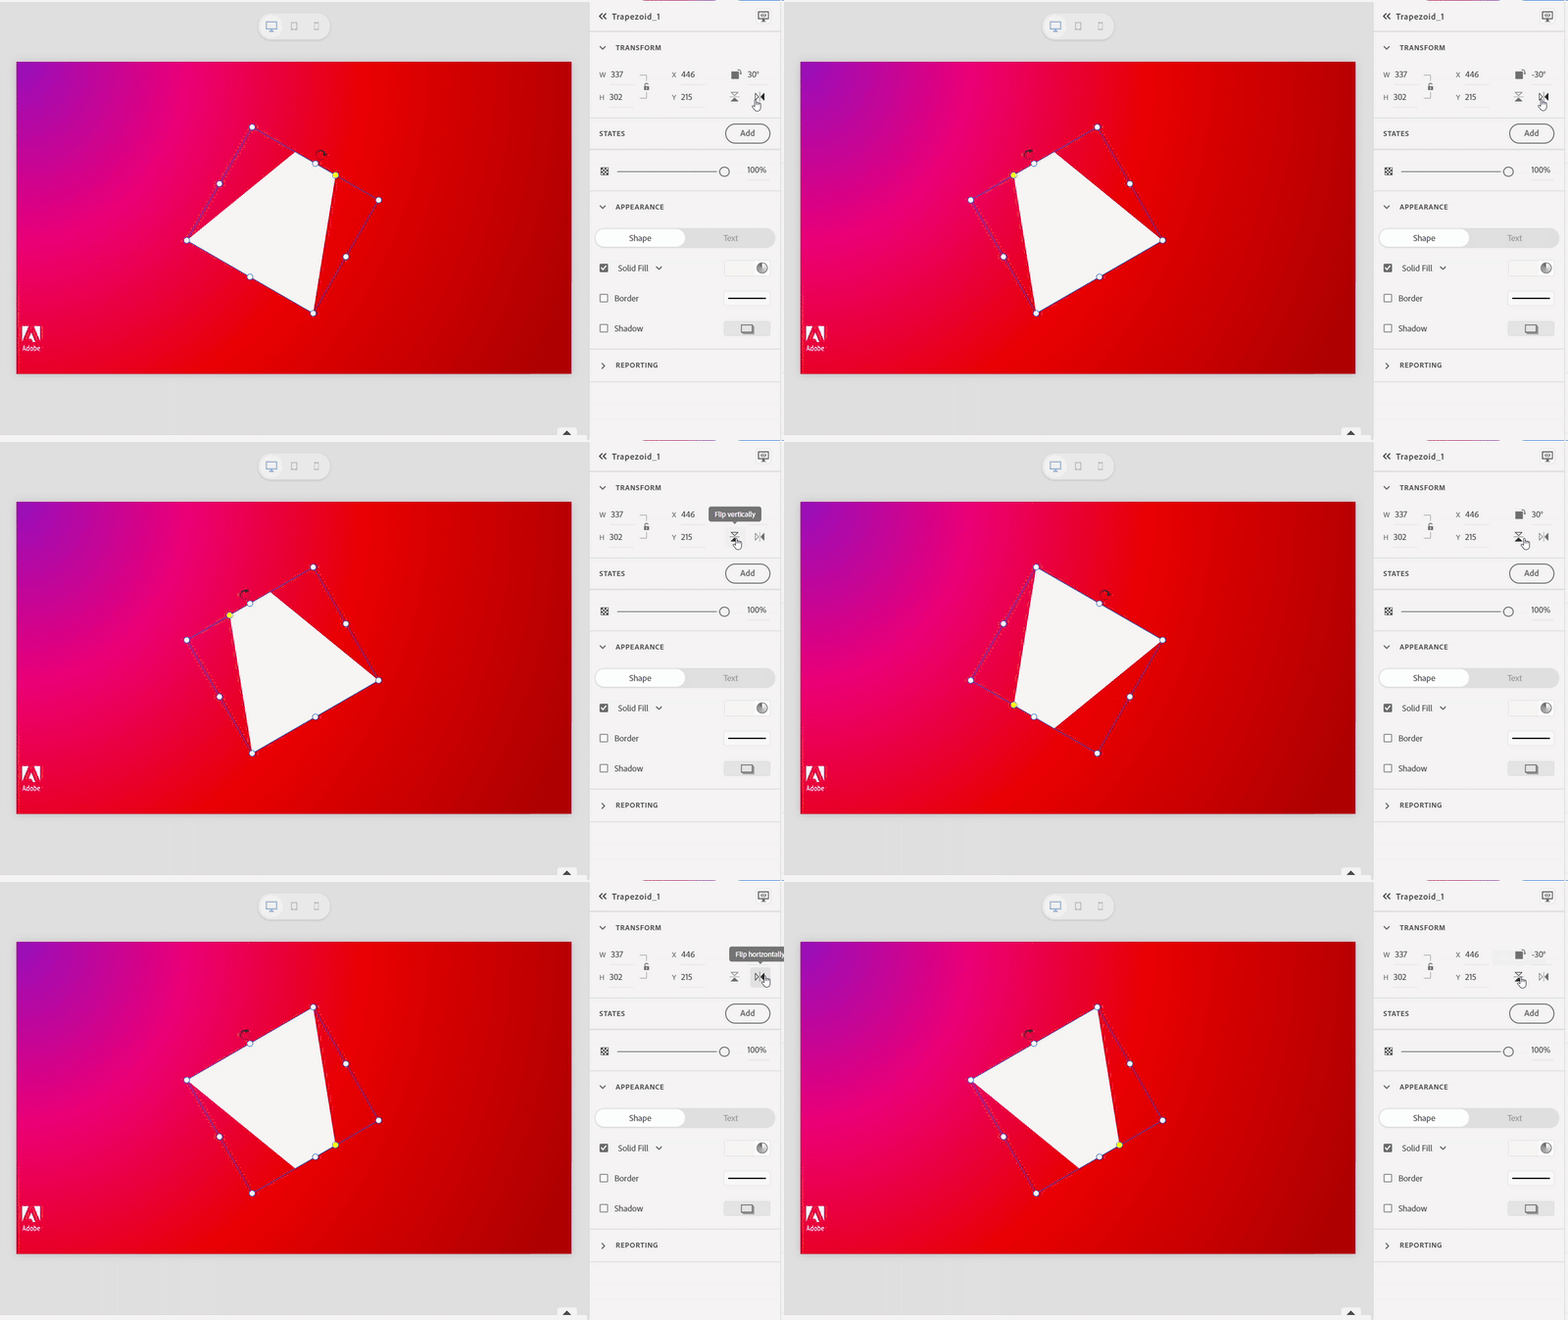
Captivate rotates and flips shapes based on the slide's axes, not the shape's center. This affects symmetrical shapes. For example, flipping a trapezoid gives different results depending on its orientation.


Customize shape appearance
After inserting a shape into your slide, Adobe Captivate provides a wide range of customization options to help you tailor its appearance and behavior. Using the Visual Properties panel, you can transform shapes, apply styling, and add text. These tools enable precise positioning, consistent formatting, and enhanced interactivity, making your eLearning content both functional and visually engaging.
-
Select a shape on the slide.
-
Select the Visual properties panel to view its customization options.
Customize a shape from the Visual properties panel Customize a shape from the Visual properties panel -
In the Appearance section, format and style the shape by adjusting fill, transparency, borders, and effects:
Fill options:
Solid colors with adjustable transparency
Linear and radial gradients
Pattern fills with built-in textures
Texture fills for realistic surfaces
Make shapes transparent to blend with the background
Border and outline options:
Line borders with customizable weight
Supported line styles such as solid, dashed, or dotted
Border colors with transparency control
Corner radius for rounded shapes
Effects:
Apply shadows to create depth and emphasis
Copy shape style
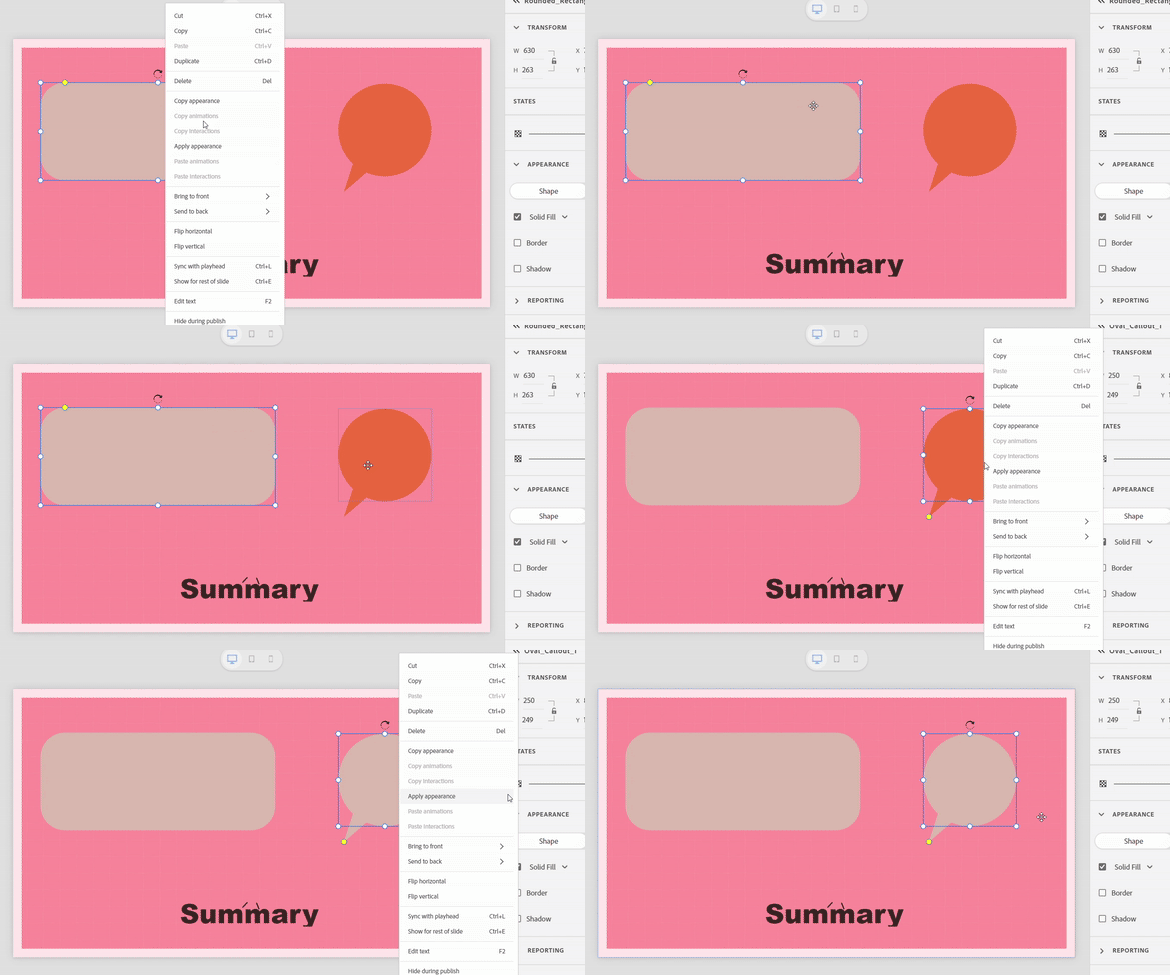
Quickly apply the style of one shape to others to keep your design consistent. This copies attributes like color, border, and shadow, saving time and giving your project a polished look without manual formatting.
-
Select the source shape that has the desired formatting.
-
Right-click and select Copy appearance.
-
Select the target shape and then right-click and select Apply appearance. All visual properties are applied to the target shape, ensuring consistent styling across multiple shapes.

Maintaining visual consistency across shapes by copying and applying formatting attributes. 
Maintaining visual consistency across shapes by copying and applying formatting attributes.
layer shapes
Change the stacking order to control which shapes appear on top. This is useful for creating custom backgrounds, improving text readability with overlays, or adding interactive elements such as hotspots and callouts.
-
Right-click the shape.
-
Select an option to change the order of layers:
- Bring to front: Moves the shape above all other objects.
- Bring forward: Moves the shape one level up in the stack.
- Send backward: Moves the shape one level down in the stack.
- Send to back: Moves the shape behind all other objects.
Controlling the layering of shapes helps create depth and proper interactive behavior in eLearning content. Controlling the layering of shapes helps create depth and proper interactive behavior in eLearning content.
Add text inside shapes
Add text inside shapes to enhance interactivity and visual communication in your eLearning projects. This allows you to create custom buttons with text labels that support interactions like navigation or feedback. Shapes with text can also serve as interactive hotspots, instructional overlays, or highlighted tips.
-
Select the shape to enter text, or right-click the shape and select Edit text from the dropdown menu.
-
After adding text to a shape, you can customize it further by selecting the Text tab in the Appearance. Use the available presets to format the text, change the font, size, and color, apply effects like shadows or outlines, and adjust alignment and spacing to improve readability. Learn more about how to format text in Captivate.
Text formatting tools help create clear, readable labels for interactive shape elements. Text formatting tools help create clear, readable labels for interactive shape elements.
Create multi-state shapes
Make shapes change appearance based on user actions. This is perfect for interactive buttons and feedback elements. Learn more about using states in Captivate.
Common uses:
- Navigation buttons (Normal, Hover, Down, Visited)
- Progress indicators (Empty, Partial, Complete)
- Answer feedback (Correct, Incorrect, Selected)
- Interactive hotspots (Hidden, Visible, Detailed view)
For example, create a button with a hover state that changes the fill color and a clicked state that confirms the selection.
Add states to shapes
-
Select the shape.
-
Select Add next to States.
Creating multiple states transforms static shapes into dynamic, interactive elements that respond to learner actions. Creating multiple states transforms static shapes into dynamic, interactive elements that respond to learner actions. -
Select Add New to create a custom state. Be sure to give it a descriptive name.
Descriptive state names improve development workflow and help track interactive behavior in complex projects Descriptive state names improve development workflow and help track interactive behavior in complex projects -
Modify the shape’s appearance for that state.
-
Repeat for other additional states.
Set default shape styles with themes
While you can apply default themes and appearance presets to newly inserted shapes, imported shapes retain their original styles from PowerPoint. This includes fill colors, borders, and effects. To unify the look, use the Copy Appearance feature to apply consistent styling across shapes.
-
Select Project properties and then select Edit Theme.
-
To set the default theme for shapes, select the Shapes section in the left menu and apply presets for fill color, borders, and shadows.
Theme presets ensure visual consistency across projects while reducing repetitive formatting tasks. Theme presets ensure visual consistency across projects while reducing repetitive formatting tasks. -
Customize the text inside shapes by adjusting the font size, font family, alignment, spacing, text color, and shadow effects.
-
Select Apply. These settings will automatically apply to any new shapes you add to the slide.
Add interactions and animations to shapes
Shapes support all Captivate animations, which makes them useful for building engaging interactive elements. You can use shapes as buttons, navigation controls, or triggers for content. Learn more about how to add animations and interactions to shapes and other imported objects from PowerPoint.
You can add:
- State changes on interaction
- Audio feedback for user actions
- Visual effects and animations
Accessibility considerations
Shapes imported from PowerPoint are fully accessible. They're included in the reading order like other objects, so screen readers can interpret them correctly. For more details, see Accessibility in Captivate.


