Select a slide that contains content.
Pēdējo reizi atjaunināts
2025. gada 18. jūn.
- Captivate User Guide
- Get to know Captivate
- Adobe Captivate releases
- Adobe Captivate 13
- Adobe Captivate 12
- Project setup
- Import from PowerPoint
- Import from Captivate Classic
- Generative AI in Adobe Captivate
- Generative AI overview
- Generative AI FAQs
- Generative credits
- Generate text
- Generate images
- Generate avatar
- Generate transcripts
- Add and edit text
- Add and edit images
- Add and edit media
- Interactive components
- Create quizzes
- Add widgets
- Interactions and animations
- Enhance your e-learning project
- Simulation projects
- Timeline and TOC
- Review and collaborate
- Preview and publish
- Accessibility
- Design options in Adobe Captivate
- Additional resources
Learn how to add a slide-level interaction in a Captivate project.
In the all-new Adobe Captivate, slide-level interactions are the ones that you apply at a slide level rather than at the object level. Slide-level interactions are timeline and object-based. For more information on creating your first slide-level interaction and other details, view Interactions in Adobe Captivate.
The following triggers are available at a slide level. Slide-level triggers, for example, Timeline-based, typically rely on the slide's timeline to execute an action. You can set up the trigger so that an action occurs when a learner enters or exits a slide.
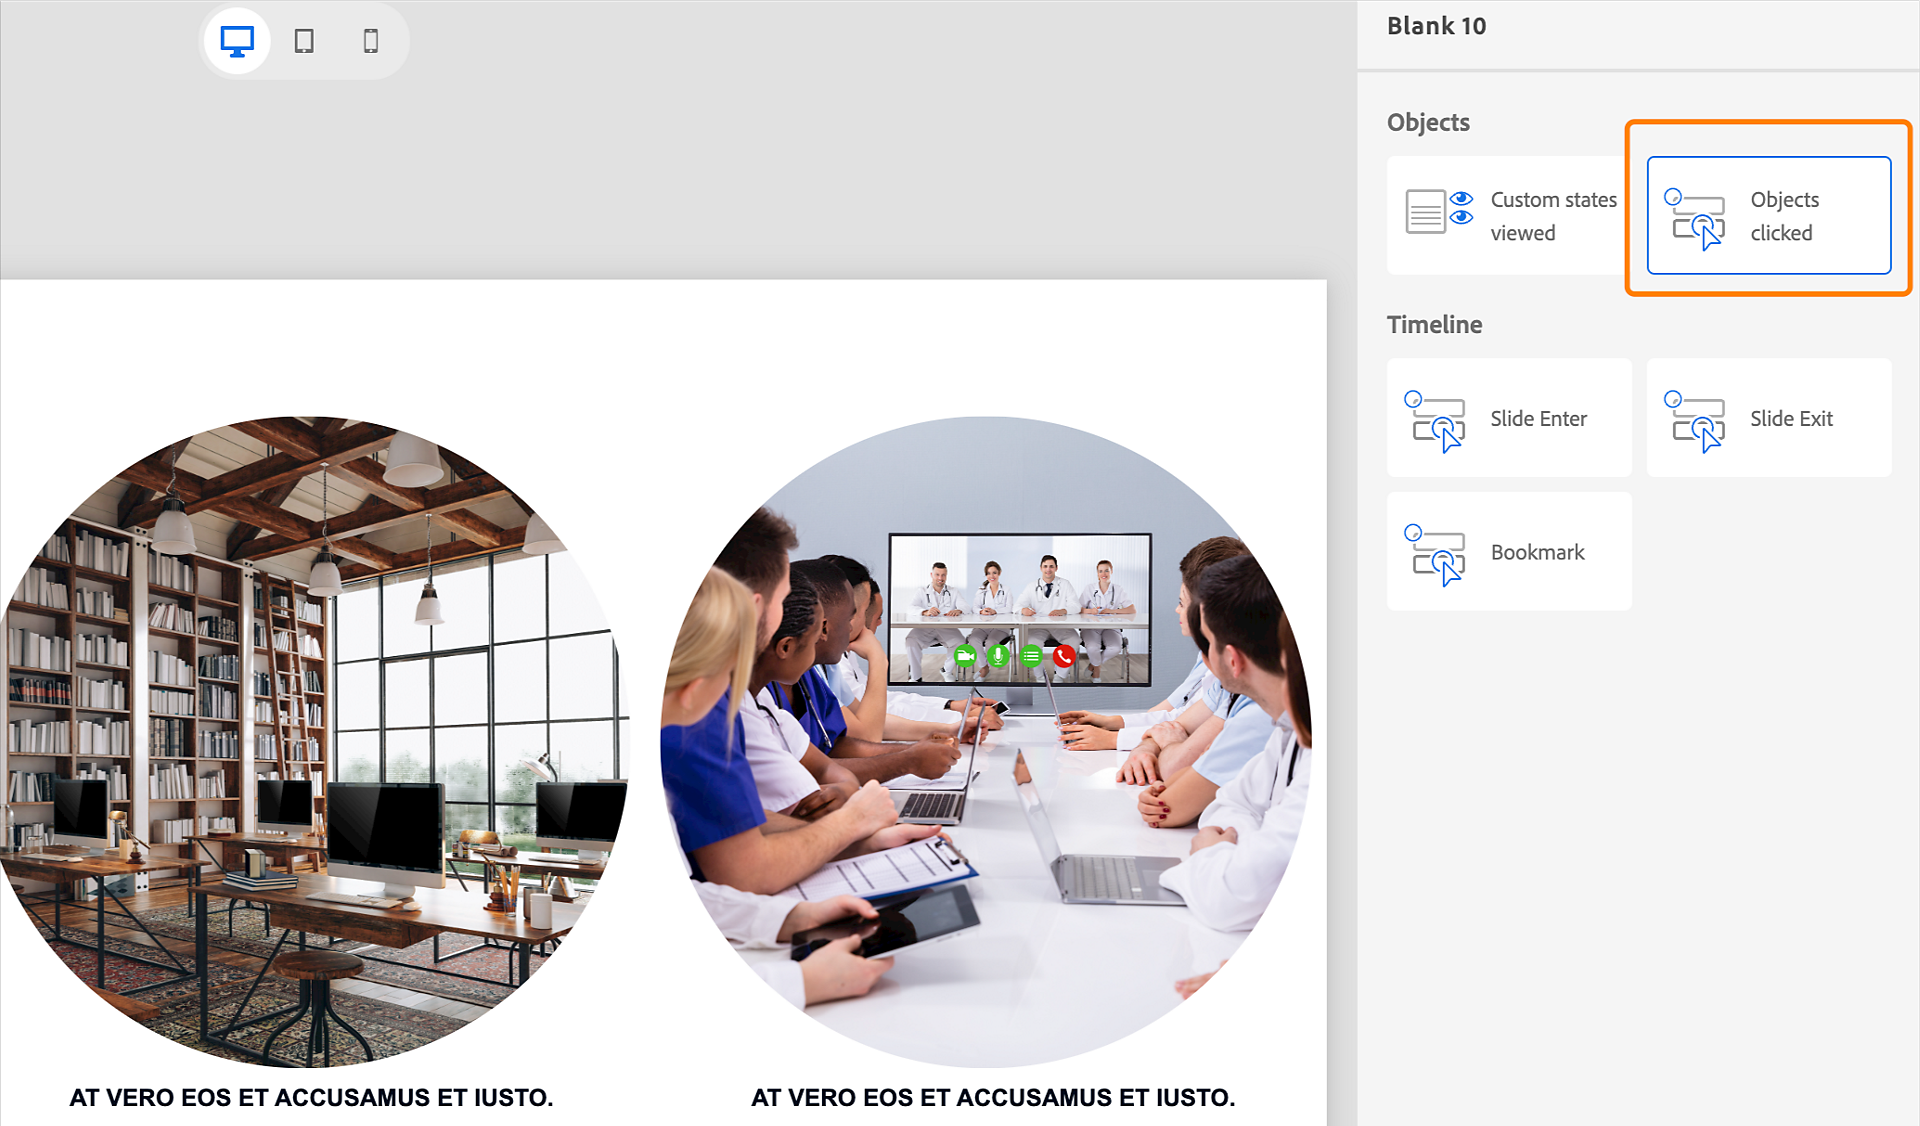
- Objects:
- Custom states viewed: An action occurs when a learner views selected custom states.
- Objects clicked: An action occurs when a learner clicks on objects.
- Timeline:
- Slide enter: A set of actions occur when a learner enters a slide.
- Slide exit: A set of actions occur when a learner exits a slide.
- Bookmark: A set of actions occur when a learner reaches a bookmark.
Slide-level triggers
These are the trigger categories that are available on a slide.
Timeline
A timeline trigger is a type of trigger that enables you to trigger actions or events based on specific points or intervals on the timeline.
The triggers for the timeline are:
An action or actions occurs when a learner enters a specific slide during the course playback.
-
-
Select Interactions in the right toolbar.
-
Click Add an interaction.
-
Select Slide Enter.
-
In the Action panel, select any action.
-
Click Done.

-
Select a slide that contains content.
-
Select Interactions in the right toolbar.
-
Click Add an interaction.
-
Select Slide Exit.
-
In the Action panel, select an action.
-
Click Done.

-
Select a slide that contains content.
-
Select Interactions in the right toolbar.
-
Click Add an interaction.
-
Select Bookmark.
-
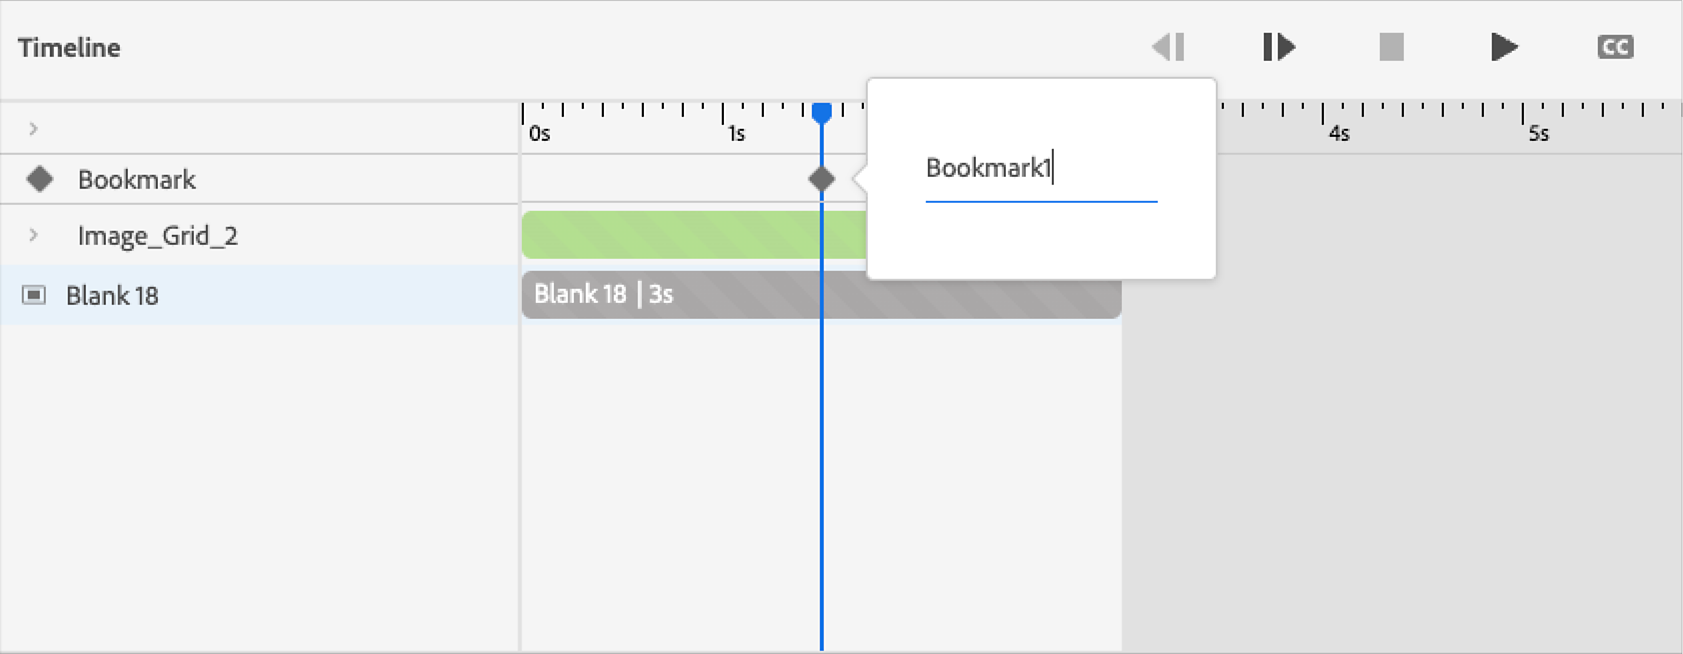
Launch the timeline panel.
-
Drag the playhead to the point where you want to insert a bookmark.
-
On the playhead, select + icon, and create a bookmark.
-
Select Interactions in the right toolbar and click Add an interaction.
-
Select Bookmark.
-
In the Action panel, select any action.
-
Click Done.

-
Select Add media blocks > Image grid in the left toolbar.
-
Select any image.
-
In the Visual Properties panel, in the States section, click Add.
-
Add custom states to any object.
-
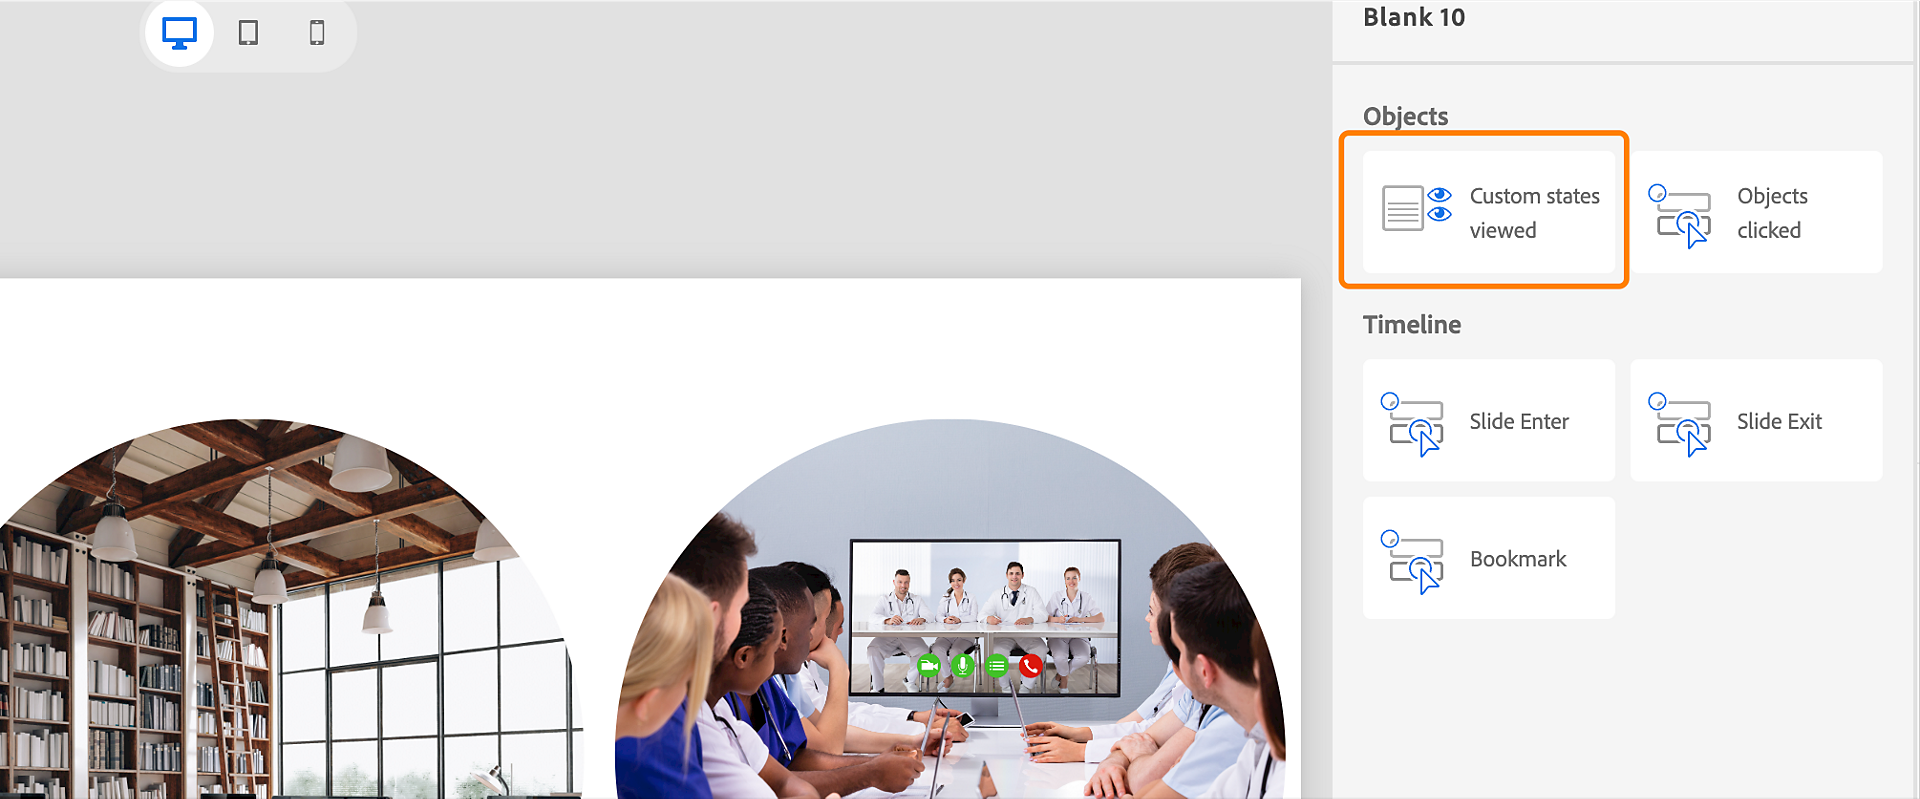
Click the gray area surrounding the slide. Select Interactions > Add an interaction in the right toolbar.
-
Select Custom states viewed.
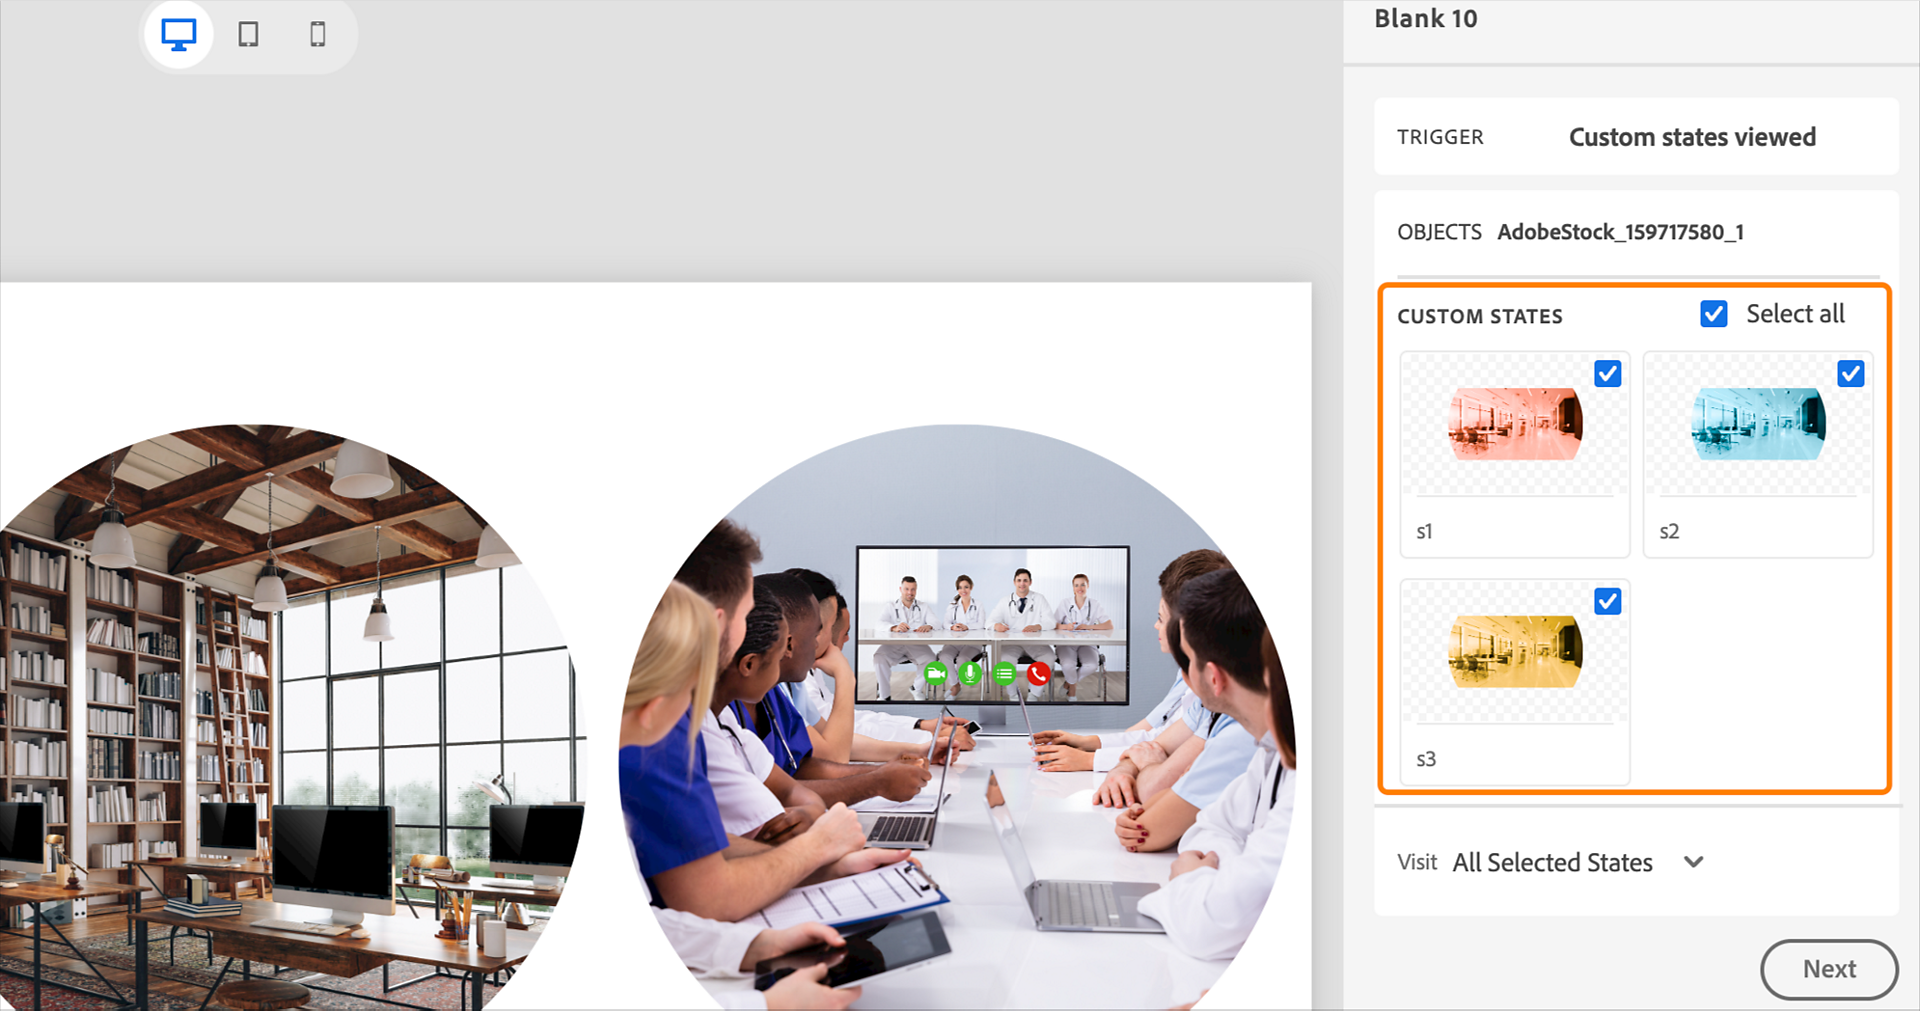
-
With the trigger set to Custom states viewed, select the object.
-
Select one or all objects.
-
In the Visit dropdown, select All Selected states or Custom.
- All selected states: Choose this option to select all custom states for the action to occur.
- Custom: In the Count field, enter how many states must be viewed for the action to occur. If the Count is two, then you must select any two states for the action to occur.
-
Click Next.
You can see the summary of the interaction so far. The action is contingent on selecting any two custom states.
-
Select an action on the Action panel.
-
Click Done.


-
Select Add media blocks > Image grid in the left toolbar.
-
Click the gray area surrounding the slide. Select Interactions > Add an interaction in the right toolbar.
-
Select Objects clicked.
-
Select an object or all objects from the list of objects on the slide. In this case images and text are objects.
-
In the Visit dropdown, select All Selected objects or Custom.
You can also determine whether the action will occur if the objects are clicked.
-
Click Next.
-
Select an action on the Action panel.
-
Click Done.