How to Add third-party plug-ins for Adobe Audition

Third‑party plug‑ins let you extend the already powerful effects provided with Adobe Audition. The application supports VST3
 and VST plug-ins on both platforms and Audio Units plug-ins on macOS.

Applying plug‑in effects is identical to applying built‑in effects. For information about plug-in features, consult the documentation provided by the plug‑in manufacturer.

Enable VST3, VST and Audio Units plug-ins

To access third party effects, the plug-ins must be scanned, click Scan for Plug-in button to scan all the system audio plug-in folders. To optimize the menus in the application, use the check boxes next to the effect name to enable and disable them in the application.

Opomba:

If effects are being used in a multitrack session, close the session.

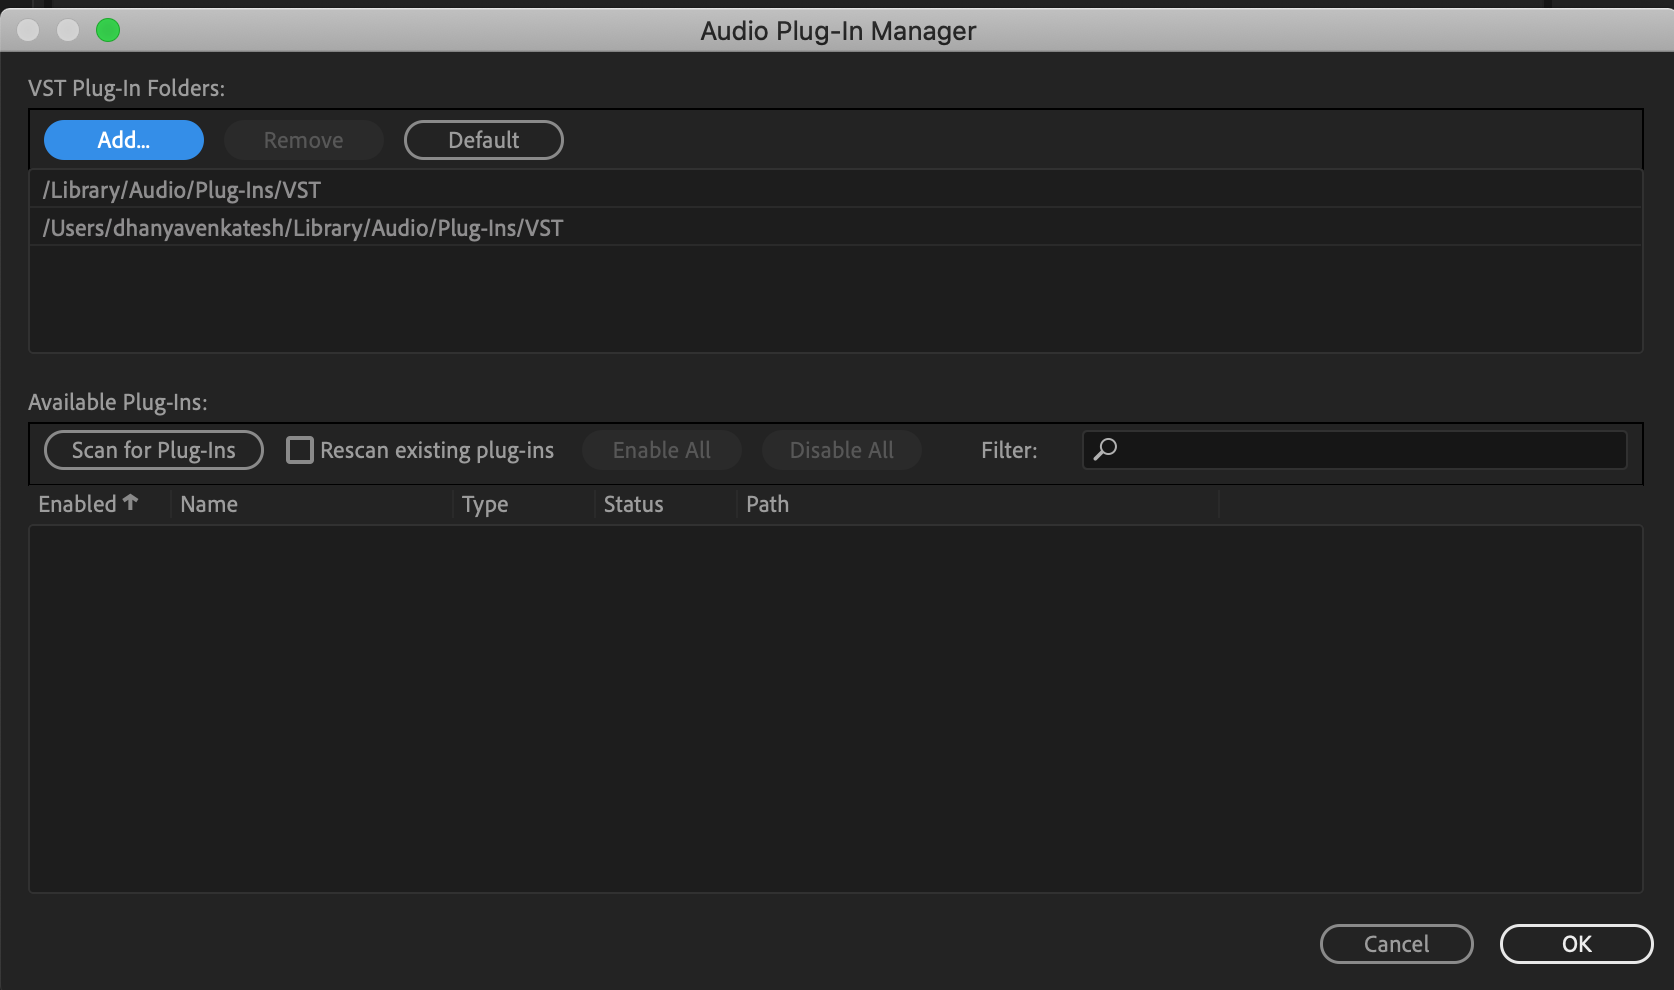
  1. Choose Effects > Audio Plug-in Manager.

    Audio plug-in manager
    Audio plug-in manager
  2. In the VST Plug-in Folders section, click Add to specify custom folders you want to scan for plug‑ins. Click Default to specify the standard VST folder for your operating system. Note: Folders section applies only to the legacy VST effects. VST 3 folder should not be added to this section.

  3. In the Available Plug-ins section, click Scan For Plug-ins. If you’ve recently updated a plug-in, select Rescan Existing Plug-ins.

  4. Audition will automatically enable all valid effects. To hide an effect from the Audition effects list, uncheck the Enable checkbox.  If a plug-in is listed as 'Not Working', click Reload to rescan. Select the plug-ins you want to access in Adobe Audition, and click OK.