
If you have a question to ask or an idea to share, come and participate in the Adobe Lightroom Classic community. We'd love to hear from you!
Last updated on
15 Apr 2026
- Lightroom Classic User Guide
- Introduction to Lightroom Classic
- What's new in Lightroom Classic
- Lightroom Classic Release Notes
- Lightroom Classic technical requirements
- Keyboard shortcuts
- Lightroom Classic FAQ
- Lightroom Classic Key Concepts
- Lightroom Classic tutorials
- Set Preferences for working in Lightroom Classic
- Reset Preferences for working in Lightroom Classic
- Supported image formats
- Workspace
- Import photos
- Specify import options
- Set import preferences
- Import photos from a camera or card reader
- Import photos from a folder on a hard drive
- Import photos automatically
- Import photos from Photoshop Elements
- Import photos from a tethered camera
- Select best photos while importing with Assisted Culling
- The Filename Template Editor and Text Template Editor
- Set up tethered camera support for Fujifilm cameras
- Organize photos in Lightroom Classic
- Face recognition
- Work with photo collections
- Group photos into stacks
- Flag, label, and rate photos
- Use keywords
- Metadata basics and actions
- Save metadata to external sidecar files
- Find photos in the catalog
- Work with video in Lightroom Classic
- Advanced metadata actions
- Use the Quick Develop panel
- Select best photos with Assisted Culling
- Group your photos into a stack
- Process and develop photos
- Develop module basics
- Apply Presets
- Create panoramas and HDR panoramas
- Flat-Field Correction
- Correct distorted perspective in photos using Upright
- Improve image quality using Enhance
- Work with image tone and color
- Edit your images with Color Mixer tool
- Masking
- Apply local adjustments
- HDR photo merge
- Develop module options
- Retouch photos
- Cure red eye and pet eye effects
- Use the Radial Filter tool
- Adjustments with Lens Blur
- Edit and Export in HDR
- Remove Tool
- Remove distracting people
- Remove reflections
- Remove sensor dust in a photo
- Viewing photos
- Export photos
- Work with external editors
- Manage catalogs and files
- Maps
- Photo books
- Slideshows
- Print photos
- Web galleries
- Content Authenticity
- Lightroom and Adobe services
- Troubleshooting
- Technical Support
- Performance Guidelines
- Technical issues
- GPU Issues
- Startup Issues
- Rendering Issues
- Stability Issues
- Miscellaneous Issues
- Workflow Issues
- Catalog Issues
- Sync Issues
Explore the new and enhanced features in the latest releases of Lightroom Classic.
April 2026

Add images to Firefly boards
Organize and create mood boards by adding Lightroom images to Firefly boards.

Create film-inspired looks
Transform standard shots with the new Film-inspired presets group.

Support for PSB format
Lightroom Classic now provides full support for PSB files.

Supported camera models
Find the newly added camera models.

Supported lens profiles
Find the newly added lens profiles.

Try these features
Start exploring the latest updates and enhancements in Lightroom Classic now.
Release notes
Review a summary of updates and fixed issues for previous Lightroom Classic releases.
February 2026

Edit in Firefly
Easily enhance Lightroom images in Firefly with prompt-based editing, or turn images into videos.

Support for WebP format
You can now import, edit, and sync WebP files.
October 2025

Assisted Culling
Quickly select the best shots from a large set of images with Assisted Culling. This feature is currently available as Early Access.

Auto Stacking
Easily stack your images based on time and visual similarity. You can also use the Stack filter in the Attribute panel.

Dust Removal
Quickly detect and remove dust spots caused by the camera's sensor or lens.

Performance Improvements
Achieve substantial performance improvements with enhanced speed, accuracy, and smooth responsiveness across tools and adjustments for interactive editing tasks.

Zoom while Cropping
You can now zoom in while cropping an image to make the best selection.

Tether support for Leica cameras
Lightroom Classic now supports tethered capture for Leica cameras.

Color Variance
Fine-tune the overall tone and color in a photo using the Variance slider in Point Color.
August 2025

Generate Previews using GPU
Use GPU to generate previews.

Create and manage subsets in the Copy-Paste settings dialog
Create and manage custom subsets in Copy-Paste settings, with options to select only the modified Develop settings.
June 2025

Remove extra people from a photo
The People removal tool identifies and removes extra people from a photo.

Remove reflections in a photo
The Reflection removal tool helps you remove the window and glass reflections in a photo.

View and control all AI edits together
The AI Edit Status icon allows you to view and update edits made with AI-powered tools like Denoise, Super Resolution, Raw Details, and more.

Tether support
Lightroom Classic now supports tethered capture for Fujifilm cameras. You can capture photos and change camera settings right from Lightroom Classic.

Performance improvements
Achieve substantial performance improvements with enhanced speed, accuracy, and smooth responsiveness across tools and adjustments for interactive editing tasks.
Previous releases of Lightroom Classic

Enhance landscape features with Select Landscape
Automatically detect landscape elements like mountains, water, natural ground, artificial ground, architecture and more in your photos and create individual masks for each element for precise editing.

Easily manage recent catalogs
Choose from a variety of reflective or rotational symmetry options to make your art stand out.

Adaptive Profiles
Adjust the tones and colors of your photos with Adaptive Profiles to create an enhanced yet realistic starting point for further editing. Try it on landscape or cityscape raw images in HDR mode for best results.

Tether enhancement - Focus point selection
Easily adjust focus points and autofocus modes directly from the tethered live view window for Sony, Canon, and Nikon cameras.
Learn how to easily adjust focus points and autofocus modes directly from the tethered live view >

Catalog back-up management
Easily manage your catalog backups with a new backup panel in Catalog Settings, allowing you to open backup locations, check sizes, and delete older backups without removing actual files.

Support for new cameras and lenses in Lightroom
Find newly added cameras and lenses in the complete list of supported camera profiles.
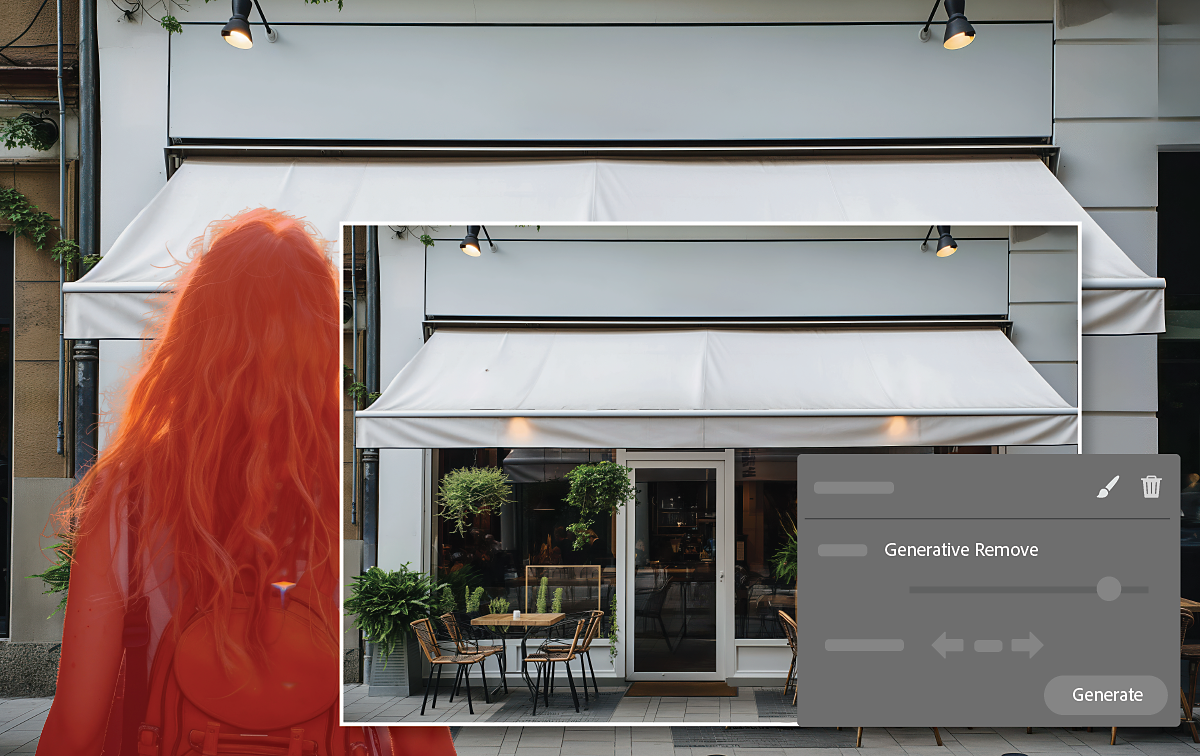
Remove distractions in a photo with Generative Remove
Generative Remove now includes improved selection with object detection for easier removal of unwanted objects and distractions, even on complex backgrounds.
Learn how to remove distractions in a photo with Generative Remove >

Secure your digital assets with Content Credentials
Own your photos with Content Credentials. Easily attach your name, social media handle, and a list of edits to exported JPEGs via a digital signature.
Learn how to secure your digital assets with Content Credentials >

Add Denoise to Linear Raw DNGs
Own your photos with Content Credentials. Easily attach your name, social media handle, and a list of edits to exported JPEGs via a digital signature.
Support for new cameras and lenses in Lightroom
Find newly added cameras and lenses in the complete list of supported camera profiles.
More like this
Have a question or an idea?
