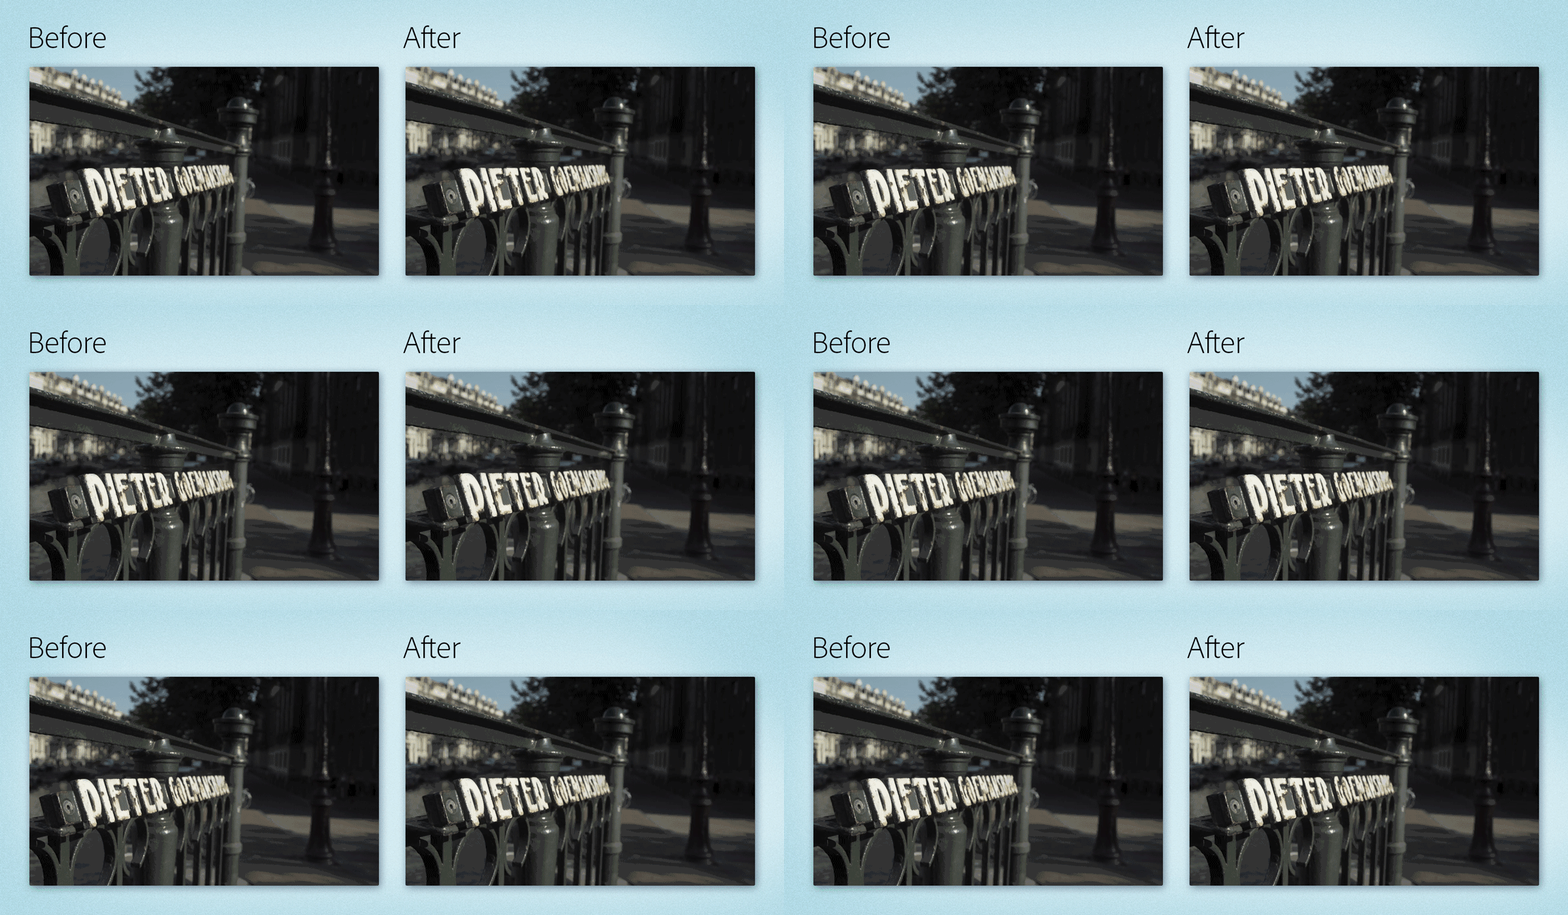
In the Effects & Presets panel, select the search box and type Camera-Shake Deblur.
- After Effects User Guide
- Beta releases
- Getting started
- Workspaces
- Projects and compositions
- Importing footage
- Preparing and importing still images
- Importing from After Effects and Adobe Premiere Pro
- Importing and interpreting video and audio
- Preparing and importing 3D image files
- Importing and interpreting footage items
- Import SVG files
- Working with footage items
- Detect edit points using Scene Edit Detection
- XMP metadata
- Text and Graphics
- Text
- Motion Graphics
- Work with Motion Graphics templates in After Effects
- Use expressions to create drop-down lists in Motion Graphics templates
- Work with Essential Properties to create Motion Graphics templates
- Replace images and videos in Motion Graphics templates and Essential Properties
- Animate faster and easier using the Properties panel
- Variable Font Axes
- Drawing, Painting, and Paths
- Overview of shape layers, paths, and vector graphics
- Paint tools: Brush, Clone Stamp, and Eraser
- Taper shape strokes
- Shape attributes, paint operations, and path operations for shape layers
- Use Offset Paths shape effect to alter shapes
- Creating shapes
- Create masks
- Remove objects from your videos with the Content-Aware Fill panel
- Roto Brush and Refine Matte
- AI-powered Object Matte
- Create Nulls for Positional Properties and Paths
- Layers, Markers, and Camera
- Animation, Keyframes, Motion Tracking, and Keying
- Animation
- Keyframe
- Motion tracking
- Keying
- Transparency and Compositing
- Adjusting color
- Effects and Animation Presets
- Effects and animation presets overview
- Effect list
- Effect Manager
- Simulation effects
- Stylize effects
- Audio effects
- Distort effects
- Perspective effects
- Channel effects
- Generate effects
- Time effects
- Transition effects
- The Rolling Shutter Repair effect
- Blur and Sharpen effects
- 3D Channel effects
- Utility effects
- Matte effects
- Noise and Grain effects
- Detail-preserving Upscale effect
- Obsolete effects
- Cycore plugins
- Expressions and Automation
- Expressions
- Expression basics
- Understanding the expression language
- Using expression controls
- Syntax differences between the JavaScript and Legacy ExtendScript expression engines
- Editing expressions
- Expression errors
- Using the Expressions editor
- Use expressions to edit and access text properties
- Expression language reference
- Expression examples
- Automation
- Expressions
- Immersive video, VR, and 3D
- Construct VR environments in After Effects
- Apply immersive video effects
- Compositing tools for VR/360 videos
- Advanced 3D Renderer
- Import and add 3D models to your composition
- Import 3D models from Creative Cloud Libraries
- Create parametric meshes
- Image-Based Lighting
- Animated Environment Lights
- Enable lights to cast shadows
- Extract and animate lights and cameras from 3D models
- Tracking 3D camera movement
- Adjust Default Camera Settings for 3D compositions
- Cast and accept shadows
- Embedded 3D model animations
- Shadow Catcher
- 3D depth data extraction
- Enable in‑engine Depth of Field in Advanced 3D
- Modify materials properties of a 3D layer
- Apply Substance 3D materials
- Work in 3D Design Space
- 3D Transform Gizmos
- Single 3D Gizmo for multiple 3D layers
- Do more with 3D animation
- Preview changes to 3D designs real time with the Mercury 3D engine
- Stereoscopic 3D in After Effects
- Add responsive design to your graphics
- Views and Previews
- Rendering and Exporting
- Basics of rendering and exporting
- H.264 Encoding in After Effects
- Export an After Effects project as an Adobe Premiere Pro project
- Converting movies
- Multi-frame rendering
- Automated rendering and network rendering
- Rendering and exporting still images and still-image sequences
- Using the GoPro CineForm codec in After Effects
- Working with other applications
- Collaboration: Frame.io, and Team Projects
- Memory, storage, performance
- Knowledge Base
About Blur & Sharpen effects
In general, blur effects sample the area around a pixel and assign to the pixel a new value, which is the average of the sampled values. Increased blurriness is the result of increasing the size of the sample, whether the size is expressed as a radius or a length.
Some blur effects have a Repeat Edge Pixels option. Select this option to make the blur algorithm operate as if the pixel values beyond the edge of the layer are the same as the values of the edge pixels. This option keeps edges sharp, preventing them from darkening and becoming more transparent—the result of being averaged with a lot of zeroes. Deselect this option to make the blur algorithm operate as if the pixel values beyond the edge of the layer are zero.
Film grain and noise are removed from an image when you blur it. To make the image look more realistic, you may want to add noise back to the image so that it doesn’t look retouched. Learn more about Noise & Grain effects.
Third-party effects in this category included with After Effects:
CC Cross Blur effect
CC Radial Blur effect
CC Radial Fast Blur effect
CC Vector Blur effect
Explore all the third-party plug-ins included with After Effects.
Applying an effect or preset
You can apply an effect or an effect preset by dragging it onto your composition from the Effects & Presets panel. To open the Effects & Presets panel, select Window > Effects & Presets.


Bilateral Blur effect
The Bilateral Blur effect selectively blurs an image so that edges and other details are preserved. Areas with high contrast—where pixel values differ by a large amount—are blurred less than areas of low contrast.
The primary difference between the Bilateral Blur effect and the Smart Blur effect is that edges and details are still blurred a small amount by the Bilateral Blur effect. The result is a softer, dreamier look than the Smart Blur effect with equivalent settings.
The result of the Bilateral Blur effect is very similar to the result of the Surface Blur filter in Adobe Photoshop.
This effect works with 8-bpc, 16-bpc, and 32-bpc color.


Threshold
The radius of the blur is automatically decreased in areas where an edge or other prominent detail feature exists. The Threshold value determines how the Bilateral Blur effect decides what areas contain features to be preserved and what areas to be blurred by the full amount. A lower Threshold value causes more fine details to be preserved. A higher Threshold value results in a more simplistic result, with fewer details preserved.
Radius
A larger radius for a blur means that more pixels are averaged together to determine each pixel value, so increasing the Radius value increases the blurriness.
Colorize
When Colorize is not selected, the Bilateral Blur effect operates on one value for each pixel: its luminance value, which is a weighted average of its R, G, and B color channel values. The result is a monochromatic image.
When Colorize is selected, the Bilateral Blur effect operates on each color channel individually. The result is a color image.
Box Blur effect
Box Blur is similar to Fast Blur and Gaussian Blur, but Box Blur has the added advantage of an Iterations property, which allows you to control the quality of the blur.
This effect works with 8-bpc, 16-bpc, and 32-bpc color.
Iterations
Number of times the blur is sequentially applied to the image. A value around 3 gives a blur similar in quality to Fast Blur. A higher number of iterations creates smoother transitions between colors and increases the blur, but it also increases the render time. The default value creates boxy results.


Camera Lens Blur effect
The effect is a replacement for the Lens Blur effect. The effect has a larger blur radius (500) and is much faster than the Lens Blur effect. The Camera Lens Blur effect also does not disable Render Multiple Frames Simultaneously multiprocessing, as its predecessor did.
This effect works with 8-bpc, 16-bpc, and 32-bpc color.
Descriptions of the Camera Lens Blur effect’s properties also apply to the camera layer’s Camera Options properties group, which has the same (or similar) names.
Iris Properties
Iris properties include Shape, Roundness, Aspect Ratio, Rotation, and Diffraction Fringe.
Diffraction Fringe
Creates a halo around the edge of an iris that simulates light bending, concentrating around the edge of the iris blades. When set to 100, a natural normal halo that is based on the area represented in the shape of the blur is visible. At 500, all the energy of the blur is pushed from inside the blur to the ring/halo. This effect, in essence, emulates a catadioptric lens.
Blur Map
A control layer can be used as a blur map to affect Camera Lens Blur effect properties.
Layer
Layer to use as the blur map.
Channel
Luminance, color, or alpha channel for the blur map.
Blur Focal Distance
The value from the control layer corresponds to zero blurring. The difference between the Blur Focal Distance value and a value from the control layer dictates the amount of blurriness for the corresponding area on the layer with the effect applied.
Highlight
Modifies color values of the pixels that are above the threshold. Higher highlight values produce the best results for getting a good blooming blur/glow effect.
Gain
The amount of energy fed into pixels that are above the threshold. Depending on how bright a pixel is above the threshold, the pixel value is increased in brightness by this relative amount.
Threshold
The luminosity limit on what is boosted by Gain. Pixels much brighter than the threshold are boosted more than those pixels slightly above it. Setting the threshold to 0 boosts any pixel with a brightness higher than 0. Setting it to 1 effectively eliminates any highlight (unless the image contains overbrights).
Saturation
The amount of color retained in the boosted pixel. Setting it to 0 pushes the boosted colors toward white (what the old Lens Blur effect used to do). Setting to 100 attempts to retain as much color as possible. This saturation of the highlights is especially noticeable in situations with colored lights (like a cityscape at night), in which the colors create a multicolored tapestry of bokeh.
Edge Behavior
Learn about Blur & Sharpen effects and understand how Repeat Edge Pixels options are treated in blur effects.
Use Linear Working Space
Produces a result similar to a project set to a linearized working color space. Check this property (or set it from the project settings) to see realistic bokeh effects from your images.
In addition to enabling the Use Linear Working Space checkbox, be sure to work in 32-bpc color. Working with a lower color bit depth causes quantization.
Forward and backward compatibility
If the Camera Lens Blur effect is added to an After Effects CS5.5 and later project and then saved as an After Effects CS5 project, a warning appears stating that the effect is missing. Projects created in After Effects CS5 or earlier using the Lens Blur effect retain that effect when opened in After Effects CS5.5 and later. However, you cannot directly apply the Lens Blur effect in After Effects CS5.5 or later. Learn about saving and backing up projects in After Effects CS5.5 and later.
Camera-Shake Deblur effect
Camera-Shake Deblur effect helps you recover blurry footage caused by camera shake. You can stabilize shaky footage with the Warp Stabilizer VFX effect, but unwanted artifacts like motion blur may still exist. Camera-Shake Deblur effect reduces unwanted artifacts to produce better results. The effect targets blurry frames and tries to reconstruct them by using sharp ones on either side of the blurry frame. Camera-Shake Deblur effect uses optical flow technology to blend sharp frames with blurry frames.


Applying Camera-Shake Deblur effect
To view it from the Effect menu, select Effects > Blur & Sharpen > Camera-Shake Deblur.
-
-
The effect is displayed under Blur & Sharpen effect category.
-
Drag the effect to the timeline and apply it to the composition.
Camera-Shake Deblur effect provides you with a set of properties to control the effect performance.
-
In Effect Controls panel, twirl open Camera-Shake Deblur effect.
-
Modify the properties displayed under the effect.
- Blur Duration: Change the number of frames to compare around the blurry frame to get a non-motion-blurred frame. The Blur Duration property controls the number of frames for which motion blur lasts. Select a lower value for a shorter period of shake and a higher value for a longer period of shake.
- Deblur Method: Use the optical flow method, which affects how pixels are mapped from the non-motion-blurred frames to the blurry frame. You can choose between High Quality (slower) and Standard quality. High Quality (slower) provides more accurate results but takes longer to process. Standard is fast and provides standard production-quality results.
- Strength: Control how much correction is applied to the blurry frame. You can adjust the strength values from 100% (default) to 200%, depending on how blurry a frame is. Higher values can result in artifacts if the non-motion-blurred frames within the blur duration are not aligned properly with the blurry frames.
- Shake Sensitivity: Determine the threshold of whether a frame is considered blurry enough to need deblurring. Lower Shake Sensitivity value deblurs only the blurriest frames and may not be able to identify other motion blurs. Higher Shake Sensitivity value is sensitive to any kind of motion blur and tries to deblur any motion blur identified.
Tip:- For best results, apply the Camera-Shake Deblur effect after stabilizing the footage. For example, apply the Warp Stabilizer VFX effect first, then apply the Camera-Shake Deblur effect.
- For shots that are difficult to deblur, applying multiple copies of the Camera-Shake Deblur effect with a low Strength value may achieve better results.
Camera-Shake Deblur effect in After Effects
Play this video to learn about reducing motion blur with the Camera-Shake Deblur effect.
Channel Blur effect
The Channel Blur effect individually blurs the red, green, blue, or alpha channels of a layer.
If you have noise or artifacts primarily in one color channel—such as MPEG compression artifacts in the blue channel of DV footage—use Channel Blur to clean up the noise in that channel, leaving the other channels sharp. This effect works with 8-bpc, 16-bpc, and 32-bpc color.


Compound Blur effect
The Compound Blur effect blurs pixels in the effect layer based on the luminance values of a control layer, also known as a blur layer or blurring map. By default, bright values in the blur layer correspond to more blurring of the effect layer, while dark values correspond to less blurring– select Invert Blur for light values to correspond to less blurring.
This effect is useful for simulating smudges and fingerprints or changes in visibility caused by atmospheric conditions such as smoke or heat, especially with animated blur layers such as those generated with the Turbulent Noise effect.
This effect works with 8-bpc, 16-bpc, and 32-bpc color.


Maximum Blur
The maximum amount, in pixels, that any part of the affected layer can be blurred.
Stretch Map To Fit
Stretches the control layer to the dimensions of the layer to which it's applied– otherwise, the control layer is centered on the effect layer.
Directional Blur effect
The Directional Blur effect gives a layer the illusion of motion.
This effect works with 8-bpc, 16-bpc, and 32-bpc color. The effect uses GPU acceleration for faster rendering.


Direction
The direction of the blur. The blur is applied equally on either side of the center of a pixel; therefore, a setting of 180° and a setting of 0° produce the same results.
Fast Box Blur effect
The effect can replicate the rendering result of Fast Blur (Legacy) but at a faster speed. To apply the effect, select Effect > Blur & Sharpen > Fast Box Blur. The Fast Box Blur effect is rendered using the GPU of your computer.
For scripting and expressions, the match name of the Fast Box Blur effect is ADBE Box Blur2. The older match name ADBE Box Blur still works to apply the effect, but with the older effect name Box Blur.
Gaussian Blur effect
The Gaussian Blur effect blurs and softens the image and eliminates noise. The quality setting of the layer doesn’t affect Gaussian Blur.
This effect uses the Repeat Edge Pixels option and works with 8-bpc, 16-bpc, and 32-bpc colors. It uses GPU acceleration for faster rendering.
The Gaussian Blur effect is a replacement for the Gaussian Blur (Legacy) effect and produces a slightly different rendering result than the latter.


Radial Blur effect
The Radial Blur effect creates blurs around a point, simulating the result of a zooming or rotating camera.
You can specify the level of anti-aliasing applied at Best quality– no anti-aliasing is applied at Draft quality. At Draft quality, the blur appears grainy. You may prefer the draft results for special effects, but the grain may flicker on interlaced displays.
This effect works with 8-bpc, 16-bpc, and 32-bpc color.


Type
Spin blurs in arcs around the Center point, as if the camera were rotating– Amount specifies degrees of rotation. Zoom blurs radially outward from the center point– Amount specifies the length of the blur.
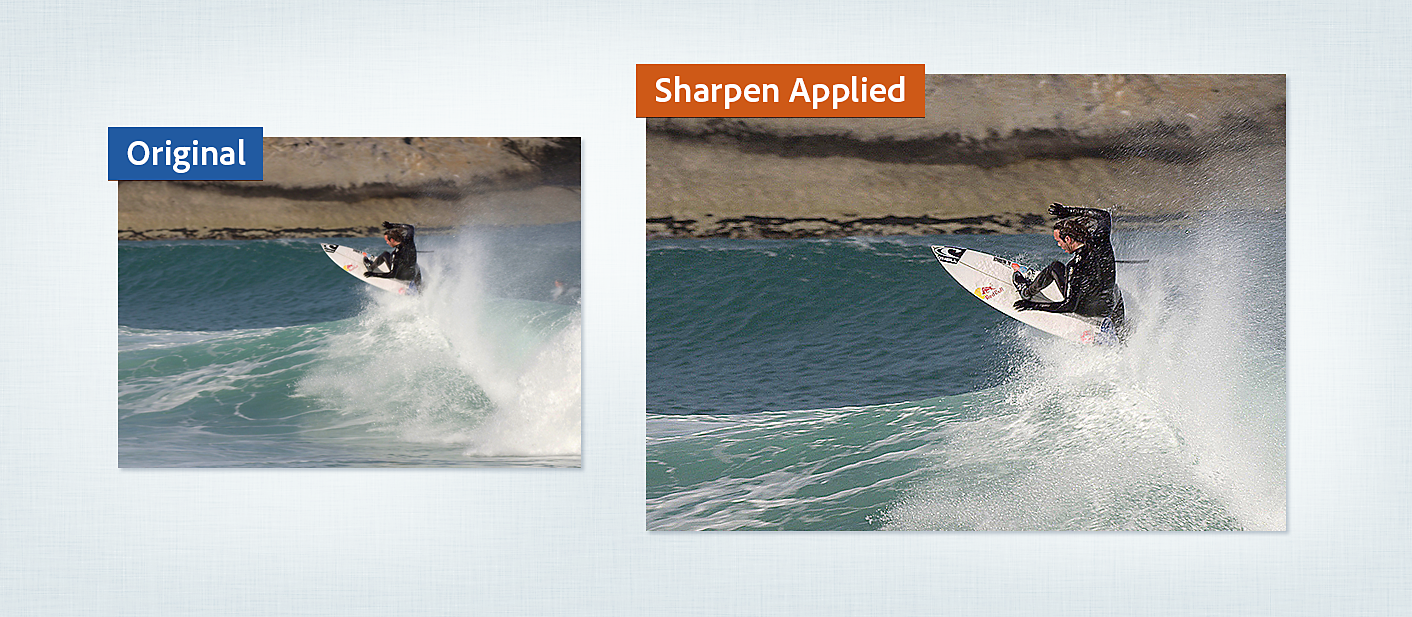
Sharpen effect
The Sharpen effect increases the contrast where color changes occur. The quality setting of the layer doesn’t affect Sharpen.
This effect works with 8-bpc, 16-bpc, and 32-bpc color.
The Sharpen effect uses GPU acceleration for faster rendering.


Smart Blur effect
The Smart Blur effect blurs an image while preserving lines and edges within it. For example, you can use it to smoothly blur shaded areas while retaining crisp outlines of text and vector graphics.


This effect works with 8-bpc and 16-bpc color.
Radius
How far the filter searches for dissimilar pixels to blur.
Threshold
How different the values of pixels should be before they are eliminated.
Mode
What parts of the image receive the blur? Normal specifies that the blur be applied to the entire selection, whereas Edge Only and Overlay Edge specify that the blur be applied only to the edges of color transitions. Where significant contrast occurs, Edge Only applies black-and-white edges, and Overlay Edge applies white.
Unsharp Mask effect
The Unsharp Mask effect increases the contrast between colors that define an edge.
This effect works with 8-bpc, 16-bpc, and 32-bpc color.


Radius
The distance from the edge at which pixels are adjusted for contrast. If you specify a low value, only pixels near the edge are adjusted.
Threshold
The greatest difference between adjacent pixels for which contrast isn’t adjusted. A lower value produces a greater result. A value that is too low causes contrast for the entire image to be adjusted and can generate noise or cause unexpected results.