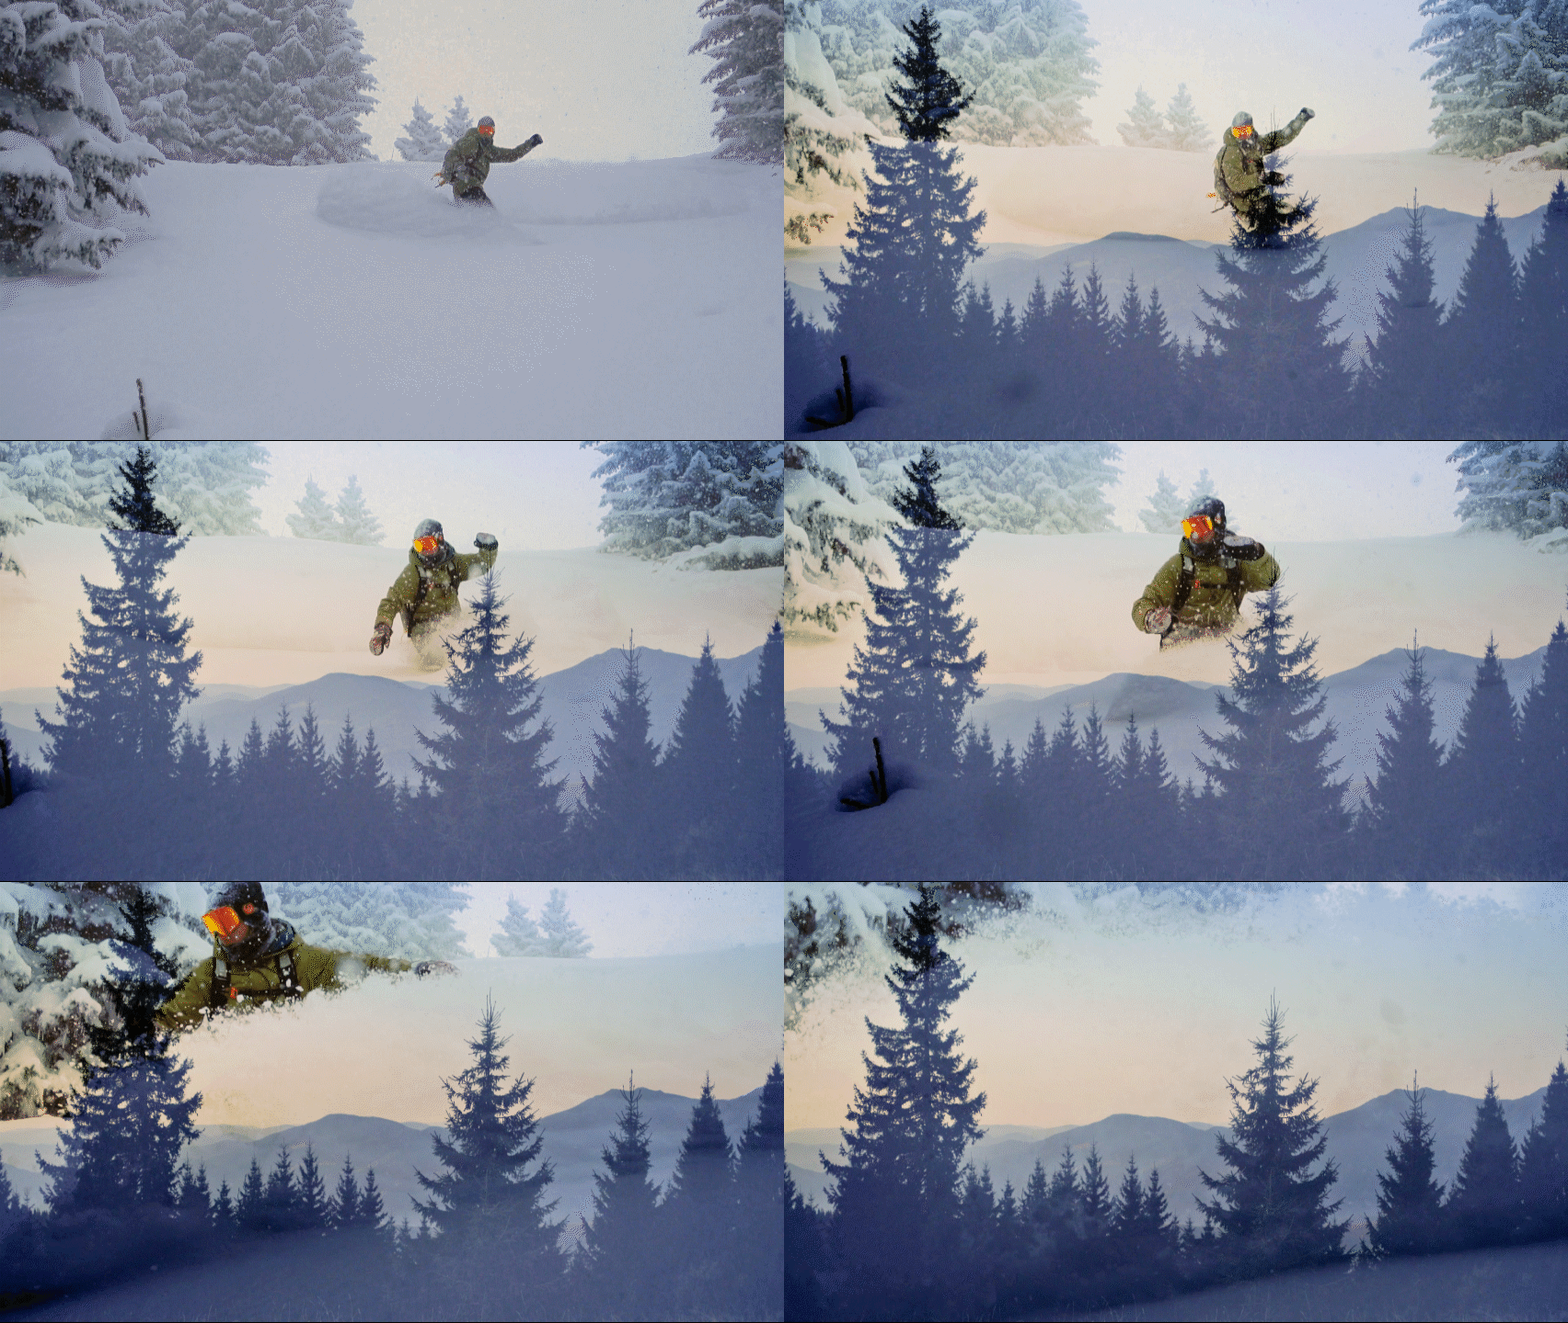
Double exposure is a combination of two exposures in one image or video to produce evocative results by superimposing them. Use this edit in PRE to add a video within a photo and create projects that are dramatic and engrossing.
- Get to know Premiere Elements
- Adobe Premiere Elements User Guide
- Introduction to Adobe Premiere Elements
- Workspace and workflow
- Working with projects
- 360° and VR Video Editing
- Importing and adding media
- Arranging clips
- Editing clips
- Reduce noise
- Select object
- Candid Moments
- Color Match
- Color Fonts and Emojis
- Smart Trim
- Freehand Crop
- Delete All Gaps
- Change clip speed and duration
- Split clips
- Freeze and hold frames
- Adjusting Brightness, Contrast, and Color - Guided Edit
- Stabilize video footage with Shake Stabilizer
- Replace footage
- Working with source clips
- Trimming Unwanted Frames - Guided Edit
- Trim clips
- Editing frames with Auto Smart Tone
- Artistic effects
- Color Correction and Grading
- Applying transitions
- Special effects basics
- Effects reference
- Applying and removing effects
- Create a black and white video with a color pop - Guided Edit
- Time remapping - Guided edit
- Effects basics
- Working with effect presets
- Finding and organizing effects
- Editing frames with Auto Smart Tone
- Fill Frame - Guided edit
- Create a time-lapse - Guided edit
- Best practices to create a time-lapse video
- Applying special effects
- Use pan and zoom to create video-like effect
- Transparency and superimposing
- Reposition, scale, or rotate clips with the Motion effect
- Apply an Effects Mask to your video
- Adjust temperature and tint
- Create a Glass Pane effect - Guided Edit
- Create a picture-in-picture overlay
- Applying effects using Adjustment layers
- Adding Title to your movie
- Removing haze
- Creating a Picture in Picture - Guided Edit
- Create a Vignetting effect
- Add a Split Tone Effect
- Add FilmLooks effects
- Add an HSL Tuner effect
- Fill Frame - Guided edit
- Create a time-lapse - Guided edit
- Animated Sky - Guided edit
- Select object
- Animated Mattes - Guided Edit
- Double exposure- Guided Edit
- Special audio effects
- Movie titles
- Creating titles
- Adding shapes and images to titles
- Adding color and shadows to titles
- Apply Gradients
- Create Titles and MOGRTs
- Add responsive design
- Editing and formatting text
- Text Styles and Style Browser
- Align and transform objects
- Motion Titles
- Appearance of text and shapes
- Exporting and importing titles
- Arranging objects in titles
- Designing titles for TV
- Applying styles to text and graphics
- Adding a video in the title
- Disc menus
- Sharing and exporting your movies
What is the Double Exposure?


How will my videos look with this effect?
Here are a few examples of videos with Double Exposure effect applied to them.


How to apply Double Exposure?
Start by importing the silhouette photo


Select Guided > Fun Edits > Double Exposure . Now in the Right Panel, click on the Graphics icon to choose a photo from the Photo category. If you wish to use your own assets, choose Add Media or Project Assets. Note that you can only select one photo.
Drag-and-drop the photo on the track Video 1 in the Timeline.
Import and add your video clip


Click Add Media to add a new video clip. If you have already imported the clip, select Project Assets to choose it. Ensure you only add one video clip.
Drag-and-drop the video clip to the Video 2 track on the Timeline at Playhead position.
Match duration
Now to match the duration of the photo to the video, click the right edge of the photo on Video 1 track and drag it to match the duration of the clip on Video 2 track.


Change the Blend Mode
Click on the Applied Effects icon on the right panel. Now click on Blend Mode dropdown and select one of the mode according to your preference. We recommend you to try different blend modes for different effects.


Apply adjustments and effects
The Guided Edit will now prompt you to adjust the exposure of the photo on video Track 1. Click on exposure and select one the presets. Similarly you can also change brightness and contrast of the photo.


Select Temperature and Tint to apply one of the presets and make your video look different in double exposure.
Click play to see the final result. To export the final output, select File > Export and Share. For information about various exports and share options available, see Export and share your videos.