- Introduction
- Aero desktop
- Aero Player (Beta) on Android
- Preparing assets for Adobe Aero
- Import AR-ready assets
- Design AR experiences
- Export and share
- Cloud documents and storage
- Examples, ideas, and inspirations
Adobe Aero will be discontinued on iOS, Android, and Creative Cloud Desktop effective November 6, 2025. Existing users can access the application and download their content until December 3, 2025. For more information, see Aero End of Support FAQs.
Learn how to set an image anchor to lock your AR experience to a real-world image like a poster or wall art.


What is an image anchor?
An image anchor is a 2D image specified by an author that acts a target for your AR experience.
Set an Image Anchor


- Use a digital version and a physical version of an image in the same aspect ratio.
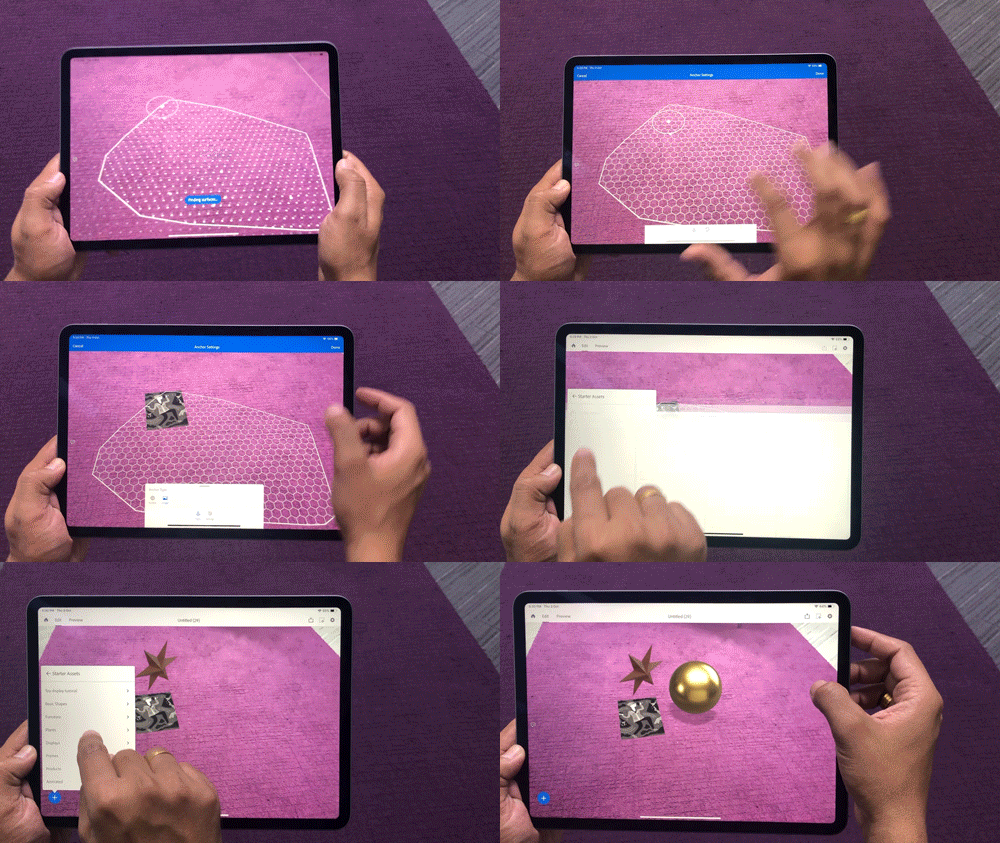
- In the Edit mode, select a surface anchor. Then, tap on Settings in the upper-right corner and choose Anchor Type and this will take you into Image Anchor mode.
- From Image Anchor mode, select Type > Image at the bottom of the screen.
- Then select the digital image that you want to use as the anchor from either your Creative Cloud files or your Camera Roll. You can use image files for your image anchor including .jpg and .png.
- Tap on Settings and set the height and width of the digital image to match the size of the physical image and then tap on Done. The digital image is shown on screen.
- When you point the camera at the physical image, you can place content on top of the physical image anchor which is recognized by the camera.
Update the image anchor
You can set a new image anchor or update the real-world dimensions at any time from the Anchor Settings. You can also switch back to a surface anchor.
Preview and share your image-anchored AR work
- To see your AR work as a viewer, tap on Preview, point the camera at the printed image to see the content appear. The content can only move to where the image anchor is and where your camera can view it.
- You can also have others view your work by sharing a link to your AR work. When you share an AR experience based on an image anchor, make sure that the viewers have access to the printed copy of the image anchor to trigger the content.
Image anchors are recognized and tracked using computer vision technology. There are two components to working with image anchors - recognition and tracking.
Best practices for image anchors
- Set the dimensions of the actual physical printed image in the image anchor settings.
- Images with high contrast lines, corners, and edges work best.
- Real-world lighting conditions should be considered. Image anchor wan good even lighting to work welll..
- Avoid rotational symmetry. If the image is rotationally symmetrical, the AR system may have trouble aligning your experience.
- Avoid repeating patterns. If an image anchor has repeating patterns, the AR system may have trouble aligning your experience.
What's next?
Next, try adding interactivity to digital assets.
Have a question or an idea?
Ask questions or suggest ideas in Adobe Aero's Support Community.
Share your work or get inspired on Behance.