Speed up your designs with a professional template. It couldn’t be easier — try it yourself.
Typekit is now Adobe Fonts.


Get started with a template
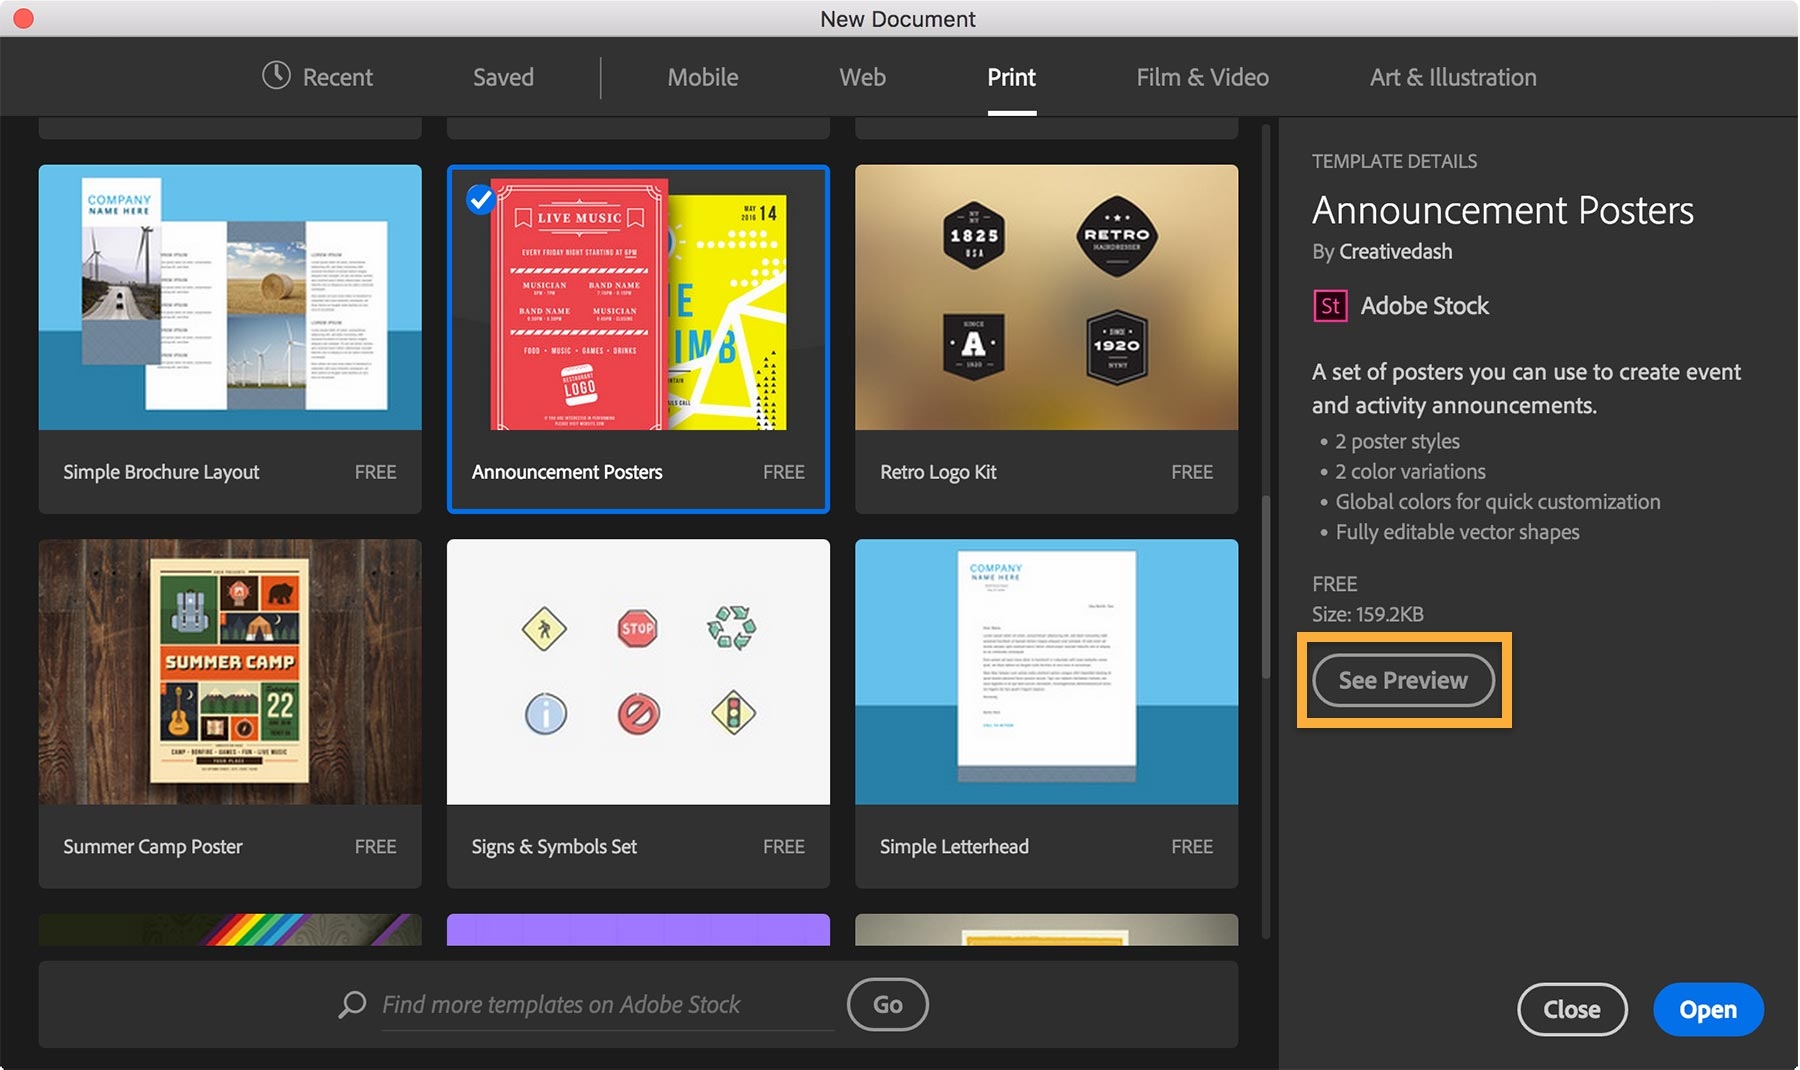
Launch Adobe Illustrator and click New or press Control+N (Windows) or Command+N (macOS).
Choose a template or refine your choices by clicking a category tab like Print or Web at the top of the screen. If you want to follow along, click Print and select Announcement Posters. Click See Preview for a quick look at what’s included in the template. Click Download, and then click Open once it is licensed. The template design opens in a new document and is ready to modify.


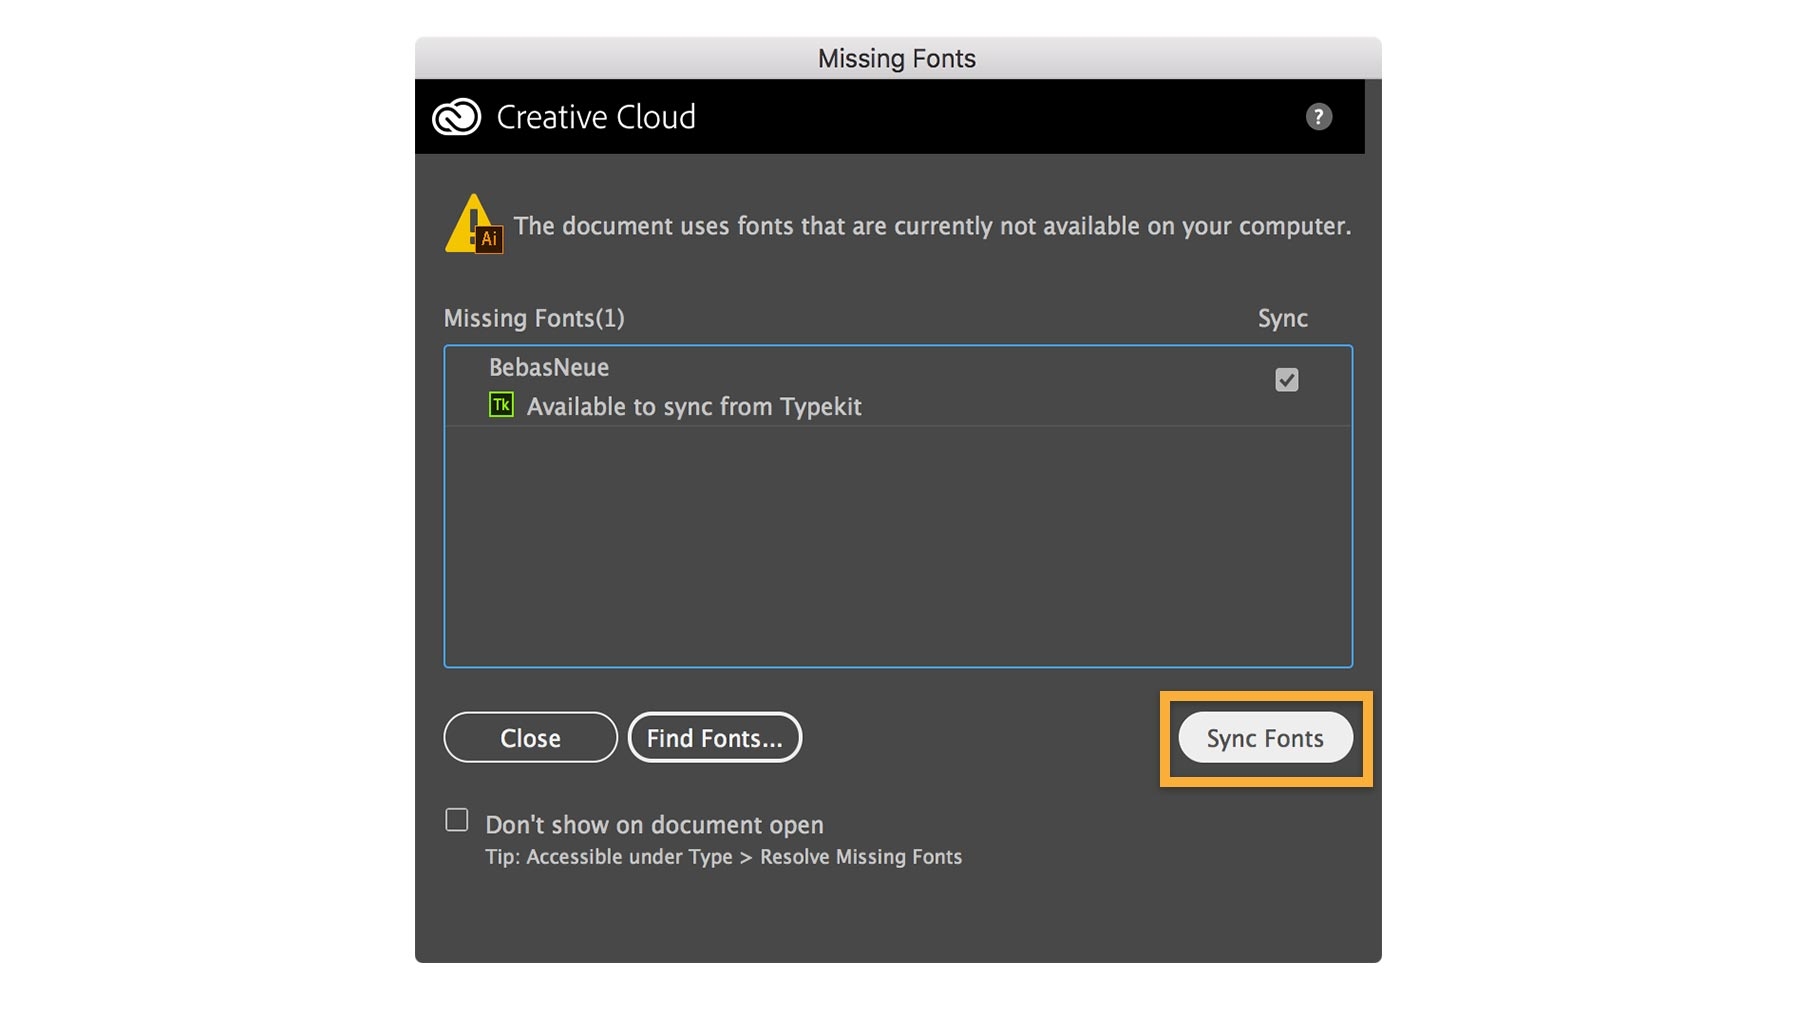
Missing a font?
You may see a Missing Fonts dialog box if the template uses any Adobe Typekit fonts not installed on your computer. Click Sync Fonts to automatically install the font so the type in your template displays as designed. In Step 5, you’ll change the font to suit your design.


Zoom in for a better view
Select the Zoom tool, and then press and hold down the mouse on the blue poster to zoom in. To zoom out, Press Alt (Windows) or Option (macOS), and then press and hold the mouse. You can easily pan while zoomed in — press and hold the spacebar and drag to move your view of the screen.


Delete unwanted objects
With the Selection tool, click any objects you want to remove and press Delete. Now you’re ready to customize the text and add new design elements.


Customize the message
Select the Type tool. Drag to highlight the entire headline and type your own text.
Not the right style? Try adding a new font from the vast Typekit Library included with your Adobe Creative Cloud membership. Reselect your text and click Character in the Control panel. Click the down-facing arrow next to the Font menu and click Add Fonts from Typekit.
Browse the immense collection of high-quality typefaces, or select Neuzeit Grotesk Black. Click Sync to add it to your computer.
Back in Illustrator, click the down-facing arrow in the Character panel. Select Neuzeit Grotesk Black in the Font menu to change the look of your headline.
Note: Some fonts are available only with a paid Creative Cloud membership. See Getting started with Typekit to learn more.


Change colors easily
You can change different-colored elements to a single color to unify the design. Press Shift and select the headline, subhead, and triangles with the Selection tool. Double-click the Fill box in the Tools panel to open the Color Picker. Select Hue (H) and move the rainbow-colored slider up or down to pick a color range. Move the round marker on the left to refine the color.
Click OK when you’re done.


You can change the background color just as easily. Choose Window > Swatches. Select the background and double-click the selected swatch in the Swatches panel. Adjust the CMYK sliders to change the color and click OK. We used C: 96, M: 99, Y: 34, and K: 30 and named our color Deep Purple.
Note: This color is saved with a Global attribute. If you change this color swatch in the future, all objects associated with the color will change instantly — making it a snap to experiment with color choices.


Add a shape
Press and hold the Rectangle tool and select the Ellipse tool. Press Shift and drag to draw a perfect circle. Drag its center point to move it. See Draw, edit, and re-edit shapes easily to do more with shapes.


Create a color gradation
Double-click the Gradient tool. In the Gradient panel, select a Type (we used Linear), and then double-click one of the two gradient color stops.
Click the Gradient panel menu and select CMYK. Adjust the sliders to make the color as vibrant as you want and press Enter. Repeat to change the other gradient stop.


Copy the style elsewhere
You can reuse the gradient in another part of your poster to tie things together visually. With the Selection tool, click the white bars to select them. Then select the Eyedropper tool and click inside the gradient-filled circle — it applies the same gradient in one click.


Rearrange the design elements
The artwork in the template is placed on separate layers. When you isolate individual elements on layers, you can edit them without disturbing other parts of your composition.
Choose Window > Layers.
In the Layers panel, scroll to the Fitness Event Blue layer group. Click the eye icons to hide or show the layers in this group so you can see how they are organized. To move your circle behind the headline, drag the layer below the Text Top layer.


Get ready to save and print
To save your unique poster, choose File > Save. Rename the document and save it in the Illustrator (AI) format. You can return to edit this file anytime.
When you’re ready to hand off your poster for printing, choose File > Save As and select Adobe PDF. In the next dialog box, select a suitable setting like High Quality Print or Press Quality.
Hope you had fun with this tutorial. Why stop here? You can explore other top-notch templates. See Customize an Illustrator template today to learn how to access thousands of templates from the Adobe Stock site.
Search for Illustrator templates at Adobe Stock.