Before you begin
We're rolling out a new, more intuitive product experience. If the screen shown here doesn’t match your product interface, select help for your current experience.
Before you begin
We're rolling out a new, more intuitive product experience. If the screen shown here doesn’t match your product interface, select help for your current experience.
You can use Acrobat to make PDFs meet the common accessibility standards, such as the latest version of the Web Content Accessibility Guidelines (WCAG) and PDF/UA (Universal Access, or ISO 14289). Acrobat provides the following accessibility tools:
You can use the Prepare for accessibility tool to check and make a PDF accessible. It prompts you to address accessibility issues, such as a missing document description or title. It looks for common elements that need further action, such as scanned text, form fields, tables, and images. You can run a Prepare for accessibility action on all PDFs except dynamic forms (XFA documents) or portfolios.
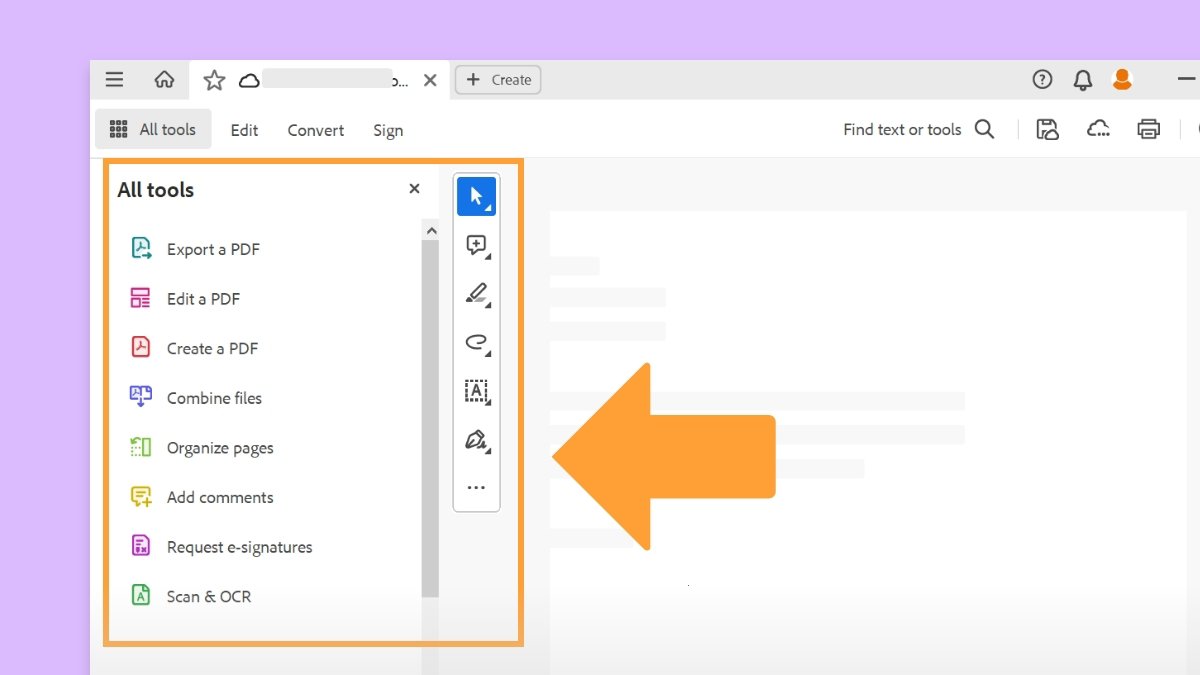
Open the PDF, and then, from the global bar in the upper left, select All tools, select View more, and then select Prepare for accessibility.
Prepare for accessibility panel with a list of available actions appear on the left panel.
From the left panel, select Check for accessibility.
From the Accessibility Checker Options dialog, select the options as required and then select Start Checking.
Once the check is complete, it displays a panel on the right that lists the accessibility issues. Select each issue type drop-down to view the details and make fixes, as suggested.
Since the Accessibility Check feature does not distinguish between essential and nonessential content types, some reported issues may not affect readability. We suggest that you review all issues to determine the ones that need correction.
The report displays one of the following statuses for each rule check:
To view a complete report of the check, from the left panel, select Open accessibility report.
It displays a detailed report in the right panel.
To fix a failed check after running the Prepare for accessibility check, select ellipsis in the Accessibility Checker panel on the right and select one of the following options from the context menu:
A document author can specify that no part of an accessible PDF is to be copied, printed, extracted, commented on, or edited. This setting could interfere with a screen reader's ability to read the document because screen readers must be able to copy or extract the document's text to convert it to speech.
This flag reports whether it's necessary to turn on the security settings that allow accessibility.
To fix the rule automatically, go to All tools > Prepare for accessibility > Check for accessibility and then ensure that the option Accessibility permission flat is set is selected before running the check. Then, select Open accessibility report, and from the right panel, right-click the Accessibility permission flag and select Fix.
To manually fix the accessibility permissions:
Select the hamburger menu ![]() (Windows) or the File menu (macOS) > Document properties.
(Windows) or the File menu (macOS) > Document properties.
In the Document properties dialog:
If your assistive technology product is registered with Adobe as a Trusted Agent, you can read PDFs that might be inaccessible to another assistive technology product. Acrobat recognizes when a screen reader or other product is a Trusted Agent and overrides security settings that would typically limit access to the content for accessibility purposes. However, the security settings remain in effect for all other purposes, such as to prevent printing, copying, extracting, commenting, or editing text.
See the related WCAG section: 1.1.1 Non-text Content. (A), 4.1.2 Name, role, value
Reports whether the document contains non-text content that is not accessible. If the document appears to contain text, but doesn't contain fonts, it could be an image-only PDF file.
To fix the rule automatically, go to All tools > Prepare for accessibility > Check for accessibility. Then, ensure that the option Document is not-image only PDF is deselected before running the check.
To fix this rule check manually, use OCR to recognize text in scanned images:
From the All tools menu, select Scan & OCR.
From the Scan & OCR panel, under Recognize Text, select In this file.
From the Pages dialog, select the pages you want to process, the document language, and then select Recognize text.
See the related WCAG section: 1.1.1. Non-text content (A)
If this rule check fails, the document isn't tagged to specify the correct reading order.
To fix the item automatically, go to All tools > Prepare for accessibility > Check for accessibility. Then, ensure that the option Document is tagged PDF is selected before running the check. Acrobat automatically adds tags to the PDF.
To specify tags manually, do one of the following:
See the related WCAG section: 1.3.1 Info and Relationships, 1.3.2, 2.4.1, 2.4.4, 2.4.5, 2.4.6, 3.1.2, 3.3.2, 4.1.2 Name, role, value
Verify this rule check manually. Make sure that the reading order displayed in the Tags panel coincides with the logical reading order of the document.
Setting the document language in a PDF enables some screen readers to switch to the appropriate language. This check determines whether the primary text language for the PDF is specified. If the check fails, set the language.
To set the language automatically, select Primary Language in the Accessibility Checker tab and then choose Fix from the Options ![]() menu. Choose a language in the Set Reading Language dialog box, and then select OK.
menu. Choose a language in the Set Reading Language dialog box, and then select OK.
To set the language manually, do one of the following:
See the related WCAG section: Language of Page (Level A)
Reports whether there is a title in the Acrobat application title bar.
To fix the title automatically, select Title in the Accessibility Checker tab, and choose Fix from the Options ![]() menu. Enter the document title in the Description dialog box (deselect Leave As Is, if necessary).
menu. Enter the document title in the Description dialog box (deselect Leave As Is, if necessary).
To fix the title manually:
Select the hamburger menu ![]() (Windows) or the File menu (macOS) > Document properties.
(Windows) or the File menu (macOS) > Document properties.
In the dialog that opens, under Description, enter a title in the Title text box.
Select Initial View and then from the Show drop-down, select Document Title.
Select OK.
See the related WCAG section: 2.4 Page Titled (Level A)
This check fails when the document has 21 or more pages, but doesn't have bookmarks that parallel the document structure.
To add bookmarks to the document, select Bookmarks on the Accessibility Checker panel, and choose Fix from the Options ![]() menu. In the Structure Elements dialog box, select the elements that you want to use as bookmarks, and click OK. (You can also access the Structure Elements dialog box by clicking the Options menu on the Bookmark tab and selecting the New Bookmarks From Structure command.)
menu. In the Structure Elements dialog box, select the elements that you want to use as bookmarks, and click OK. (You can also access the Structure Elements dialog box by clicking the Options menu on the Bookmark tab and selecting the New Bookmarks From Structure command.)
See the related WCAG sections: 2.4.1 Bypass Blocks (Level A), 2.4.5 Multiple Ways (Level AA)
When this check fails, it's possible that the document contains content that isn't accessible to people who are color-blind.
To fix this issue, make sure that the document's content adheres to the guidelines outlined in WCAG section 1.4.3. Or, include a recommendation that the PDF viewer use high-contrast colors:
Select the hamburger menu ![]() (Windows) or the Acrobat menu (macOS) > Preferences.
(Windows) or the Acrobat menu (macOS) > Preferences.
In the dialog that opens, from the left panel, select Accessibility.
Select Replace Document Colors and then select Use High-Contrast Colors. From the High-contrast color combination, choose the color combination that you want and then select OK.
This check reports whether all content in the document is tagged. Ensure that all content in the document is either included in the Tags tree, or marked as an artifact.
Do one of the following to fix this rule check:
See the related WCAG sections: 1.1.1 Non-text content (A), 1.3.1 Info and Relationships (Level A), 1.3.2 Meaningful Sequence (Level A), 2.4.4 Link Purpose (In Context) (Level A), 3.1.2 Language of Parts (Level AA), 4.1.2 Name, role, value
This rule checks whether all annotations are tagged. Ensure that annotations such as comments and editorial marks (insert and highlight) are either included in the Tags tree or marked as artifacts.
To have Acrobat assign tags automatically to annotations as they're created, choose Automatically tag form fields from the Options ( . . . ) menu on the Tags panel.
See the related WCAG section: 1.3.1 Info and Relationships (Level A), 4.1.2 Name, role, value
Because tabs are often used to navigate a PDF, it's necessary that the tab order parallels the document structure.
To fix the tab order automatically, select Tab Order on the Accessibility Checker panel, and choose Fix from the Options ![]() menu.
menu.
To manually fix the tab order for links, form fields, comments, and other annotations:
Click the Page Thumbnails panel on the navigation pane.
Click a page thumbnail, and then choose Page Properties from the Options ![]() menu.
menu.
In the Page Properties dialog box, choose Tab Order. Then, select Use Document Structure, and select OK.
Repeat these steps for all thumbnails in the document.
See the related WCAG section: 2.4.3, Focus Order (Level A)
Specifying the encoding helps PDF viewers' present users with readable text. However, some character-encoding issues aren't repairable within Acrobat.
To ensure proper encoding, do the following:
The WCAG doesn't address Unicode character mapping.
This rule checks whether all multimedia objects are tagged. Ensure that content is included in the Tags tree or marked as an artifact.
Open the Content ![]() panel and right-click (Windows) or Ctrl-click (Mac OS) the content that you want to mark as an artifact. Then, select Create Artifact from the context menu. (To display the Content panel, select the hamburger menu
panel and right-click (Windows) or Ctrl-click (Mac OS) the content that you want to mark as an artifact. Then, select Create Artifact from the context menu. (To display the Content panel, select the hamburger menu ![]() (Windows) > View or select the View menu (macOS), and then select Show/Hide > Side Panels > Content.)
(Windows) > View or select the View menu (macOS), and then select Show/Hide > Side Panels > Content.)
Tag the content by choosing All tools > Prepare for accessibility > Fix reading order. Select the content, and then apply tags as necessary.
Assign tags using the Tags ![]() panel. Right-click (Windows) or Ctrl-click (Mac OS) the element in the Tags tree, and choose Create Tag From Selection. (To display the Tags panel, select the hamburger menu
panel. Right-click (Windows) or Ctrl-click (Mac OS) the element in the Tags tree, and choose Create Tag From Selection. (To display the Tags panel, select the hamburger menu ![]() (Windows) > View or select the View menu (macOS), and then select Show/Hide > Side Panels > Accessibility tags.)
(Windows) > View or select the View menu (macOS), and then select Show/Hide > Side Panels > Accessibility tags.)
See the related WCAG sections: 1.1.1 Non-text Content. (A), 1.2.1 Audio- only and Video- only (Prerecorded). (A), 1.2.2 Captions (Prerecorded). (A), 1.2.3 Audio Description or Media Alternative (Prerecorded). (A), 1.2.5 Audio Description (Prerecorded). (AA)
Elements that make the screen flicker, such as animations and scripts, can cause seizures in individuals who have photosensitive epilepsy. These elements can also be difficult to see when the screen is magnified.
If the Screen Flicker rule fails, manually remove or modify the script or content that causes screen flicker.
See these related WCAG sections: 1.1.1 Non-text Content. (A), 1.2.1 Audio- only and Video- only (Prerecorded). (A), 1.2.2 Captions (Prerecorded). (A), 1.2.3 Audio Description or Media Alternative (Prerecorded). (A), 2.3.1 Three Flashes or Below Threshold. (Level A)
Content cannot be script-dependent unless both content and functionality are accessible to assistive technologies. Make sure that scripting doesn't interfere with keyboard navigation or prevent the use of any input device.
Check the scripts manually. Remove or modify any script or content that compromises accessibility.
See these related WCAG sections: 1.1.1 Non-text Content. (A), 2.2.2 Pause, Stop, Hide. (Level A), 4.1.2 Name, role, value
This rule check applies to documents that contain forms with JavaScript. If the rule check fails, make sure that the page does not require timed responses. Edit or remove scripts that impose timely user response so that users have enough time to read and use the content.
See the related WCAG section: 2.2.1 Timing Adjustable. (Level A)
For URLs to be accessible to screen readers, they must be active links that are correctly tagged in the PDF. (The best way to create accessible links is with the Create Link command, which adds all three links that screen readers require to recognize a link.) Make sure that navigation links are not repetitive and that there is a way for users to skip over repetitive links.
If this rule check fails, check navigation links manually and verify that the content does not have too many identical links. Also, provide a way for users to skip over items that appear multiple times. For example, if the same links appear on each page of the document, also include a "Skip navigation" link.
See the related WCAG section: 2.4.1 Bypass Blocks. (Level A)
In an accessible PDF, all form fields are tagged and part of the document structure. In addition, you can use the tool tip form field property to provide the user with information or instructions.
To tag form fields, choose All tools > Prepare for accessibility > Automatically tag PDF.
See the related WCAG sections: 1.3.1 Info and Relationships. (Level A), 4.1.2 Name, role, value
For accessibility, all form fields need a text description (tool tip).
To add a text description to a form field:
See the related WCAG sections: 1.3.1 Info and Relationships. (Level A), 3.3.2 Labels or Instructions (Level A), 4.1.2 Name, role, value
Make sure that images in the document either have alternate text or are marked as artifacts.
If this rule check fails, do one of the following:
See the related WCAG section: 1.1.1 Non-text Content. (A)
Screen readers don't read the alternate text for nested elements. Therefore, don't apply alternate text to nested elements.
To remove alternate text from nested elements, do the following:
See the related WCAG section: #1.1.1 Non-text Content. (A)
Make sure that alternate text is always an alternate representation of content on the page. If an element has alternate text but does not contain any page content, there is no way to determine which page it is on. If the Screen Reader Option in the Reading preferences is not set to read the entire document, then screen readers never read the alternate text.
See the related WCAG section: 1.1.1 Non-text Content. (A)
Alternate text can't hide an annotation. If an annotation is nested under a parent element with alternate text, then screen readers don't see it.
To remove alternate text from nested elements:
See the related WCAG sections: 1.3.1 Info and Relationships. (Level A), 4.1.2 Name, role, value
This report checks for content other than figures that require alternate text (such as multimedia, annotation, or 3D model). Make sure that alternate text is always an alternate representation of content on the page. If an element has alternate text but does not contain any page content, there is no way to determine which page it is on. If the Screen Reader Options in the Reading preferences is not set to read the entire document, then screen readers don't read the alternate text.
See the related WCAG section: 1.1.1 Non-text Content. (A)
Because table structure can be complex, it is best practice to check them for accessibility manually.
This rule checks whether each TR in a table is a child of Table, THead, TBody, or TFoot.
Related WCAG section: 1.3.1 Info and Relationships. (Level A)
In a proper table structure, TH and TD are children of TR.
See related WCAG section: #1.3.1 Info and Relationships. (Level A)
For accessibility, it's necessary that all tables in the PDF have a header.
See the related WCAG section: 1.3.1 Info and Relationships. (Level A)
To be accessible, tables must contain the same number of columns in each row, and rows in each column.
See the related WCAG section: 1.3.1 Info and Relationships. (Level A)
Table summaries are optional, but can improve accessibility.
See the related WCAG section: 1.3.1 Info and Relationships. (Level A)
The check reports whether each List Item (LI) is a child of List (L). When this rule check fails, the structure of this list is incorrect. Lists must have the following structure: A List element must contain List Item Elements. And, List Item Elements can only contain Label Elements and List Item Body Elements.
To fix the list structure:
See the related WCAG section: 1.3.1 Info and Relationships. (Level A)
Lists must have the following structure: A List element must contain List Item Elements. And, List Item Elements can only contain Label Elements and List Item Body Elements. When this rule check fails, the structure of this list is incorrect.
To fix the list structure:
See the related WCAG section: 1.3.1 Info and Relationships. (Level A)
This rule checks nested headings. When this check fails, headings are not nested properly.
To fix the list structure:
See the related WCAG section: 2.4.6 Headings and Labels. (Level AA). The order of headings is not required under WCAG, and is only an advisory technique.
| WCAG 2.0 | ISO 14289 -1 (File) | Techniques |
|---|---|---|
| 1.1.1 Non-text Content. (A) |
|
|
| 1.2.1 Audio- only and Video- only (Prerecorded). (A) |
|
|
| 1.2.2 Captions (Prerecorded). (A) |
|
|
| 1.2.3 Audio Description or Media Alternative (Prerecorded). (A) |
|
|
| 1.2.4 Captions (Live). (AA) |
|
|
| 1.2.5 Audio Description (Prerecorded). (AA) |
|
|
| 1.2.6 Sign Language (Prerecorded). (AAA) |
|
|
| 1.2.7 Extended Audio Description (Prerecorded). (AAA) |
|
|
| 1.2.8 Media Alternative (Prerecorded). (AAA) |
|
|
| 1.2.9 Audio- only (Live). (AAA) |
|
|
| 1.3.1 Info and Relationships. (Level A) |
|
|
| 1.3.2 Meaningful Sequence. (Level A) |
|
|
| 1.3.3 Sensory Characteristics. (Level A) |
|
|
| 1.4.1 Use of Color. (Level A) |
|
|
| 1.4.2 Audio Control. (Level A) |
|
|
| 1.4.3 Contrast (Minimum). (Level AA) |
|
|
| 1.4.4 Resize text. (Level AA) |
|
|
| 1.4.5 Images of Text. (Level AA) |
|
|
| 1.4.6 Contrast (Enhanced). (Level AAA) |
|
|
| 1.4.7 Low or No Background Audio. (Level AAA) |
|
|
| 1.4.8 Visual Presentation. (Level AAA) |
|
|
| 1.4.9 Images of Text (No Exception). (Level AAA) |
|
|
| 2.1.1 Keyboard. (Level A) |
|
|
| 2.1.2 No Keyboard Trap. (Level A) |
|
|
| 2.1.3 Keyboard (No Exception). (Level AAA) |
|
|
| 2.2.1 Timing Adjustable. (Level A) |
|
|
| 2.2.2 Pause, Stop, Hide. (Level A) |
|
|
| 2.2.3 No Timing. (Level AAA) |
|
|
| 2.2.4 Interruptions. (Level AAA) |
|
|
| 2.2.5 Re- authenticating. (Level AAA) |
|
|
| 2.3.1 Three Flashes or Below Threshold. (Level A) |
|
|
| 2.3.2 Three Flashes.(Level AAA) |
|
|
| 2.4.1 Bypass Blocks. (Level A) |
|
|
| 2.4.2 Page Titled. (Level A) |
|
|
| 2.4.3 Focus Order. (Level A) |
|
|
| 2.4.4 Link Purpose (In Context). (Level A) |
|
|
| 2.4.5 Multiple Ways. (Level AA) |
|
|
| 2.4.6 Headings and Labels. (Level AA) |
|
|
| 2.4.7 Focus Visible. (Level AA) |
|
|
| 2.4.8 Location. (Level AAA) |
|
|
| 2.4.9 Link Purpose (Link Only). (Level AAA) |
|
|
| 2.4.10 Section Headings. (Level AAA) |
|
|
| 3.1.1 Language of Page. (Level A) |
|
|
| 3.1.2 Language of Parts. (Level AA) |
|
|
| 3.1.3 Unusual Words. (Level AAA) |
|
|
| 3.1.4 Abbreviations. (Level AAA) |
|
|
| 3.1.5 Reading Level. (Level AAA) |
|
|
| 3.1.6 Pronunciation. (Level AAA) |
|
|
| 3.2.1 On Focus. (Level A) |
|
|
| 3.2.2 On Input. (Level A) |
|
|
| 3.2.3 Consistent Navigation. (Level AA) |
|
|
| 3.2.4 Consistent Identification. (Level AA) |
|
|
| 3.2.5 Change on Request. (Level AAA) |
|
|
| 3.3.1 Error Identification. (Level A) |
|
|
| 3.3.2 Labels or Instructions (Level A) | ||
| 4.1.2 Name, role, value |

Work smarter with Acrobat on your desktop
Create, edit, and organize PDFs with powerful tools that help you stay productive anywhere.