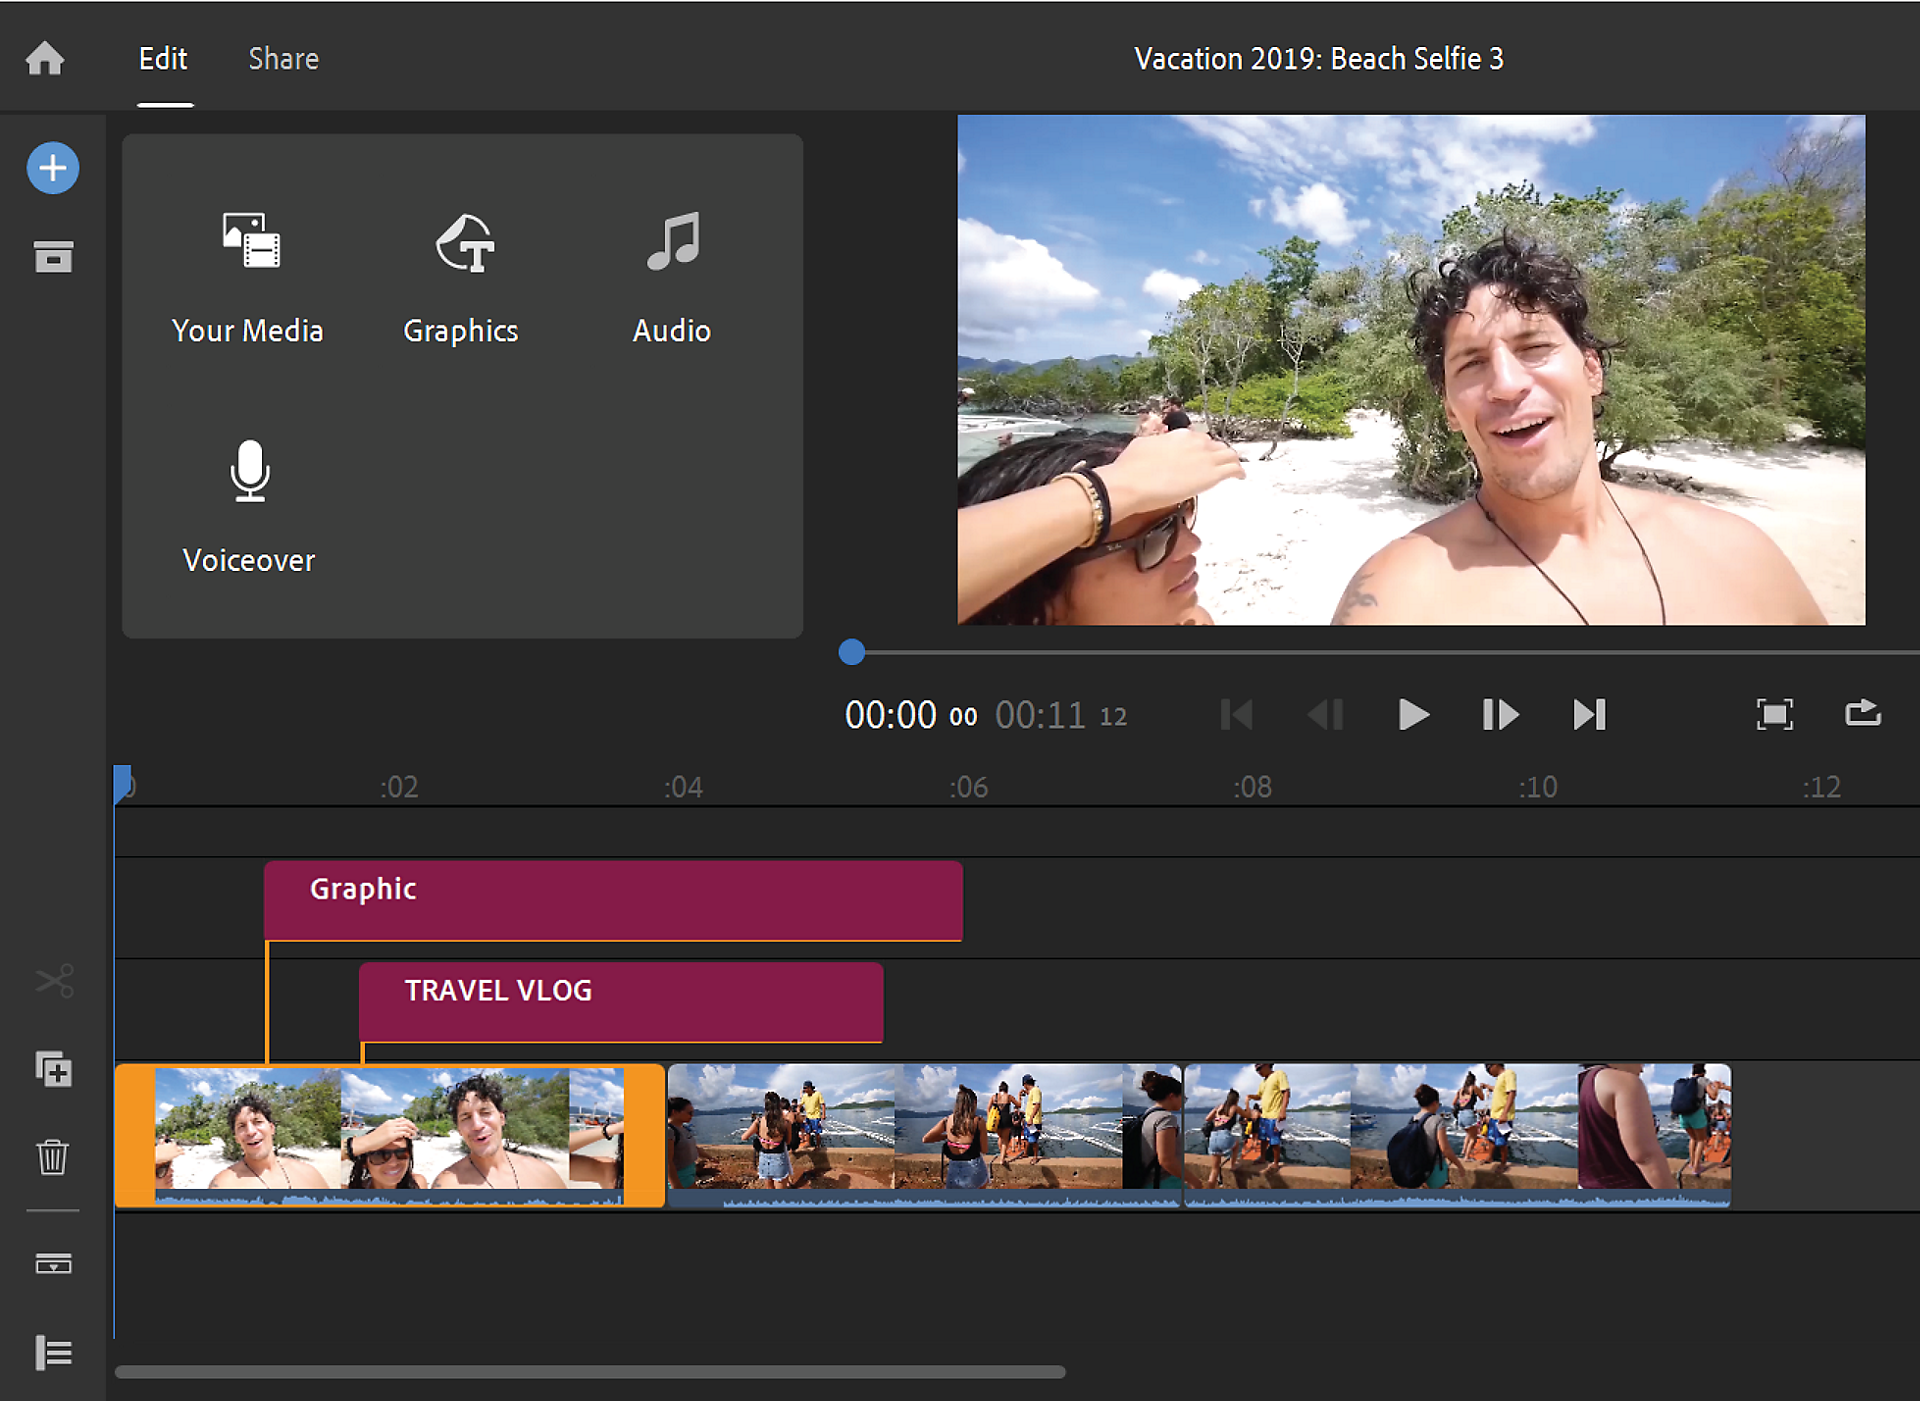
Přesuňte ukazatel pozice na místo, kde se má titul ve videu zobrazit.
- Uživatelská příručka Adobe Premiere Rush
- Úvod
- Co je aplikace Adobe Premiere Rush
- Systémové požadavky aplikace Adobe Premiere Rush
- Co je nového v Adobe Premiere Rush
- Poznámky k verzi | Adobe Premiere Rush
- Seznámení s rozhraním aplikace Adobe Premiere Rush
- Klávesové zkratky
- Adobe Premiere Rush | Běžné otázky
- Tipy a triky
- Odinstalovat aplikaci Adobe Premiere Rush pro počítače
- Import záběrů
- Úprava videa
- Úprava videa na časové ose
- Přidání a doladění zvuku
- Změna barvy, velikosti a polohy videa
- Vytvoření titulků
- Přidání přechodů, efekty posunu a přiblížení a automatické přerámování klipů
- Změna vlastností klipu
- Změna poměru stran vašeho videa
- Vytvoření efektu obrazu v obraze
- Zrychlení nebo zpomalení videa
- Použití písem z Adobe Fonts
- Duplikování projektů a sekvencí
- Export videa
- Premiere Rush na iOS a Androidu
- Adobe Premiere Rush na mobilním zařízení | Běžné otázky
- Vytváření a sdílení videí pomocí aplikace Adobe Premiere Rush v systému iOS
- Export videa na kanály sociálních médií
- Vytváření a sdílení videí pomocí aplikace Adobe Premiere Rush v systému Android
- Správa předplatného aplikace Adobe Premiere Rush v systému iOS
- Správa předplatného aplikace Adobe Premiere Rush v systému Android
- Správa předplatného aplikace Adobe Premiere Rush v Samsung Galaxy Store
Informace o přidávání názvů, přechodových grafik a překryvných obrázků ve videoprojektu Adobe Premiere Rush.
S představením nové generace mobilních aplikací Adobe Premiere ukončujeme podporu Adobe Premiere Rush.Od 30. září 2025 již Premiere Rush nebude dostupný na Adobe.com.Jako alternativu doporučujeme Premiere na iPhone; verze pro Android je v současné době také ve vývoji.Další informace naleznete v často kladených dotazech k ukončení Premiere Rush.
Název jakéhokoli videoklipu nebo fotografie můžete přidat do svého projektu Premiere Rush. Pomocí šablon Motion Graphics můžete vytvářet jednoduché tituly pouze s textem nebo divoce barevné tituly s textem, grafikou a animací. Premiere Rush umožňuje přístup k různým šablonám Motion Graphics z panelu Tituly.
Když přidáte název, Premiere Rush vytvoří klip pouze s titulem. Klip můžete snadno vybrat, upravit nebo smazat.
Vytvoření titulků
Můžete přidat grafiku, jako jsou tituly, přechody a překryvné vrstvy. V aplikaci Premiere Rush můžete vyhledávat napříč všemi grafickými kategoriemi. Chcete-li do projektu přidat grafiku, postupujte následovně:
Přidat název
-
-
Klikněte na modrou ikonu + na levém panelu nástrojů a vyberte možnost Grafika.
Vybrat grafiku Vybrat grafiku -
Vyberte Tituly. Vyberte styl titulu, který chcete přidat do projektu. Klikněte na tlačítko Přidat.
Chcete-li zobrazit více stylů titulů, klikněte na tlačítko Další.
Vybrat titul Vybrat titul Premiere Rush přidá na vaši časovou osu výchozí titulní klip, který vám ukáže náhled i v monitoru Náhled.
Chcete-li zobrazit více stylů titulů, klikněte na tlačítko Další. Konkrétní styly titulů můžete vyhledávat pomocí vyhledávacího panelu.
-
Vyberte titulní klip na časové ose a dvakrát klikněte na text v monitoru Náhled pro jeho úpravu.
Upravit výchozí text titulu Upravit výchozí text titulu -
Chcete-li přizpůsobit vzhled titulu, použijte panel Grafika. Můžete změnit písmo, velikost písma a další nastavení formátu a vzhledu.
Upravit vzhled titulu Upravit vzhled titulu Pokud chcete další možnosti písma, můžete přidat písma z Adobe Fonts. Další informace naleznete v části Jak použít fonty z Adobe Fonts.
Změnit styl titulu
Můžete upravit text, písmo, velikost, barvu a pozici titulu. Můžete také zobrazit náhled dalších stylů titulů a změnit titul na styl, který se vám líbí více.
-
Vyberte titulní klip na časové ose a kliknutím na ikonu Tituly otevřete panel Tituly.
-
Na panelu Tituly vyberte šablonu s požadovaným stylem.
-
Chcete-li dále přizpůsobit název, vyberte možnost Upravit na panelu Tituly.
-
Na monitoru Náhled vyberte textovou vrstvu a změňte písmo, velikost, barvu a další vlastnosti titulu.
Upravit pozici, velikost a dobu trvání titulu
Upravte pozici a velikost titulu.
Vyberte titulní klip na časové ose.
Poté kliknutím na monitor Náhled zobrazte modré úchyty, které vám umožňují upravit polohu a velikost titulu. Nyní můžete přesunout titul a umístit jej kamkoli na monitor.


Upravte dobu trvání titulu.
Pomocí oranžových rukojetí kolem klipu prodloužíte nebo zkrátíte dobu trvání klipu.
Chcete-li přesunout klip, stačí jej vybrat a přesunout v časové ose.


Přidat přechodovou grafiku
-
Přesuňte ukazatel pozice na místo, kde se má přechod ve videu zobrazit.
-
Klikněte na modrou ikonu + na levém panelu nástrojů a vyberte možnost Grafika.
Vybrat grafiku Vybrat grafiku -
Vyberte Grafiku přechodu. Vyberte přechodový grafický styl, který chcete přidat do projektu. Klikněte na tlačítko Přidat.
Vybrat přechodovou grafiku Vybrat přechodovou grafiku Chcete-li zobrazit více stylů titulů, klikněte na tlačítko Další. Konkrétní přechodovou grafiku můžete vyhledat pomocí vyhledávacího panelu.
-
Chcete-li přizpůsobit přechodovou grafiku, použijte panel Grafika.
Upravit vzhled přechodové grafiky Upravit vzhled přechodové grafiky
Přidat překryvnou vrstvu
-
Přesuňte ukazatel pozice na místo, kde se má překryvná vrstva ve videu zobrazit.
-
Klikněte na modrou ikonu + na levém panelu nástrojů a vyberte možnost Grafika.
Vybrat grafiku Vybrat grafiku -
Vyberte možnost Překrytí. Vyberte styl překrytí, který chcete přidat do projektu. Klikněte na tlačítko Přidat.
Vybrat překrytí Vybrat překrytí Chcete-li zobrazit více stylů titulů, klikněte na tlačítko Další. Konkrétní styly překrytí můžete vyhledávat pomocí vyhledávacího panelu.
-
Pro přizpůsobení překrytí použijte panel Grafika.
Upravit vzhled překryvné grafiky Upravit vzhled překryvné grafiky
Uložit názvy nebo grafiku
-
Pro uložení titulku nebo grafiky klikněte na ikonu ....
-
Vyberte možnost Uložit jako.
Uložení názvu nebo grafiky Uložení názvu nebo grafiky -
Zadejte jméno. Klikněte na tlačítko OK.
Tato šablona je vám k dispozici v části Uloženo v Prohlížeči grafických médií a můžete ji použít v jakémkoli projektu Premiere Rush.
Uložená část prohlížeče grafických médií Uložená část prohlížeče grafických médií
Smazat titulní klipy
Chcete-li smazat titulní klip, vyberte klip na časové ose a klikněte na ikonu Smazat na levém panelu nástrojů.


