Select the recipient who should complete the field.
Last updated on
Sep 9, 2026
Add form fields to collect signatures, information, and other recipient input, then configure each field for the person who needs to complete it.
In the modern Adobe Acrobat Sign authoring experience, you can place fields directly on the document and customize their assignment, name, requirements, and other supported properties.
Add a form field
Choose the field type you want to add.
Drag the field onto the document.

Move or resize the field as needed.
Repeat as needed for other fields and recipients.
A newly placed field is assigned to the recipient who is selected when you add it.
To learn what each available field is designed to collect, see Form field types.
Select and customize a field
Select a placed field to work with it.
A single selection provides quick actions appropriate for that field type. Double-click the field to open Customize field, where you can review and change its available properties.
Depending on the field type, you can configure properties such as:
- Recipient assignment
- Field name
- Required status
- Prefilled text
- Validation
- Appearance
- Tooltip
- Conditional behavior
- Calculated values
Not every property is available for every field type. See Form field properties for a complete comparison.
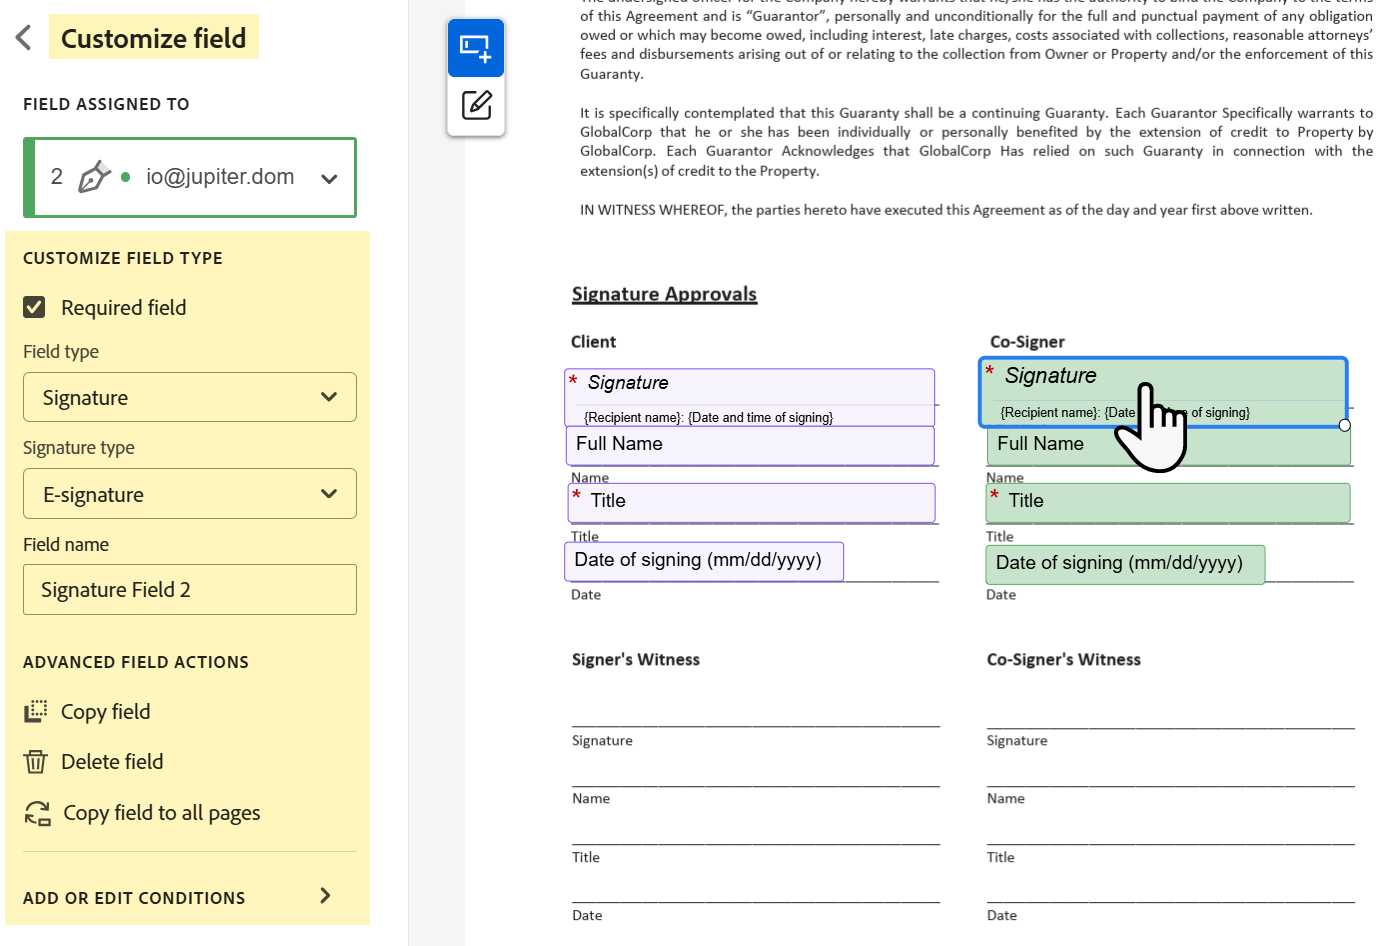
Assign or reassign a field
Each field that supports recipient assignment can be assigned to the participant who should complete it.
To change the assignment:
Double-click the field to open the Customize panel.
Choose the intended recipient from the recipient list at the top of the customization panel.
Confirm that the field now reflects the intended assignment.
Some fields don't require a recipient assignment, including Link, Participation stamp, and Transaction number.
For working with several fields at once, see Review and manage form fields.
Give fields meaningful names
Every form field has a field name. Acrobat Sign can generate names automatically, but you can change them in Customize field.
Use names that clearly identify the information the field collects, particularly when its data will be:
- Exported after signing.
- Used in reports.
- Referenced by a calculated-field formula.
For example, Employee ID is more useful in exported data than a generic name such as Text 4.
Field names must be unique. They also can't:
- Begin or end with a period.
- Contain consecutive periods.
Add a prefilled value
Fields that support Prefilled text can contain a value before the recipient opens the agreement.
Enter the value while configuring the field. If the recipient should be able to see the value but not change it, use Lock field value in the field's custom properties.
Not every field supports Prefilled text. System-populated fields and several specialized field types obtain their values in other ways.
See Form field properties for property availability by field type.
Move, resize, or delete a field
After a field is placed, you can continue adjusting the form layout.
- Drag a field to reposition it.
- Resize the field to fit the intended area of the document.
- Select one or more fields and press Delete to remove them.
Deleting a placed field removes that field from the agreement.
For selecting and managing multiple fields together, see Review and manage form fields.
Add more specialized behavior
Some field configurations have their own workflows.
Use:
- Configure form field validation to control the format of information recipients can enter.
- Set conditions on form fields to show, hide, enable, or disable fields based on other field values.
- Create a calculated field to derive a value from other fields.
- Create and configure checkbox groups when related checkboxes need shared selection requirements.
- Use Prefill fields when the sender needs to provide information before the agreement reaches recipients.

Streamline your work with Acrobat Sign
Manage and sign documents online quickly and easily.
