单击“专家”,然后单击“导向”。从“导向编辑”列表中,选择“在字幕中添加视频”。
- Get to know Premiere Elements
- Adobe Premiere Elements User Guide
- Introduction to Adobe Premiere Elements
- Workspace and workflow
- Working with projects
- 360° and VR Video Editing
- Importing and adding media
- Arranging clips
- Editing clips
- Reduce noise
- Select object
- Candid Moments
- Color Match
- Color Fonts and Emojis
- Smart Trim
- Freehand Crop
- Delete All Gaps
- Change clip speed and duration
- Split clips
- Freeze and hold frames
- Adjusting Brightness, Contrast, and Color - Guided Edit
- Stabilize video footage with Shake Stabilizer
- Replace footage
- Working with source clips
- Trimming Unwanted Frames - Guided Edit
- Trim clips
- Editing frames with Auto Smart Tone
- Artistic effects
- Color Correction and Grading
- Applying transitions
- Special effects basics
- Effects reference
- Applying and removing effects
- Create a black and white video with a color pop - Guided Edit
- Time remapping - Guided edit
- Effects basics
- Working with effect presets
- Finding and organizing effects
- Editing frames with Auto Smart Tone
- Fill Frame - Guided edit
- Create a time-lapse - Guided edit
- Best practices to create a time-lapse video
- Applying special effects
- Use pan and zoom to create video-like effect
- Transparency and superimposing
- Reposition, scale, or rotate clips with the Motion effect
- Apply an Effects Mask to your video
- Adjust temperature and tint
- Create a Glass Pane effect - Guided Edit
- Create a picture-in-picture overlay
- Applying effects using Adjustment layers
- Adding Title to your movie
- Removing haze
- Creating a Picture in Picture - Guided Edit
- Create a Vignetting effect
- Add a Split Tone Effect
- Add FilmLooks effects
- Add an HSL Tuner effect
- Fill Frame - Guided edit
- Create a time-lapse - Guided edit
- Animated Sky - Guided edit
- Select object
- Animated Mattes - Guided Edit
- Double exposure- Guided Edit
- Special audio effects
- Movie titles
- Creating titles
- Adding shapes and images to titles
- Adding color and shadows to titles
- Apply Gradients
- Create Titles and MOGRTs
- Add responsive design
- Editing and formatting text
- Text Styles and Style Browser
- Align and transform objects
- Motion Titles
- Appearance of text and shapes
- Exporting and importing titles
- Arranging objects in titles
- Designing titles for TV
- Applying styles to text and graphics
- Adding a video in the title
- Disc menus
- Sharing and exporting your movies
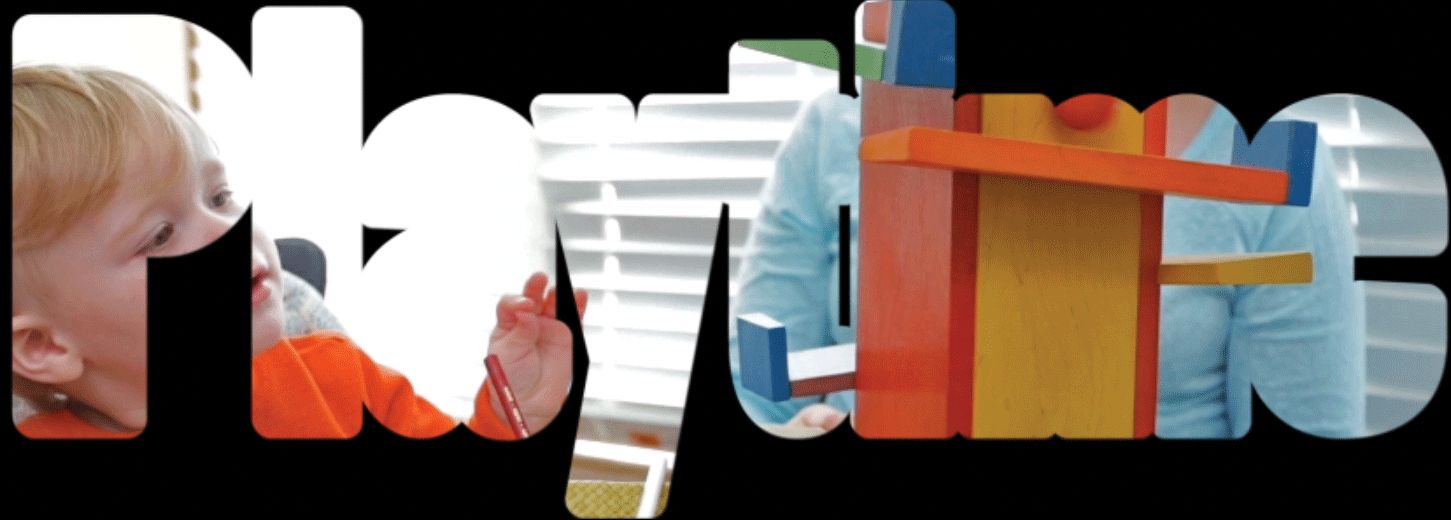
“在字幕中添加视频导向编辑”说明如何在视频的字幕中添加视频,以使字幕看起来有趣醒目。此导向编辑仅在专家视图中可用。
-
选择导向编辑 选择导向编辑 -
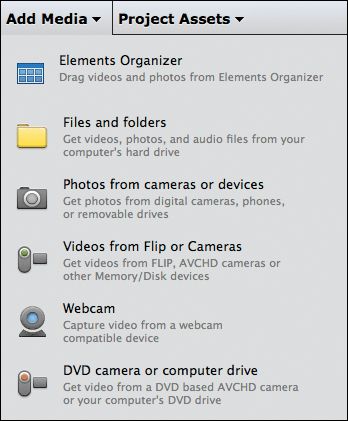
单击“添加媒体”导入剪辑。
-
选择一个媒体源。例如,如果视频剪辑位于计算机硬盘上,则选择“文件和文件夹”。
选择一个媒体源 选择一个媒体源 -
选择要导入的文件和文件夹,然后单击“打开”(Win) 或“导入”(Mac)。按住 command 键或使用 shift 键可选择多个文件。
-
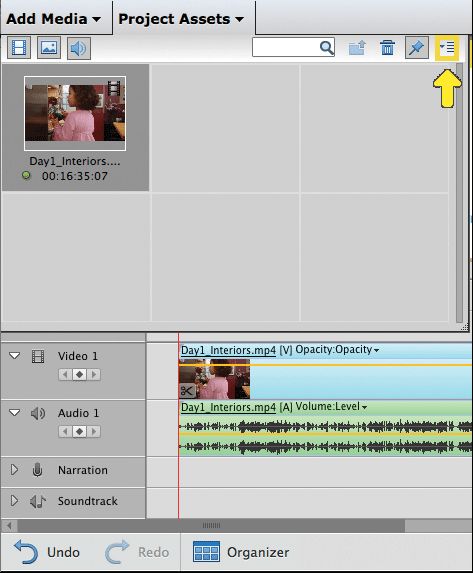
所有导入的剪辑将存储在项目资源箱中。将它们拖放到时间轴中的视频轨道 1 上。
将视频剪辑拖动到视频轨道 1 将视频剪辑拖动到视频轨道 1 -
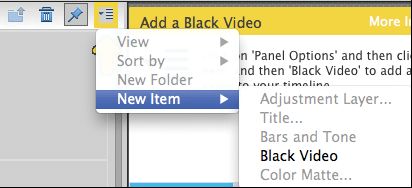
在时间轴中添加一个黑场视频。单击“项目资源”>“面板选项”>“新项目”>“黑场视频”。
添加黑场视频 添加黑场视频 -
将黑场视频拖放到视频轨道 2,直接放在视频轨道 1 中您的剪辑的上方。
注意:如果看不到视频轨道 2,可扩展时间轴。
将黑场视频添加到视频剪辑上方的轨道 将黑场视频添加到视频剪辑上方的轨道 -
扩展黑场视频的持续时间,使其对要显示的效果至少持续 10 秒钟。
-
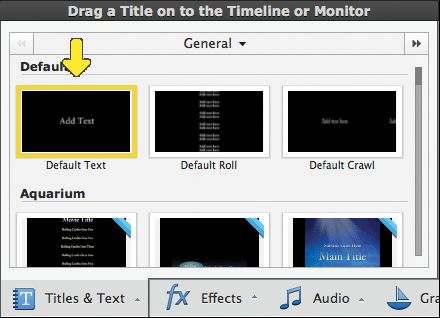
单击操作栏上的“字幕和文本”。将列表中的一个字幕到拖放到视频轨道 3。为使效果最佳,可使用默认字幕。
选择一个字幕 选择一个字幕 -
扩展字幕的持续时间(视频轨道 3),使其与黑场视频(视频轨道 2)的持续时间相匹配。调整完持续时间之后单击“下一步”。
-
双击监视器中的字幕,键入您的文本。
-
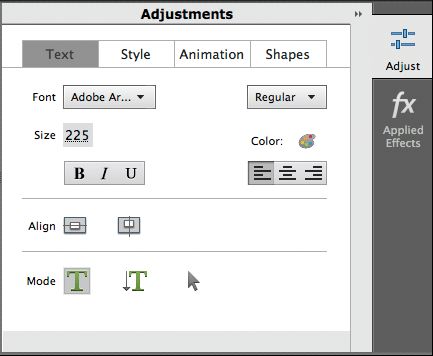
您可以通过“调整”>“调整”选项卡来更改字体和字体大小。
注意:使用“调整”选项卡中的箭头方式将字幕移动到所需位置。
调整字幕的字体和位置 调整字幕的字体和位置 -
单击操作栏上的“效果”。
-
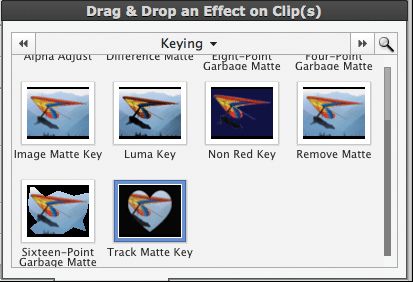
从“键控”类别中选择“轨道遮罩键”效果。将效果拖放到时间轴中的黑场视频(视频轨道 2)上。
轨道遮罩键 轨道遮罩键 -
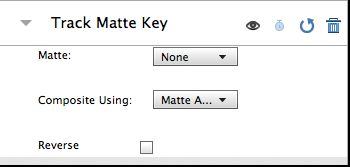
在“应用的效果”中的“轨道遮罩键”中,可执行以下操作:
- 从“遮罩”下拉菜单中选择“视频 3”。
- 选择“反转”选项。
轨道遮罩选项 轨道遮罩选项 -
您可以在“字幕调整”面板中以不同的形状添加视频。
-
单击源监视器中的“播放”按钮可查看应用的导向编辑。单击“渲染”可提高品质。
视频显示在字幕中 视频显示在字幕中

