One of the masters of photogrammetry tells us about his workflow!
To create the plants in my environments I don’t rely on photogrammetry. Instead, I use top-down photography to build my textures and create the models afterward. By constructing a rig with various light sources, I can take photos that each have a different light direction. These photos are then processed together using Designer’s multi-angle nodes.
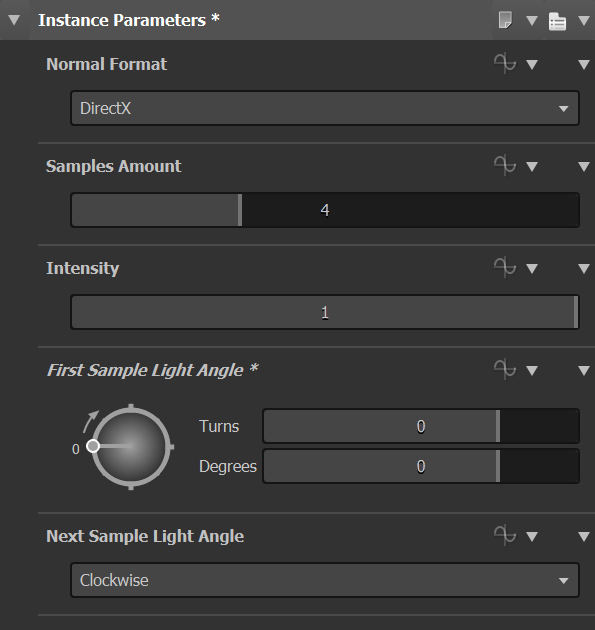
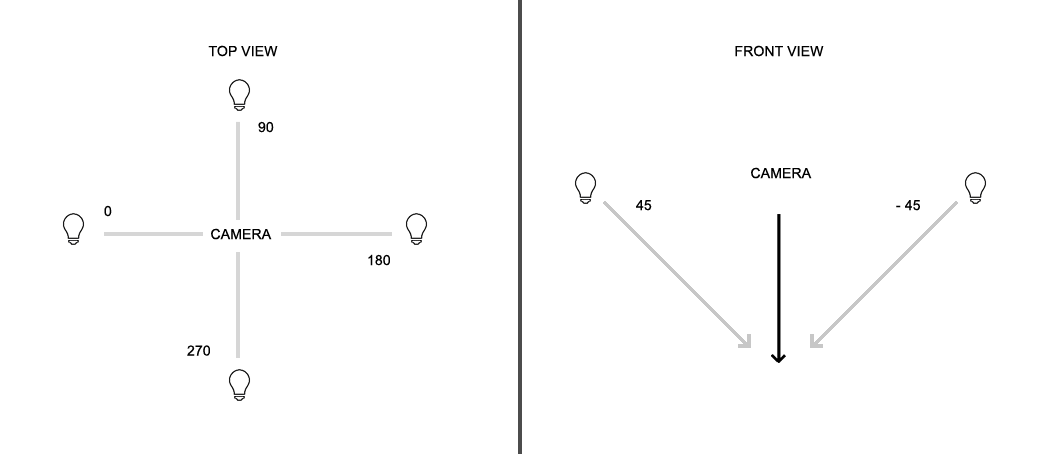
You can set the Multi-Angle to Normal node to your preference. In this example, I set it to have four light directions, meaning each image is 360 / 4 = 90 degrees from each other.
Having more images would produce a more accurate result. You could use eight samples, for instance, one photo at every 45 degrees.
The settings in the image are set to Clockwise at 0 degrees with four samples. Looking down, it will start on the left side, followed by top, then right and then bottom.
I prefer to cast shadows at less than a 45-degree angle. This way shadows are neither too long nor too short.
Some things to consider include the strength of your light source, use of a point light versus a bar, and the temperature of the light.
If your lights are too strong, you run the chance of casting a hard shadow and overexposing the surface. By having very dark or bright spots, you run the risk of losing data. Therefore, when you test your lights, make sure the majority of your image information is in a medium range. One way to check for this is to open the levels editor in Photoshop and see if most values are in the middle.
Point lights shine light in a cone shape while a bar or tube light will behave much more directionally. Keep in mind that this will affect the shadows.
The color or temperature of the light will influence the values of the photo. Therefore make sure that all light sources are of the same type and temperature.


The image above uses four directions to create a normal using the Multi-Angle to Normal. It then applies a Blur High Quality with a minimal amount to reduce noise and avoid introducing too much small detail later on.
The Multi-Angle will not capture every detail that we see in the diffuse texture. Because of this, I filter a range of the diffuse and convert it to normal. The setup then combines the large shapes from the Multi-Angle with the high-frequency details from the diffuse. To create the height texture, it makes use of a Normal to Height HQ.
*Using the Scan Processing Filters:


