This guide explains how to create custom a Substance graph that can be used as a Dynamic Stroke in Substance Painter.
Download Project Files
(This tutorial use features from Substance Painter 2019.1)
Dynamic Strokes ?
In this guide we will see how to create a new Dynamic Stroke brush with a custom Substance graph. Dynamic Strokes are regular brush strokes but powered by Substance files that can change for each stamp inside a given brush stroke.
If you want to know more about what are Dynamic Strokes and how they work you can check out the Substance Painter documentation.
Here is what we are going to achieve :

Creating a new package in Substance Designer
Let's start by creating a new empty graph in Substance Designer :
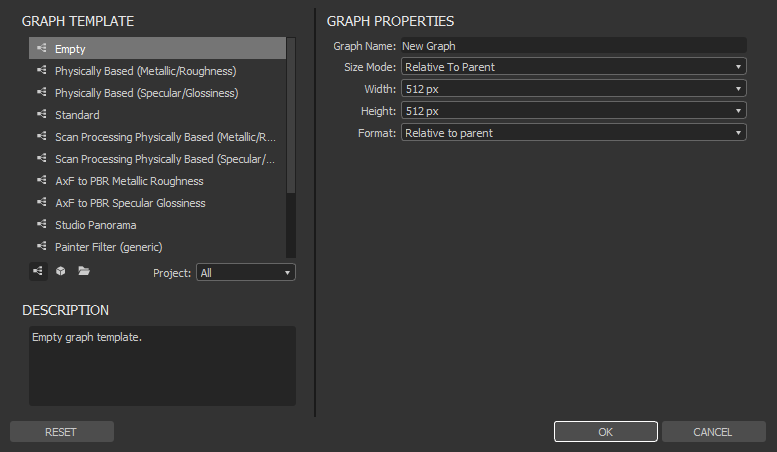
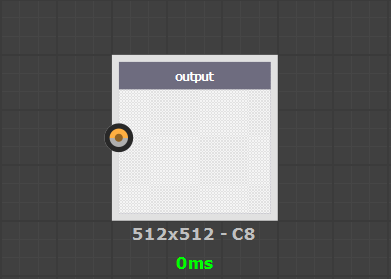
We are gonna create a really simple effect in the end, so there is no need to create all the output nodes like we would do for a full PBR material. Instead just add a new output node :
Creating the Gradient
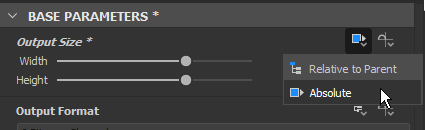
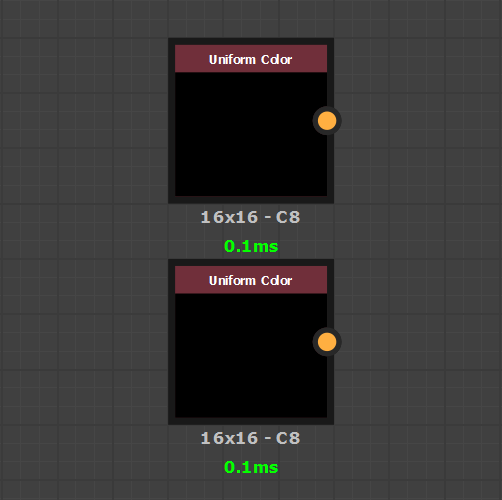
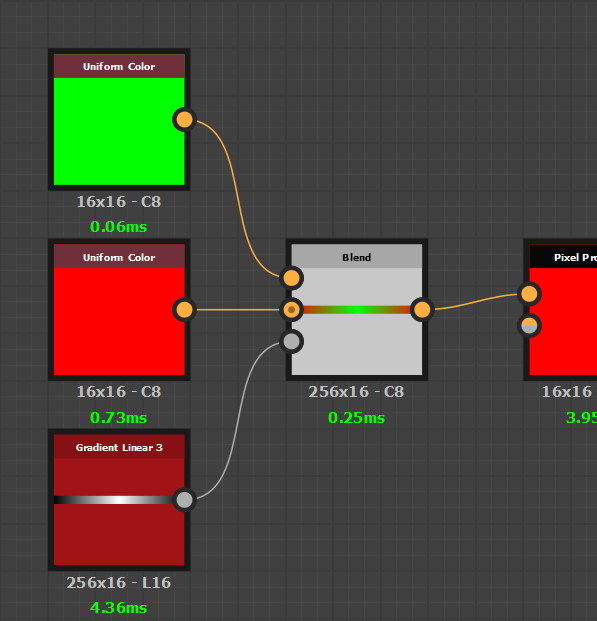
To create our gradient, we need at least two colors to blend between. By default Uniform Color nodes have their resolution set as "Relative to Parent" which is a bit overkill. To ensure good performances it is best to switch them as "Absolute" and use a 16x16 pixel resolution instead :
Now to blend the colors we will use a Blend node with a Gradient node as its mask input. Because the Uniform Color nodes are set to custom resolutions, we need to do the same for the blend node and the gradient input. This is why they are both set at 256x16 pixels (with the same method as mentionned above).
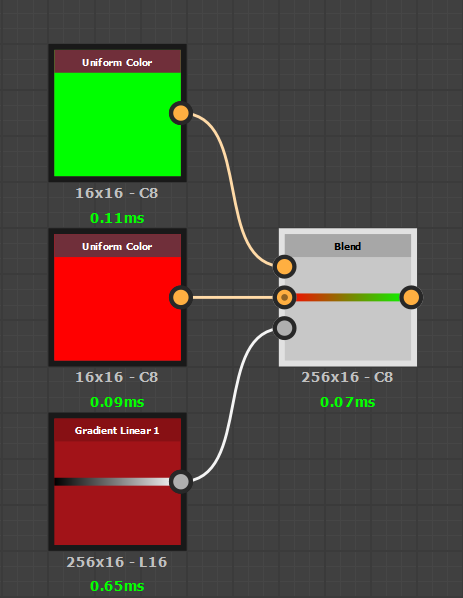
(Note : to get a left to right gradient, the setting "Rotation" of the Gradient Linear 1 node has been set to "90°")
The advantage of creating a gradient this way (instead of using a gradient map node) is that you can expose the colors as parameters so that they can be tweaked later in Substance Painter.
The Stamp Index Parameter
Before going further we will need to add the Dynamic Stroke parameter that will be controlled later by Substance Painter. What we need is to add a new input to the graph with the following configuration :
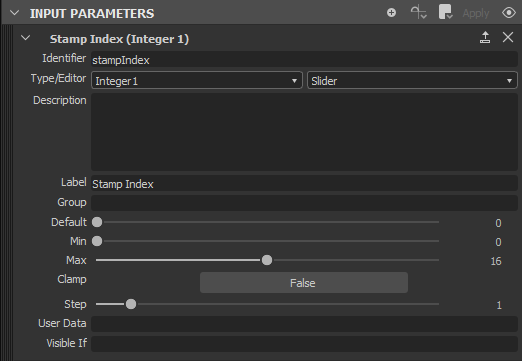
In Substance Painter the Stamp Index is the identification number of an individual stamp inside a brush stroke. With it we can track where we are in the brush stroke and even make an effect change progessively as the value increase.
Substance Painter will take control of this parameter itself, meaning we won't have to tweak it manually.
Isolating a color with the pixel processor
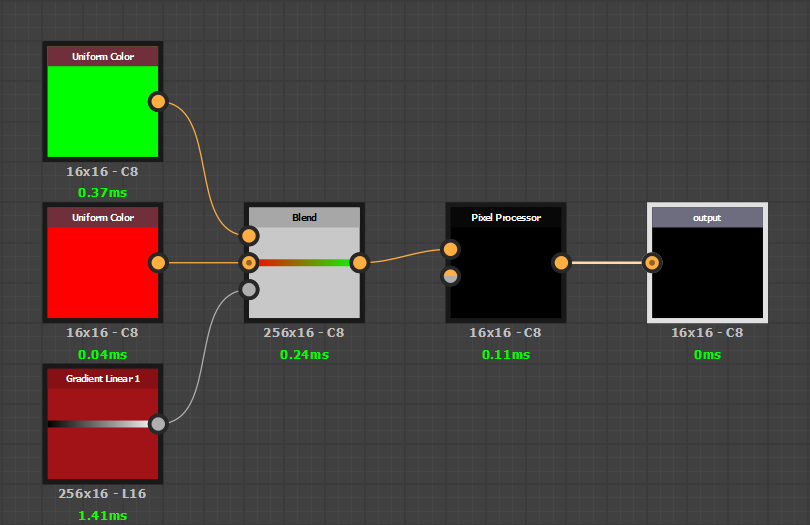
We have a gradient and now we have to extract one color from it (because otherwise we would paint the full gradient for each stamp of the brush stroke). To do so we will have to use a pixel processor node (set at an absoltue resolution of 16x16 pixels as well) :
Now let's edit the pixel processor function which has a float4 vector as its output by default. We will replace it with the following :
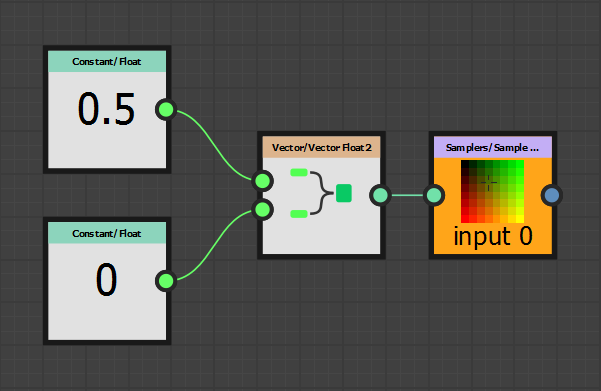
The sample node is used to read the pixels of the input image (the gradient). Instead of feeding the image coordinates we will manually create them. This is why we have two float nodes and a Vector Float 2 node to create the two components of the pixel position. Since the gradient only has relevant information on one axis, the second float node can always be set to 0.
Where things become "dynamic"
As is, the Pixel processor is not yet dynamic. The first float node (0.5) is a placeholder that we will now chnage. What we want is to integrate the Stamp Index value so that we read the gradient from left to right with which will allow us to move inside the gradient.
Let's build the following network of nodes :

The float node 0.5 has been replaced by the division operation. We get the Stamp Index value and divide it by 16 since this is the maximum value we defined in the Stamp Index input properties earlier. The idea is to get as result a value between 0 and 1 which is what the Sampler node expect as pixel coordinates.
Testing in Substance Painter
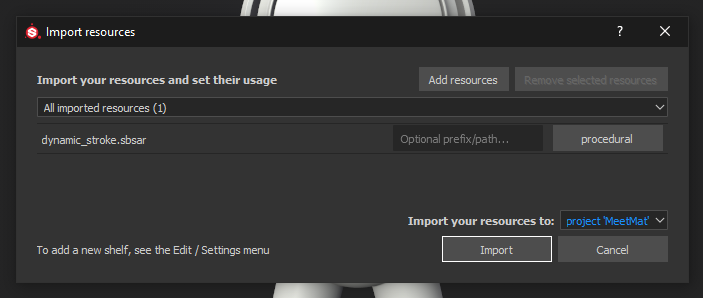
Let's cook our Substance graph and package and import it as a "procedural" into Substance Painter :

To enable the Dynamic Stroke feature just drag and drop the resource into the BaseColor or Diffuse slot of the current painting tool (requires to have a project open).
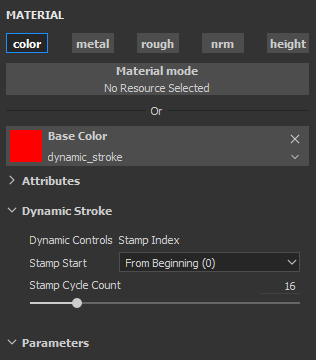
If you try to paint on your mesh you should get something similar to this :

If you change the Stamp Cycle Count parameter however, the effect breaks down :
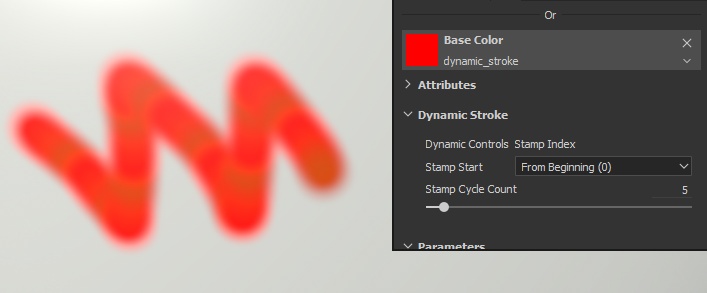
The reason why it's not working anymore is because we tell Substance Painter to only compute 5 Substance variations via the Stamp Cycle Count parameter, but inside the Pixel Processor of the graph we did our computation based on 16 stamps to create our step. Therefore the Dynamic Stroke starts to draw the gradient but is cut too soon.
Taking advantage of the Stamp Cycle Count
Fortunately, we have a way to communicate the Stamp Cycle Count number to the Substance graph. By default Substance Painter creates its own, unless it is defined by the Substance graph. So we are going to add the parameter in our graph :

Inside our Pixel Processor we adapt the function as follow :

The new Get Integer node retrieves the Stamp Cycle Count parameter we just created.
If you give a new try after recooking your Substance package you should get the following (when changing the Stamp Cycle Count parameter) :

Making the colors cycle properly
The last thing we can modify is the the way we built the gradient so that our colors follow each other without visually breaking. For that we just need to switch the Gradient Linear 1 to a Gradient Linear 3 instead :
Playing with that new verison in Substance Painter should give the following result :