In his professional life, Nikola Damjanov creates VFX for mobile video games. But when he's not on a project, he likes to play with Substance Designer and see what happens.
For the tutorial I thought about showing something a bit different to the usual. Aside from making textures, sometimes I use Substance Designer as an exploratory tool, and as an abstract sandbox. I kind of got hooked on making these scenes and, as you will see, they are quick but interesting experiments.
I start with a custom mesh from any DCC app. I suggest you limit yourself to primitives at the start as you’ll get UVs out of the box, and so you’ll be quicker. I tend to abuse modifiers at this point - whatever it takes to get me an interesting shape and a good starting point. This scene can be as complex as you wish but you shouldn’t overthink it; just go with the flow, as the whole point is to experiment. I even have this strange habit of deliberately not saving source files for those meshes so as to force myself to come up with something new every time.
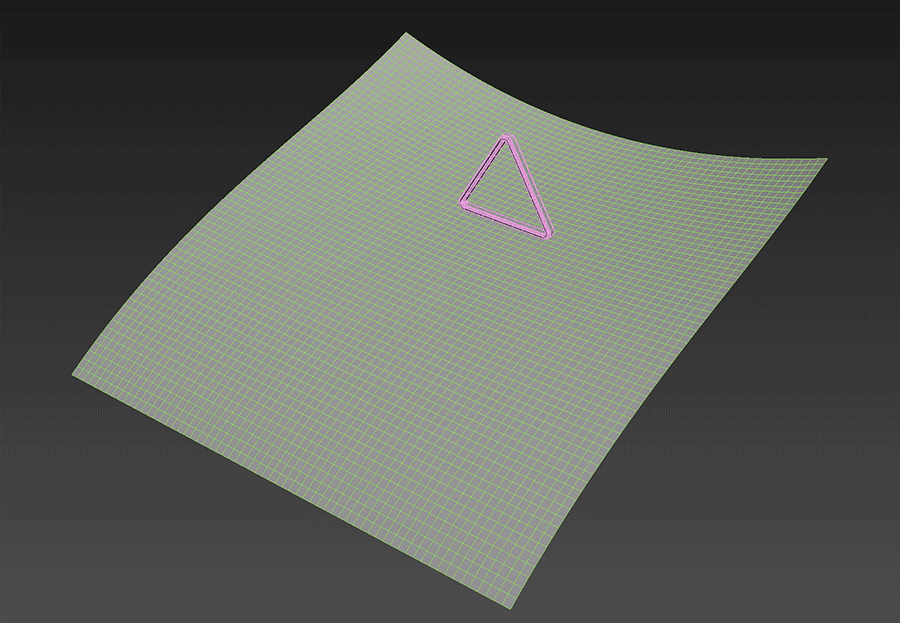
Before you export your scene make sure you have a separate material assigned for every part you want to individually control in SD. I usually have two or three materials set up. One of them is for some light-emitting object, and that one doesn’t even need UVs. You can also plan ahead a bit and set up some cameras upfront. Those will get exported with the FBX so you can access them in Substance Designer’s 3D view.
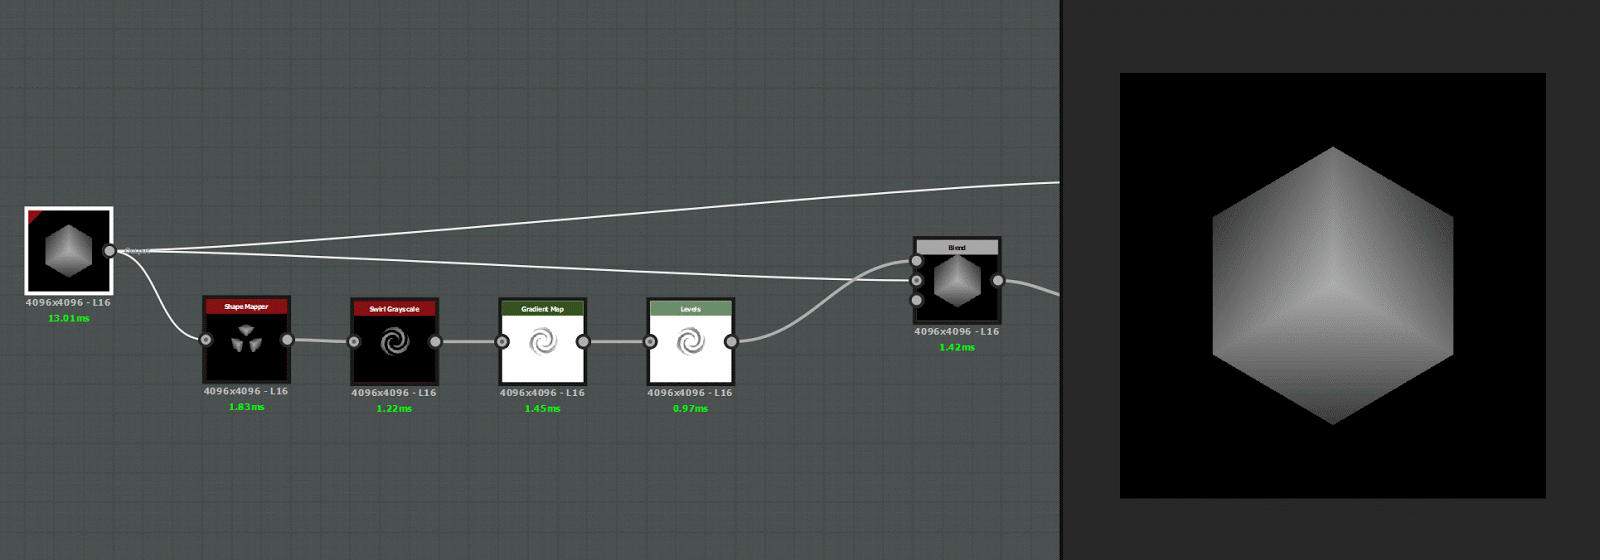
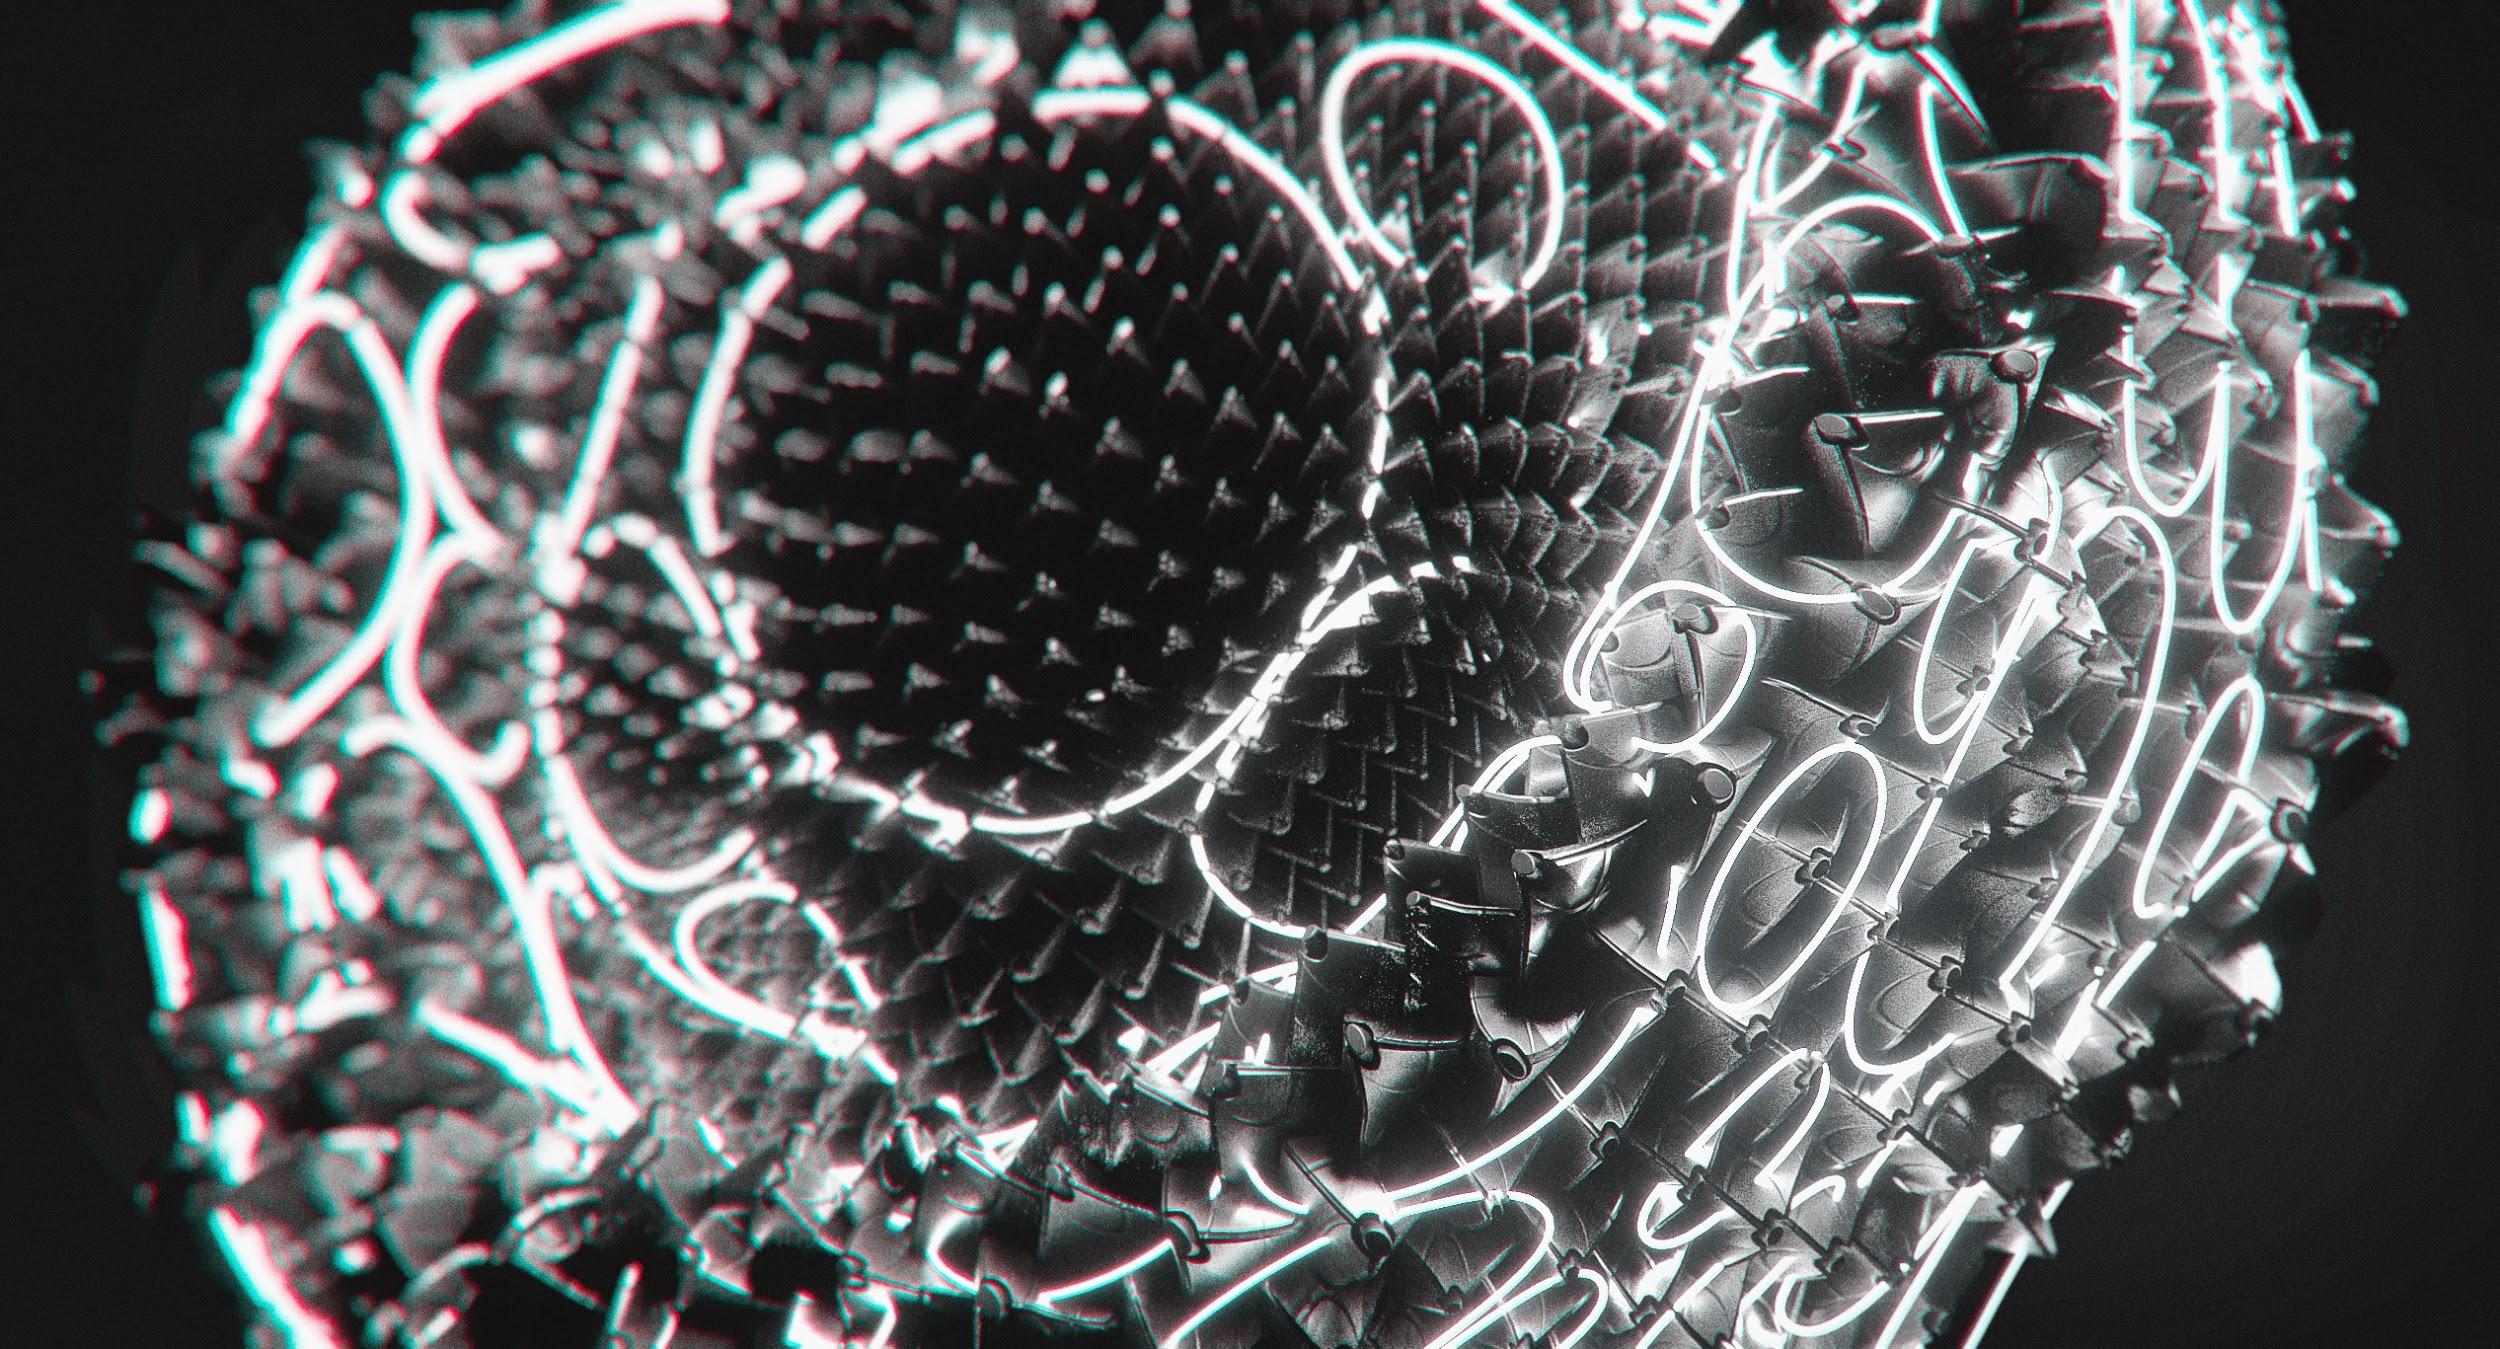
Let’s go through one of the setups. Everything started from a simple Cube3D. The first layer of details came from the main shape, but it used Shape Mapper and Swirl to modify the ornaments.
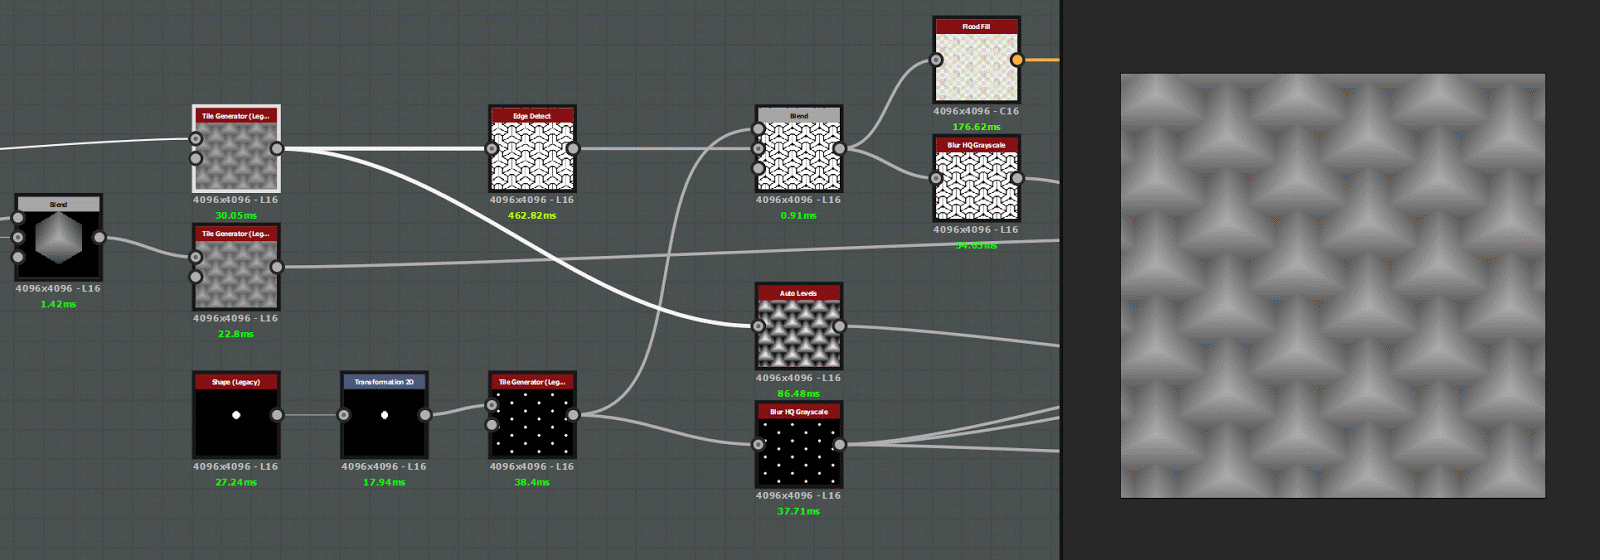
From the original and detailed cubes came two tile generators. Combine the first one with some Edge Detect and Disc Shapes tiled over the tips of the cubes to get the second level of detail. Discs add nice secondary details and Edge Detect is good for a tertiary layered engraved look close to the cube edges.
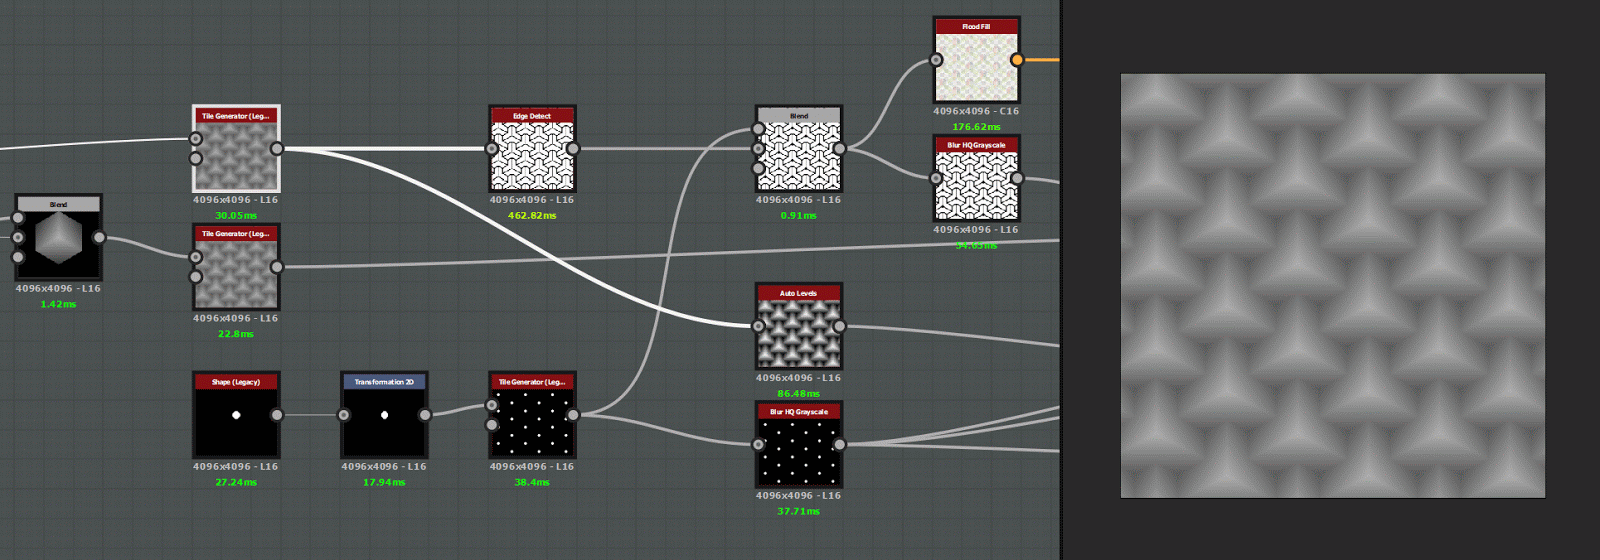
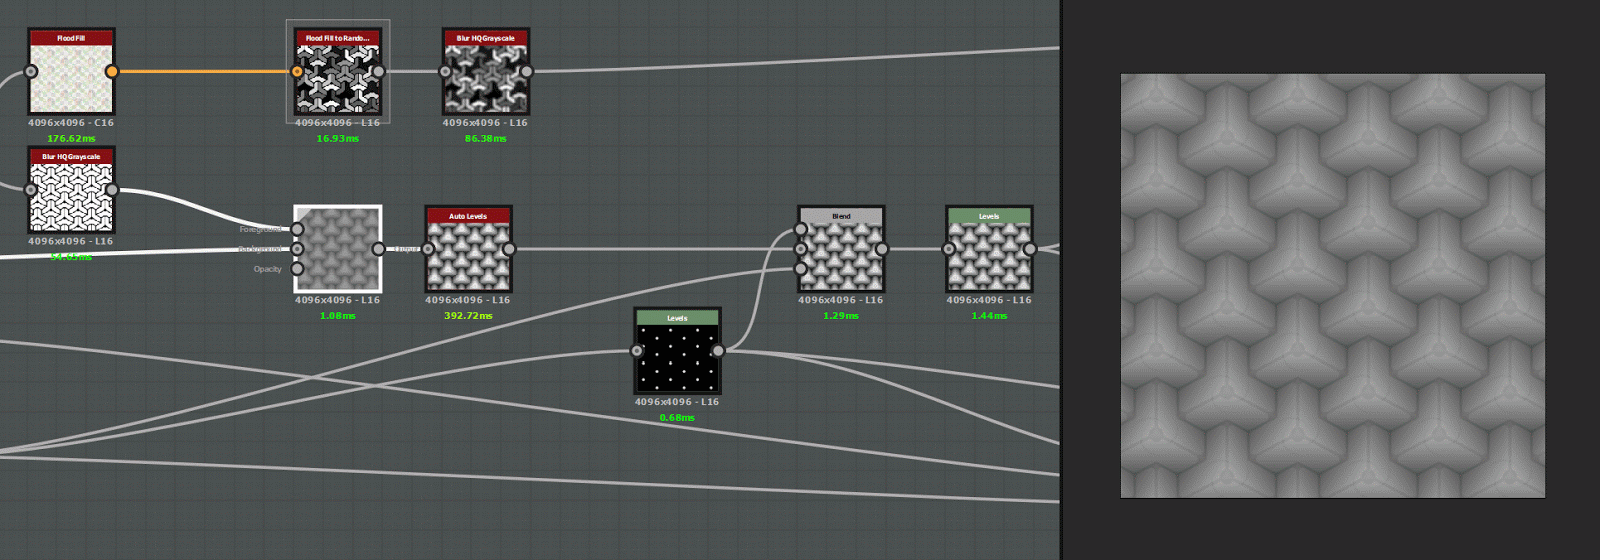
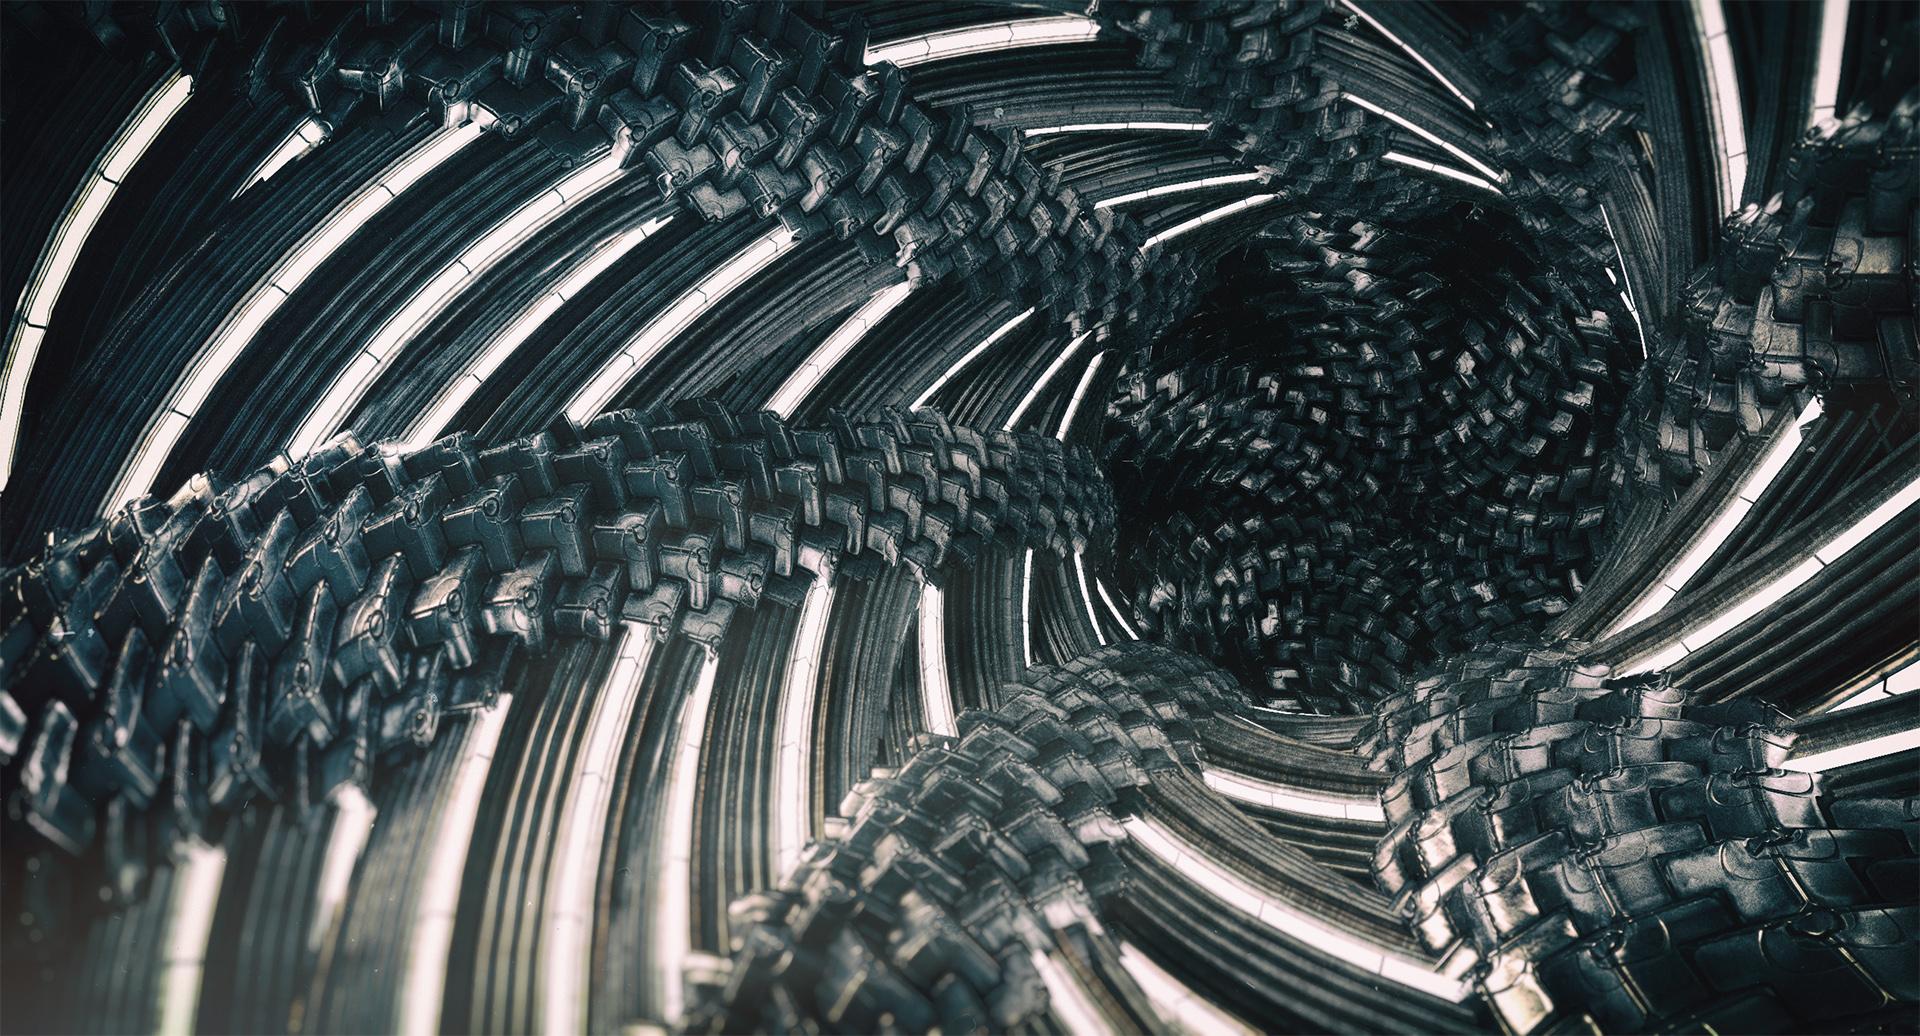
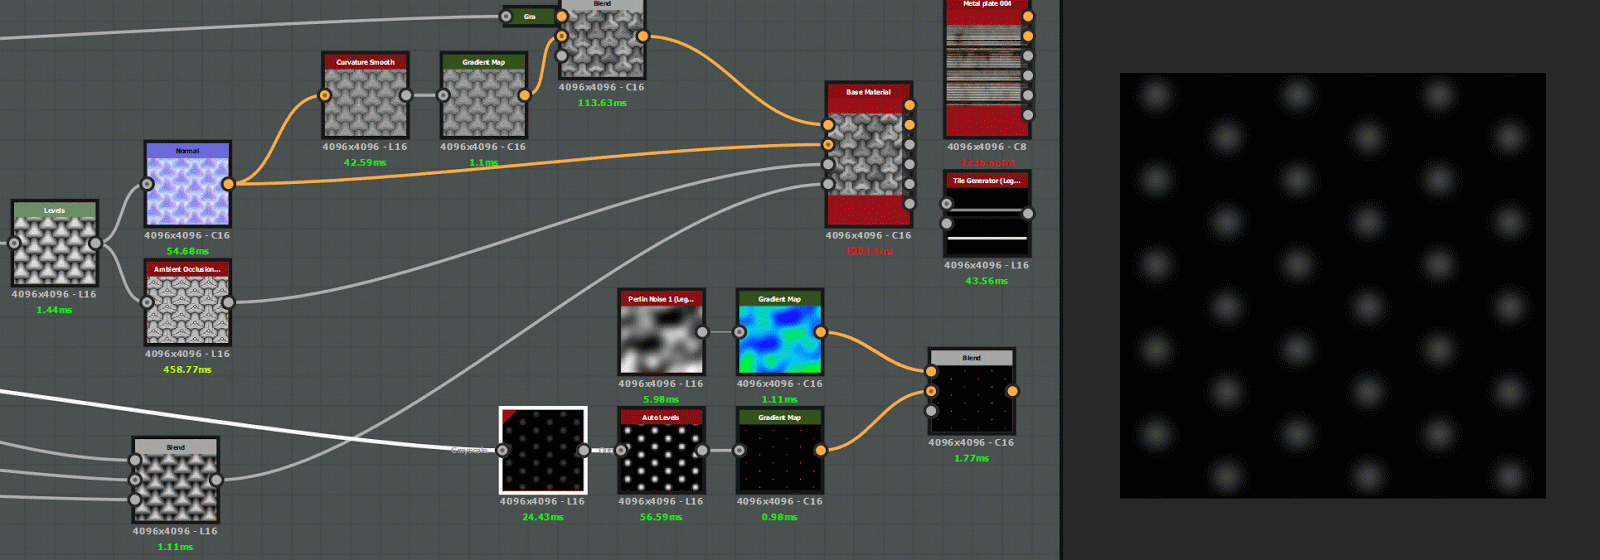
The last step was an excellent origin point for the majority of final maps. The HBAO derived directly from it, and so did the normal map, but I combined Curvature Smooth and Random Grayscale from FloodFill to get the base color. The height map was made from the non-detailed cube tiles, as those engravings were too small and unnecessary for displacement and only stayed in the normal map.

Tiled discs were reused to make the small lights. They were blurred and then constricted and colored by a gradient map. Additional color variation was added with Perlin noise and another gradient map. Then this map was used as emissive.
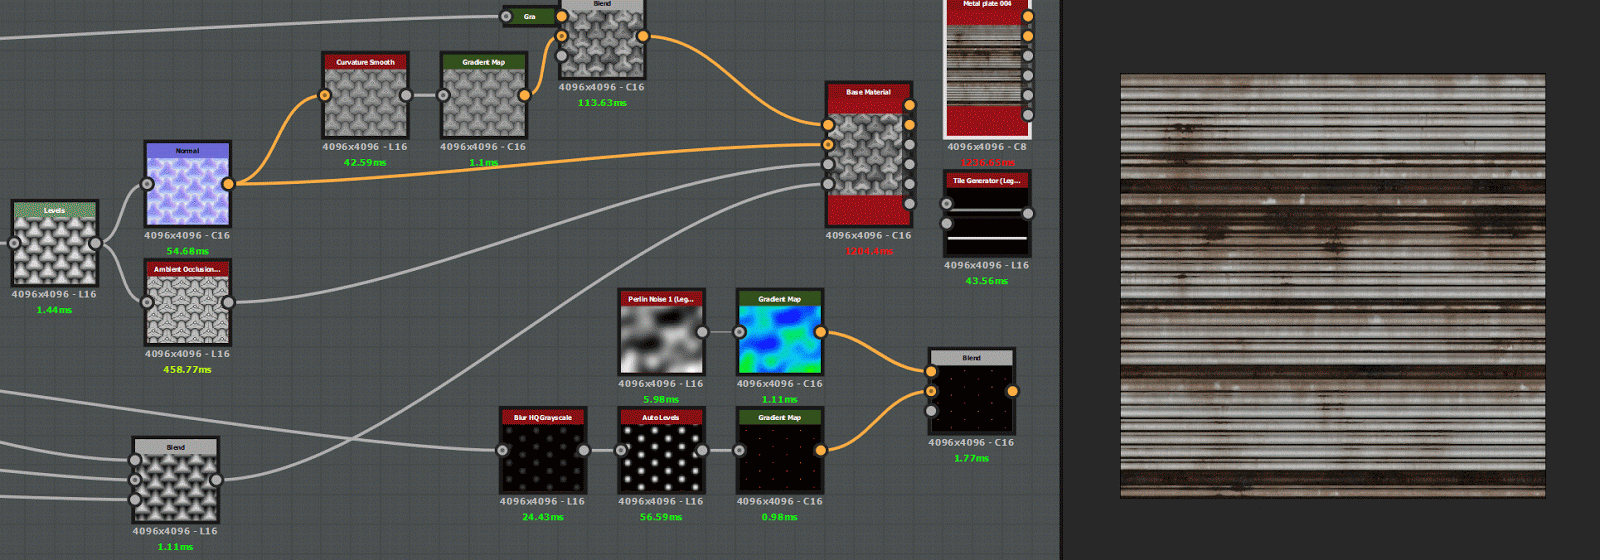
The second material was a complete cheat as I used something that already came with Substance Designer - Metal Plate 004. But it needed some neon lights to break up the material and light the scene. Again, a custom emission map was made but this time it was a simple tile generator that matched the number tiles with the metal plate and then was randomly masked. It looked like there were neon stripes going through the material, which is just what it needed.
Some examples of the same material in different conditions:


Find the source files here.