
Choose Edit > Preferences > Type (Windows) or Photoshop > Preferences > Type (Mac OS).
Last updated on
27 Des 2022
- Panduan Pengguna Photoshop
- Pengantar Photoshop
- Photoshop dan produk serta layanan Adobe lainnya
- Photoshop di perangkat seluler (tidak tersedia di Tiongkok daratan)
- Photoshop di iPad (tidak tersedia di Tiongkok daratan)
- Photoshop di iPad | Pertanyaan umum
- Berkenalan dengan ruang kerja
- Persyaratan sistem | Photoshop di iPad
- Membuat, membuka, dan mengekspor dokumen
- Menambahkan foto
- Bekerja dengan lapisan
- Menggambar dan melukis dengan kuas
- Membuat seleksi dan menambahkan mask
- Memoles komposit Anda
- Bekerja dengan lapisan penyesuaian
- Menyesuaikan tonalitas komposit Anda dengan kurva
- Menerapkan operasi transformasi
- Memangkas dan memutar komposit Anda
- Memutar, menggeser, men-zoom, dan mereset kanvas
- Bekerja dengan lapisan Ketikan
- Bekerja dengan Photoshop dan Lightroom
- Mendapatkan font yang hilang di Photoshop di iPad
- Teks Bahasa Jepang di Photoshop di iPad
- Mengelola pengaturan aplikasi
- Pintasan sentuh dan gestur
- Pintasan keyboard
- Mengedit ukuran gambar Anda
- Livestream saat Anda berkarya di Photoshop di iPad
- Mengoreksi imperfeksi dengan Kuas Reparasi
- Membuat kuas di Capture dan menggunakan di Photoshop di iPad
- Bekerja dengan file Camera Raw
- Berkreasi dan bekerja dengan Objek Cerdas
- Menyesuaikan eksposur dalam gambar Anda dengan Pencerah dan Penggelap
- Perintah penyesuaian otomatis di Photoshop di iPad
- Mencoreng area dalam gambar Anda dengan Photoshop di iPad
- Menambah atau mengurangi saturasi gambar Anda menggunakan alat Spons
- Isian berdasarkan konten untuk iPad
- Photoshop di web (tidak tersedia di Tiongkok daratan)
- Photoshop (beta) (tidak tersedia di Tiongkok daratan)
- AI generatif (tidak tersedia di Tiongkok daratan)
- Pertanyaan umum tentang AI generatif di Photoshop
- Isian Generatif di Photoshop di desktop
- Menghasilkan Gambar dengan prompt teks deskriptif
- Perluasan Generatif di Photoshop di desktop
- Mengganti latar belakang dengan Generasikan latar belakang
- Mendapatkan variasi baru dengan Hasilkan yang Serupa
- Memilih model AI untuk kontrol generatif
- Isian Generatif di Photoshop di iPad
- Perluasan Generatif di Photoshop di iPad
- Fitur AI generatif di Photoshop di web
- Autentisitas konten (tidak tersedia di Tiongkok daratan)
- Dokumen Cloud (tidak tersedia di Tiongkok daratan)
- Dokumen cloud Photoshop | Pertanyaan umum
- Dokumen cloud Photoshop | Pertanyaan alur kerja
- Mengelola dan bekerja dengan dokumen cloud di Photoshop
- Memutakhirkan penyimpanan cloud untuk Photoshop
- Tidak dapat membuat atau menyimpan dokumen cloud
- Mengatasi kesalahan dokumen cloud Photoshop
- Mengumpulkan log sinkronisasi dokumen cloud
- Mengundang orang lain untuk mengedit dokumen cloud Anda
- Membagikan dokumen untuk ditinjau
- Ruang Kerja
- Dasar-dasar ruang kerja
- Preferensi
- Belajar lebih cepat dengan Panel Temukan Photoshop
- Membuat dokumen
- Menempatkan file
- Pintasan keyboard default
- Kustomisasi pintasan keyboard
- Galeri alat
- Preferensi performa
- Bar Tugas Kontekstual
- Menggunakan alat
- Preset
- Kisi-kisi dan garis bantu
- Gestur sentuh
- Menggunakan Bar Sentuh dengan Photoshop
- Kemampuan sentuh dan ruang kerja yang dapat disesuaikan
- Pratinjau teknologi
- Metadata dan catatan
- Menempatkan gambar Photoshop di aplikasi lain
- Penggaris
- Menampilkan atau menyembunyikan Ekstra non-cetak
- Menentukan kolom untuk gambar
- Urungkan dan riwayat
- Panel dan menu
- Menempatkan elemen dengan pengaitan
- Menempatkan dengan alat Penggaris
- Menata, membagikan, dan berkolaborasi dengan Proyek
- Menyempurnakan penggenerasian Adobe Firefly
- Dasar-dasar warna dan gambar
- Cara mengubah ukuran gambar
- Bekerja dengan gambar raster dan vektor
- Ukuran dan resolusi gambar
- Mendapatkan gambar dari kamera dan pemindai
- Membuat, membuka, dan mengimpor gambar
- Melihat gambar
- Kesalahan Penanda JPEG tidak valid | Membuka gambar
- Melihat banyak gambar sekaligus
- Menyesuaikan pemilih warna dan contoh warna
- Gambar high dynamic range
- Mencocokkan warna dalam gambar Anda
- Konversi antar-mode warna
- Mode warna
- Menghapus bagian gambar
- Mode campuran warna
- Memilih warna
- Menyesuaikan tabel warna terindeks
- Informasi gambar
- Filter distorsi tidak tersedia
- Tentang warna
- Penyesuaian warna dan monokrom menggunakan saluran
- Memilih warna di panel warna dan contoh warna
- Sampel
- Mode Warna atau mode Gambar
- Semburat warna
- Menambahkan perubahan mode bersyarat ke tindakan
- Menambahkan contoh warna dari HTML CSS dan SVG
- Kedalaman bit dan preferensi
- Lapisan
- Dasar-dasar lapisan
- Pengeditan non- destruktif
- Membuat dan mengelola lapisan dan grup
- Memilih, mengelompokkan, dan menautkan lapisan
- Menempatkan gambar ke dalam bingkai
- Opasitas lapisan dan campuran warna
- Lapisan mask
- Menerapkan Filter Cerdas
- Komp lapisan
- Memindahkan, menumpuk, dan mengunci lapisan
- Lapisan mask dengan mask vektor
- Mengelola lapisan dan grup
- Efek lapisan dan gaya
- Mengedit mask lapisan
- Mengekstraksi aset
- Menampilkan lapisan dengan mask pemotongan
- Menghasilkan aset gambar dari lapisan
- Bekerja dengan Objek Cerdas
- Mode campuran warna
- Menggabungkan beberapa gambar ke dalam potret grup
- Menggabungkan gambar dengan Campur Warna Lapisan Secara Otomatis
- Menyejajarkan dan mendistribusikan lapisan
- Menyalin CSS dari lapisan
- Memuat seleksi dari batas lapisan atau mask lapisan
- Knockout untuk memunculkan konten dari lapisan lain
- Seleksi
- Mulai menggunakan seleksi
- Membuat seleksi dalam komposit Anda
- Pilih dan Mask ruang kerja
- Memilih dengan alat seleksi
- Memilih dengan alat laso
- Menyesuaikan seleksi piksel
- Memindahkan, menyalin, dan menghapus piksel yang dipilih
- Membuat mask cepat sementara
- Memilih rentang warna dalam gambar
- Mengonversi antara jalur dan batas seleksi
- Dasar-dasar saluran
- Menyimpan seleksi dan mask saluran alfa
- Memilih area gambar dalam fokus
- Menduplikasi, membagi, dan menggabungkan saluran
- Kalkulasi saluran
- Mulai menggunakan seleksi
- Penyesuaian gambar
- Mengganti warna objek
- Warp perspektif
- Mengurangi blur goyangan kamera
- Contoh kuas reparasi
- Mengekspor tabel pencarian warna
- Menyesuaikan ketajaman dan blur gambar
- Memahami penyesuaian warna
- Menerapkan penyesuaian Kecerahan/Kontras
- Menyesuaikan detail bayangan dan sorotan
- Penyesuaian level
- Menyesuaikan rona dan saturasi
- Menyesuaikan vibrance
- Menyesuaikan saturasi warna di area gambar
- Melakukan penyesuaian tonal cepat
- Menerapkan efek warna khusus ke gambar
- Menyempurnakan gambar Anda dengan penyesuaian keseimbangan warna
- Gambar high dynamic range
- Melihat histogram dan nilai piksel
- Mencocokkan warna dalam gambar Anda
- Memangkas dan meluruskan foto
- Mengonversi gambar berwarna menjadi hitam dan putih
- Penyesuaian dan lapisan isian
- Penyesuaian kurva
- Mode campuran warna
- Gambar target untuk ditekan
- Menyesuaikan warna dan rona dengan eyedropper Level dan Kurva
- Menyesuaikan eksposur HDR dan peronaan
- Mencerahkan atau menggelapkan area gambar
- Membuat penyesuaian warna selektif
- Perbaikan dan restorasi gambar
- Menghilangkan objek dan orang yang tidak diinginkan dengan alat Penghilang
- Menghilangkan objek dari foto Anda dengan Isian Berdasarkan Konten
- Tambalan dan Geser Berdasarkan Konten
- Memoles dan memperbaiki foto
- Koreksi distorsi dan noise gambar
- Langkah-langkah pemecahan masalah dasar untuk memperbaiki sebagian besar masalah
- Penyempurnaan dan transformasi gambar
- Mengganti langit dalam gambar Anda
- Mentransformasikan objek
- Menyesuaikan pemangkasan, rotasi, dan ukuran kanvas
- Cara memangkas dan meluruskan foto
- Membuat dan mengedit gambar panorama
- Membungkus gambar, bentuk, dan jalur
- Titik Lenyap
- Penskalaan berdasarkan konten
- Mentransformasikan gambar, bentuk, dan jalur
- Menggambar dan melukis
- Melukis pola simetris
- Menggambar persegi panjang dan memodifikasi opsi goresan
- Tentang menggambar
- Menggambar dan mengedit bentuk
- Membuat bintang atau bentuk runcing lainnya
- Alat melukis
- Membuat dan memodifikasi kuas
- Mode campuran warna
- Menambahkan warna ke jalur
- Mengedit jalur
- Melukis dengan Kuas Pencampur
- Preset kuas
- Gradasi
- Interpolasi gradasi
- Seleksi, lapisan, serta jalur isian dan goresan
- Menggambar dengan alat Pena
- Membuat pola
- Membuat pola menggunakan Pembuat Pola
- Mengelola jalur
- Mengelola pustaka pola dan preset
- Menggambar atau melukis dengan tablet grafis
- Membuat kuas bertekstur
- Menambahkan elemen dinamis ke kuas
- Gradasi
- Melukis goresan bergaya dengan Kuas Riwayat Seni
- Melukis dengan pola
- Menyinkronkan preset di beberapa perangkat
- Memigrasikan preset, tindakan, dan pengaturan
- Teks
- Filter dan efek
- Menyimpan dan mengekspor
- Manajemen Warna
- Desain aplikasi, web, dan layar
- Video dan animasi
- Pengeditan video di Photoshop
- Mengedit lapisan video dan animasi
- Gambaran umum video dan animasi
- Pratinjau video dan animasi
- Melukis bingkai di lapisan video
- Mengimpor file video dan rangkaian gambar
- Membuat animasi bingkai
- Animasi 3D Creative Cloud (Pratinjau)
- Membuat animasi timeline
- Membuat gambar untuk video
- Mencetak
- Mencetak objek 3D
- Mencetak dari Photoshop
- Mencetak dengan menajemen warna
- Lembar Kontak dan Presentasi PDF
- Mencetak foto dalam tata letak paket gambar
- Mencetak warna spot
- Mencetak gambar ke mesin cetak komersial
- Meningkatkan kualitas cetakan warna dari Photoshop
- Memecahkan masalah pencetakan | Photoshop
- Otomatisasi
- Membuat tindakan
- Membuat grafik berbasis data
- Pembuatan skrip
- Memproses batch file
- Memutar dan mengelola tindakan
- Menambahkan tindakan bersyarat
- Tentang tindakan dan panel Tindakan
- Alat Rekam dalam tindakan
- Menambahkan perubahan mode bersyarat ke tindakan
- Kit alat Photoshop UI untuk plug-in dan skrip
- Pemecahan masalah
- Masalah yang diperbaiki
- Masalah yang diketahui
- Mengoptimalkan performa Photoshop
- Pemecahan masalah dasar
- Memecahkan masalah kerusakan atau macet
- Memecahkan masalah program
- Memecahkan masalah kesalahan gores disk penuh
- Memecahkan masalah driver grafis dan GPU
- Menemukan alat yang hilang
- Photoshop 3D | Pertanyaan umum seputar fitur yang dihentikan
Photoshop provides several options for working with Chinese, Japanese, and Korean type.
Note
Your operating system must support the languages and fonts in which you wish to work. Consult your system software manufacturer for more information.
Display and set Asian type options
Photoshop 23.0 (October 2021) release now includes seamless unified typographical support for Japanese, Chinese, and Korean without having to select the East Asian text engine in Preferences or the Paragraph panel flyout menu.
Additionally, all East Asian advanced typographic features will be automatically available and grouped together in the Photoshop Type Layer Properties panel. They are still available in the Character and Paragraph panels by selecting "East Asian Features" in the Paragraph panel flyout menu.
You can also control how font names are displayed—in English or in the native language.
-
-
Select from the following options:
Show Font Names in English
Displays Asian font names in English.
East Asian (Photoshop and Photoshop CS6) or Show Asian Text Options (CS5)
Displays Asian type options in the Character and Paragraph panels.

Character, Paragraph, and Type Layer Properties panel
Character, Paragraph, and Type Layer Properties panel

Reduce spacing around Asian type characters using tsume
Tsume reduces the space around a character by a specified percentage value. As a result, the character itself is not stretched or squeezed. Instead, the space between the character’s bounding box and the em box is compressed. When tsume is added to a character, spacing around both sides of the character are reduced by an equal percentage.
-
Select the characters you want to adjust.
-
In the Character panel, enter or select a percentage for Tsume
 . The
greater the percentage, the tighter the compression between characters.
At 100% (the maximum value), there is no space between the character’s
bounding box and its em box.
. The
greater the percentage, the tighter the compression between characters.
At 100% (the maximum value), there is no space between the character’s
bounding box and its em box.
With the Photoshop 23.0 (October 2021) release, Tsume can also be accessed from the Type Layer Properties panel.
Specify how leading is measured in Asian type
-
Select the paragraphs you want to adjust.
-
Choose a leading option from the Paragraph panel menu.
Top-to-top Leading
Measures the spacing between lines of type from the top of one line to the top of the next line. When you use top‑to‑top leading, the first line of type in a paragraph is aligned flush with the top of the bounding box.
Bottom-to-bottom Leading
For horizontal type, measures the space between lines of type from the type baseline. When you use bottom-to-bottom leading, space appears between the first line of type and the bounding box. A check mark indicates which option is selected.
NoteThe leading option you choose does not affect the amount of leading between lines, only how the leading is measured.
Use tate‑chu‑yoko
Tate‑chu‑yoko is a block of horizontal type laid out within vertical type lines. Using tate‑chu‑yoko makes it easier to read half-width characters such as numbers, dates, and short foreign words in vertical text.

-
Select the characters you want to rotate.
-
Choose Tate‑Chu‑Yoko from the Character panel menu. A checkmark indicates that the option is turned on.
With the Photoshop 23.0 (October 2021) release, you can also choose the icon from the Type Layer Properties panel. In this case, the highlighted icon indicates the option is turned on.
NoteUsing tate‑chu‑yoko does not prevent you from editing and formatting type; you can edit and apply formatting options to rotated characters just as you do to other characters.
Align Asian characters with mojisoroe
Mojisoroe is the alignment of characters in Asian type. When a line of text contains different sizes of characters, you can specify how to align text to the largest characters in the line: to the top, center, or bottom of the em box (right, center, and left for vertical frames), to the roman baseline, or to the top or bottom of the ICF box (right or left for vertical frames). ICF (Ideographic Character Space) is the average height and width used by the font designer to design the ideographic characters that comprise a font.

A. Small characters aligned to the bottom B. Small characters aligned to the center C. Small characters aligned to the top
-
In the Character panel menu, choose an option from the Character Alignment submenu:
Roman Baseline
Aligns the small characters in a line to the large character.
Em box Top/Right, Em box Center, or Em box Bottom/Left
Aligns the small characters in a line to the specified position of the large character’s em box. In vertical text frames, Em box Top/Right aligns the text to the right of the em box, and Em box Bottom/Left aligns the text to the left of the em box.
ICF Top/Right and ICF Bottom/Left
Aligns the small characters in a line to the ICF specified by the large characters. In vertical text frames, ICF Top/Right aligns the text to the right of the ICF, and ICF Bottom/Left aligns the text to the left of the ICF.
NoteWith the Photoshop 23.0 (October 2021) release, you can also choose an option from the Type Layer Properties panel.
Specify left and right underlining with Asian type
-
Select vertical type.
-
Choose either Underline Left or Underline Right from the Character panel flyout menu.
Set Asian OpenType font options
Asian OpenType fonts may include a number of features that aren’t available in PostScript and TrueType fonts. It is usually best to use any weights of Kozuka Gothic Pr6N and Kozuka Mincho Pr6N OpenType fonts. These fonts have the largest collection of glyphs of the Asian fonts produced by Adobe.
-
With the Type tool selected, do one of the following:
On an existing type layer, select the characters or type objects to which you want to apply the setting.
Click the image to create a new type layer.
-
In the Character panel, make sure that an Asian OpenType Pro font is selected.
-
From the Character panel flyout menu, choose an OpenType option.
Japanese 78 Substitutes the standard glyph with the jp78‑variant glyph.
Japanese Expert Substitutes the standard glyph with the expert-variant glyphs.
Japanese Traditional Substitutes the standard glyph with the traditional-variant glyph.
Proportional Metrics Substitutes the half-width and the full-width glyphs with the proportional glyph.
Kana Substitutes the standard kana glyph with the horizontally optimized kana glyph for horizontal layout. However, the differences are often very subtle.
Roman Italics Substitutes the standard proportional glyph with the italic glyph.
For more information, see Apply OpenType features.
On-canvas glyph alternatives and Glyphs panel
When you're working in a Type layer, you can select a glyph to quickly view alternatives to it right on the canvas. Clicking the > icon in the alternatives grid takes you to the Glyphs panel.


Choose a mojikumi set
Mojikumi specifies Japanese text composition for spacing of Japanese characters, roman characters, punctuation, special characters, line start, line end, and numbers. Photoshop includes several predefined mojikumi sets based on the Japanese Industrial Standard (JIS) X 4051‑1995.
-
In the Paragraph panel, choose an option from the Mojikumi pop‑up menu.
With the Photoshop 23.0 (October 2021) release, Mojikumi pop-up menu can also be accessed from the Type Layer Properties panel
None
Turns off the use of mojikumi.
Mojikumi Set 1
Uses half‑width spacing for punctuation.
Mojikumi Set 2
Uses full‑width spacing for most characters except the last character in the line.

Mojikumi Set 1, and Mojikumi Set 2
Mojikumi Set 1, and Mojikumi Set 2 Mojikumi Set 3
Uses full‑width spacing for most characters and the last character in the line.
Mojikumi Set 4
Uses full‑width spacing for all characters.
Mojikumi Set 3, and Mojikumi Set 4
Mojikumi Set 3, and Mojikumi Set 4


Set kinsoku shori options
Kinsoku shori specifies line breaks for Japanese text. Characters that cannot begin a line or end a line are known as kinsoku characters. Photoshop includes weak and maximum kinsoku sets based on the Japanese Industrial Standard (JIS) X 4051‑1995. Weak kinsoku sets omit long vowel symbols and small hiragana characters.
Disable or enable kinsoku shori for a paragraph
-
In the Paragraph panel, choose an option from the Kinsoku pop‑up menu.
With the Photoshop 23.0 (October 2021) release, the Kinsoku pop-up menu can also be accessed from the Type Layer Properties panel.
None
Turns off the use of kinsoku shori.
JIS Weak or JIS Maximum
Prevents the following characters from beginning or ending a line:
JIS Weak Set
Characters that can’t begin a line

Characters that can’t end a line

JIS Maximum Set
Characters that can’t begin a line
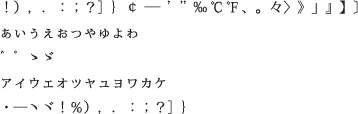
Characters that can’t end a line

Specify a kinsoku line-breaking option
Kinsoku shori or mojikumi must be selected to use the following line-breaking options.
-
From the Paragraph panel flyout menu, choose Kinsoku Shori Type and then choose one of the following methods:
Push In First
Moves characters up to the previous line to prevent prohibited characters from ending or beginning a line.
Push Out First
Moves characters down to the next line to prevent prohibited characters from ending or beginning a line.
Push Out Only
Always moves characters down to the next line to prevent prohibited characters from ending or beginning a line. A push-in is not attempted.
A check mark indicates which method is selected.
Specify a burasagari option
Burasagari lets single‑byte periods, double‑byte periods, single‑byte commas, and double‑byte commas fall outside the paragraph bounding box.
-
In the Paragraph panel, choose Burasagari from the panel menu.
With the Photoshop 23.0 (October 2021) release, the Burasagari option can also be set using a pop-up menu in the Type Layer Properties panel.
-
Choose an option from the submenu:
None
Turns off hanging punctuation.
Regular
Turns on hanging punctuation without forcing ragged lines to the bounding box edge.
Force
Forces punctuation outside the bounding box by spreading lines that end within the bounding box and end with one of the hanging characters.
NoteThe Burasagari options are not available when Kinsoku Shori is set to None.
Other Asian OpenType features
Other Asian OpenType features that the font supports are included in the pop-up menu available below the font menu in the Glyphs panel. Note that additional OpenType options are available depending on the font.

For more information, see Glyphs panel.