
- Adobe Connect User Guide
- About Adobe Connect
- Getting Started
- Basics
- New host onboarding
- Understand pods in Adobe Connect
- Layouts
- Create and manage Adobe Connect room
- Adobe Connect Central homepage
- Setup and manage audio in Adobe Connect meetings
- Join Adobe Connect meetings using telephony audio
- Backstage
- Broadcast controls- Green room
- Adobe Connect room search
- Share audio/video
- Engagement in Adobe Connect
- Breakout rooms
- Closed captioning
- Recordings
- Session dashboard
- Microsoft Outlook add-in
- Manage user content in Adobe Connect
- Generative AI features
- Basics
- Adobe Connect Mobile
Learn how to schedule Adobe Connect meetings and add rooms directly from Microsoft Outlook.
Once the Adobe Connect Outlook add-in is deployed, you can easily schedule meetings, create, and manage virtual rooms directly from your Outlook calendar. This article provides step-by-step instructions for viewing rooms, adding room links to meeting invitations, creating new rooms, setting default rooms, and updating existing meeting rooms. With these capabilities, hosts can simplify their scheduling workflow and ensure quick access to collaboration spaces within Outlook.
The following topics are covered in this article:
-
In Microsoft Outlook, select New Event to add the invite.
-
Select Adobe Connect from the toolbar.
From the Adobe Connect options , select View Rooms or Add Default Room.Add a default meeting room or view your rooms Add a default meeting room or view your rooms -
Select View Rooms.
-
Select Allow to launch the Adobe Connect login dialog.
-
Enter the Account URL.
Type the Adobe Connect domain Type the Adobe Connect domain -
Type your username and password. Select Login.
Type the username and password Type the username and password -
Select a room from the list. This list contains all the rooms where you are a host. Hover over the room name to view its information. You can also set a default room for quick and hassle-free meetings.
View all rooms View all rooms -
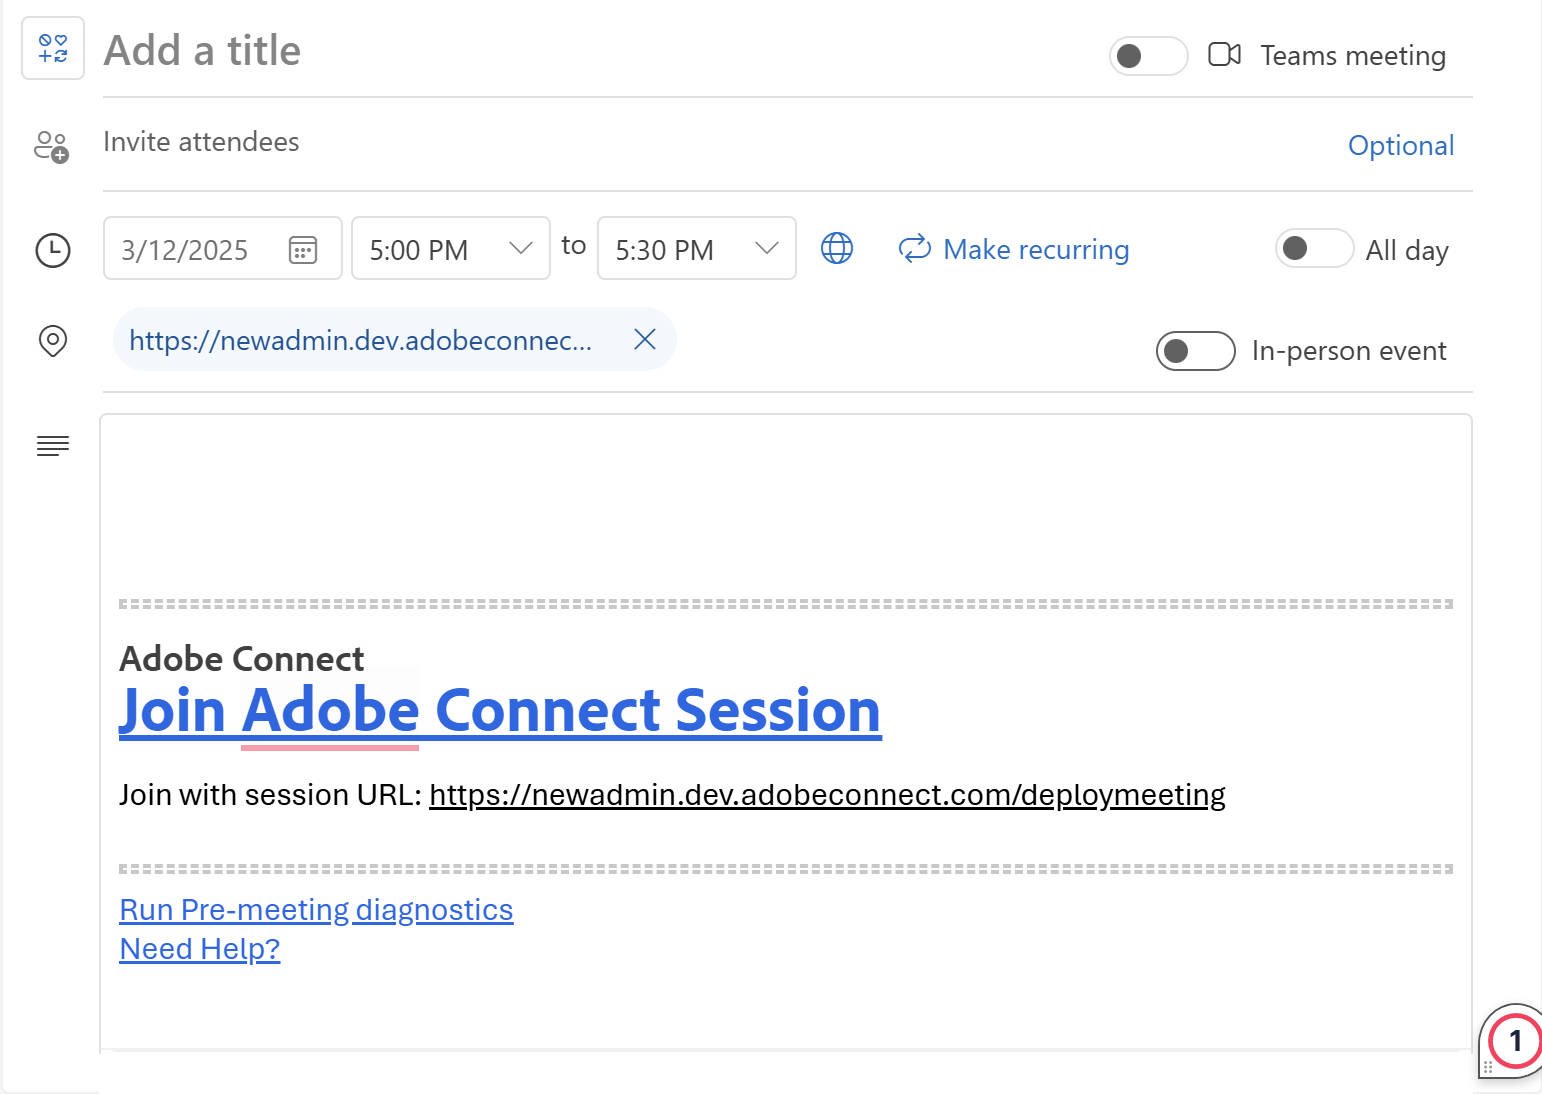
Select any room and then select Add room to add the room link to the body of the meeting invite.


-
In Microsoft Outlook, select New Event to add the invite.
-
Select Add Connect from the toolbar.
-
Select View Rooms.
-
Select Create new room.
Create a meeting room Create a meeting room -
Type the name of the room and select the type of room. The following room types are available:
- Meeting
- Virtual classroom
In the optional Additional settings section, add the meeting URL and select a template for the room. The following options are available:
- Custom meeting URL: Customize the meeting URL. For example, my.adobeconnect.com/(your room name). View Create custom URL for more information.
- Room template: From the dropdown, select a room template. View Room templates for more information.
Create a room and add meeting details Create a room and add meeting details -
Select Create and add to add the room to the list.


-
In Microsoft Outlook, select New Event to add the invite.
-
Select Adobe Connect from the toolbar and then select View Rooms.
-
Select another room in the list.
-
Select Add room to add the room link to the body of the meeting invite.
A default room is a pre-configured room for easy access to meetings, classes, or collaborative sessions. The default room is readily available to add in the invite without searching the list. Use the following steps to set a default room.
-
While creating a room or from the list of created rooms, select Set as default room to set the new or selected room as default.
Create a room and add meeting details Create a room and add meeting details -
Select Add room. When you view all rooms, the selected room now becomes default.